
Creating a journey campaign
Overview
Ortto’s Journey campaigns feature allows users to configure a complex flow of actions that can send email messages, SMS messages, and more to their customers either immediately or scheduled for a later point in time.
NOTE: Journeys are accessible across all Ortto plans with limits varying per plan level.
Accessing journeys
To access journeys, go to Marketing > Campaigns > New Campaign > Journey.
Managing journeys
Journey limits
Journey limits per plan level:
- Professional: 50 active journeys.
- Business: 100 active journeys.
- Enterprise: 200 active journeys.
Create a journey
To start a journey campaign:
- Navigate to the Campaigns page and click on New campaign.
- Select Journey.
- Select a Template or start from scratch.
- Name your journey and optionally place it in a folder.
- Select OK to proceed.
- Follow the steps in the wizard to complete your journey campaign setup. Each page of the wizard will guide you through the process.
TIP: It's recommended to give each journey a unique name to facilitate future filtering and reporting.
Journey templates
Ortto’s Templates allow users to use and create a variety of resources to easily capture and visualize data, and communicate with their customers.
- Learn more about Journey templates.
Journey preview
The Journey preview page displays current settings, exit criteria, messages, recipients, reports, and activity for your journey.
- Learn more about the Journey preview page.
Set an entry criteria
After configuring your journey setup, the next step is selecting Entry criteria. You have several options to choose from:
- Matching a filter.
- Adding to an audience.
- Submitting a form or survey.
- Specific activity occurring.
- Having a specific tag.
- Approaching a renewal date.
- Anniversary of a date.
- Recurring day.
If you prefer not to choose now or want to return later, simply click Edit.
- Learn more about Entry criteria.
Journey shapes
The shapes available to build your journey are described below.
NOTE:
- The maximum amount of shapes you can add to a journey is 100.
- Including a maximum of 20 Filter shapes.
To add a shape to a journey select Edit on the overview page then select the + button.
Choose from the relevant shapes:
The Email feature lets users send communications to their contacts based on specific actions, delays, conditions, or filters.
- Learn more about sending Emails via a journey.
SMS
The SMS feature lets users send communications to their contacts based on specific actions, delays, conditions, or filters.
- Learn more about sending SMS via a journey.
Push notification
The Push notification feature lets users send communications to their contacts based on specific actions, delays, conditions, or filters.
- Learn more about sending Push notifications via a journey.
Widget
Capture widgets will appear for people when they reach the widget shape in the journey (and they view a web page on which the widget is set to display, as an identified contact).
- Learn more about Using capture widgets in journeys.
Action
Choose from system actions or actions associated with a data source, such as Salesforce.
- Learn more about Journey actions.
- Learn more about Data source actions.
Delay
The delay shape enables you to have contacts wait for a pre-defined amount of time, a specific time or a dynamic date.
- Learn more about Delay shapes in journeys.
- Learn more about What happens to delay shapes when journeys are switched ON/OFF.
- Learn more about What happens when delay and filter shapes are modified.
Condition
Split the journey with a true/false, multi-path, or time condition.
- Learn more about Journey conditions.
Filter
Wait until they match a filter. Choose from suggested conditions or from the full list of available conditions under Start from scratch.
- Learn more about Journey filters.
Split
Split the journey with percentages, determine how many people follow the subsequent left or right paths of the journey.
- Learn more about Split shapes.
Managing journey shapes and paths
While in the journey editor, click the ... icon next to each shape to access its options. The available options will vary depending on the shape. For instance, options for an Email shape may include:
- View.
- Rename.
- Edit.
- Switch ON.
- Duplicate.
- Replace asset.
- Move.
- Copy link.
- Send Test.
- Download HTML.
- Remove.
Join paths
Connect to path: This allows you to connect a path within the same group of paths immediately following a shape such as a Condition or Split.
Jump to shape: This allows you to connect the path to any other shape in the journey (except the shape immediately preceding the jump).
- Learn more about Managing journey shapes and paths.
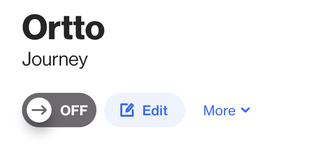
Switching a journey on and off
Switching a journey off means it will pause people at the stage in the journey they are at.
To switch a journey ON:
- In the journey panel, click OFF.
- Confirm by clicking OK to allow contacts to enter the journey.
- A confirmation message will appear at the top of the screen indicating the journey is now on.
To switch a journey OFF:
- In the journey panel, click ON.
- A countdown timer will appear, giving 3 seconds to cancel.
- If not canceled, a confirmation message will show that the journey is now off.
- Learn more about Switching a journey ON / OFF using occurs conditions.
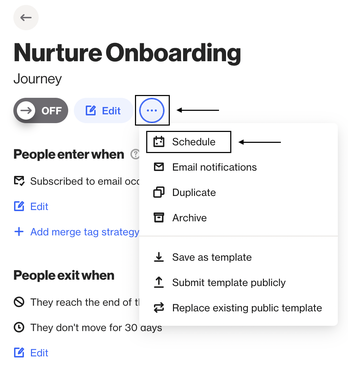
Scheduling a journey
To schedule a journey, use the options menu (…) at the top of the settings panel.
NOTE: You don't need to manually turn the journey ON; it will activate automatically at the scheduled date and time.
Troubleshooting journeys
Find answers to issues you may encounter when building your journey campaign, and tips for resolving the issues.
Learn more about Troubleshooting journeys.
Test your journey
Testing a journey lets you check that your workflow, including emails, actions, and conditions, is set up correctly before it's activated.
Learn more about how to test your journey.
Restoring a journey
Restoring a journey lets you revert and restore to previous workflow versions.
Learn more about restoring a journey.