
Journey preview page
Overview
Once you have given your journey a name and selected the entry criteria in the blank template, or once you have selected an Ortto template, you’ll be taken to the Journey’s preview page.
The Journey’s preview page contains the Journey panel on the left, and on the right is:
- A preview of the journey.
- A list of messages that will be sent.
- A list of the journey recipients.
- The journey performance report.
- An overview of activity associated with the journey.
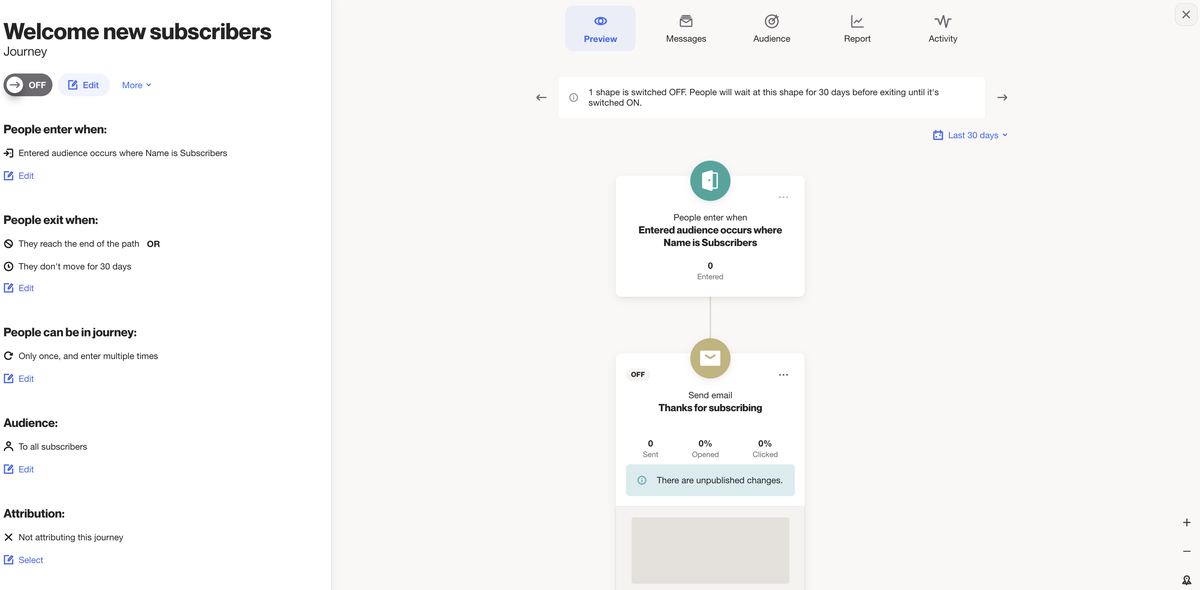
Journey panel
The Journey panel is where you specify the journey Entry and exit conditions, the frequency at which people can enter, audiences, and attribution.
Journey options
Next to the journey ON/OFF toggle are a number of journey options.
- The Edit button takes you to the journey flow editor.
- The More link reveals additional features:
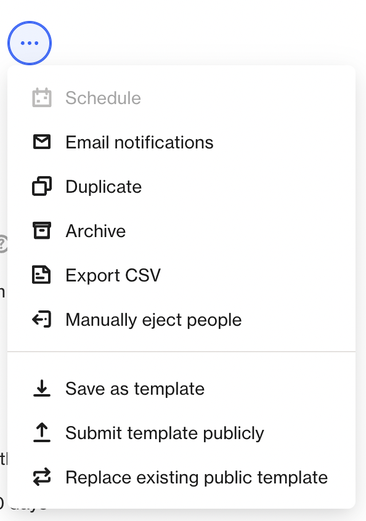
- Schedule: Choose a time and date to automatically switch the journey ON.
- Email notifications: When you enable email notifications, the specified recipients (account users) will receive emails at a frequency of your choosing with a snapshot report and link to the Report tab within the journey.
- Duplicate: Make a duplicate of the journey, including all messages.
- Archive: Archive the journey with the option to also archive assets (email and SMS messages, and push notifications) linked to the journey.
- Export CSV: Export a CSV containing information related to the journey, such as entry criteria, number of shapes, and key metrics. You’ll receive an email with a download link to access the CSV.
- Manually eject people: Select this option to remove specific contacts from a journey. You can build a filter that contacts must match in order to be ejected. This is great if you want to remove certain contacts from a journey while allowing others to continue.
- Save as template: Save this journey flow as a template (only save once the journey flow has been configured to ensure all shapes are saved to the template).
People enter when
In the People enter when section, you can set the filter conditions that determine how and when people enter the journey.
Learn more about entry criteria.
People exit when
In the People exit when section, you can set the filter conditions that determine how and when people exit the journey.
The Default exit conditions decide when people leave the journey. They exit either when they finish the journey (reach the final shape) or if they stay idle for the number of days you set.
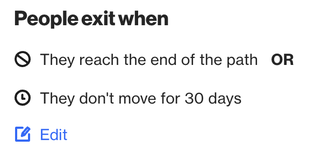
EX: This could happen if they were waiting at a Filter step for an email click and didn’t interact with the email within the specified time.
- The longest duration you can set for They don’t move for x days is 365 days. You can't delete the default exit conditions. You can use them alone as exit criteria or add additional conditions as required.
- The exit conditions can be singular, nested or grouped, and you can use AND/OR operators to modify your filter.
- Just like entry criteria, exit criteria can also be connected using occurs conditions.
- Learn more about using occurs conditions.
- Learn more about journey exit reasons.
People can be in journey
In this section, you can choose how often a person can participate in a journey:
- Only once, and enter one time only: A person can enter the journey once and won’t enter again, even if they exit due to inactivity and later meet the entry criteria again, or if the journey is turned off and then back on.
- Only once, and enter multiple times: A person can be in the journey once at a time. They must exit the journey they're in before they can re-enter the same journey.
EX: If someone enters a journey after making a purchase (like receiving a Thanks for purchasing email), they won't enter again even if they make another purchase until they've exited the current journey. Once they exit, they can enter again if they meet the entry conditions.
3. More than once, and enter multiple times: A person enters the journey each time they meet the entry conditions. This means they could be in different stages of the journey concurrently, entering each time they fulfill the entry condition (like opening an email).
When people unsubscribe
The When people unsubscribe section lets you control which audiences contacts can unsubscribe from using an email in the journey.
- Unsubscribe them from all communications: Contacts can unsubscribe from all audiences when they click Unsubscribe in a journey email.
- Unsubscribe from the <selected> audience: Contacts can unsubscribe only from the specified audience when they click Unsubscribe from this list in a journey email.
NOTE:
- If you limit the unsubscribe option to a specific audience and the contact isn't a member of that audience, they'll have the option to unsubscribe from all emails.
- Limiting the unsubscribe option to a specific audience doesn't prevent contacts from unsubscribing from all emails by clicking the unsubscribe link or managing their subscription preferences.
- To see an audience listed under select audience, you must first add that audience to your email preference center.
This option is useful when you want to associate a journey with a specific audience.
EX: If your organization sells Product A and Product B with separate audiences, you can ensure emails in a Product A journey are associated only with Product A. This way, if someone chooses to unsubscribe, they will only unsubscribe from emails about Product A, while remaining subscribed to emails about Product B.
Attribution
Enabling Attribution allows you to choose an activity (and its details) that will be counted as a conversion for this campaign. You can select an activity from an integrated data source (like BigCommerce) or define a custom activity. Once this activity is logged, it will be considered a conversion for the journey.
Learn more about attribution.
Preview
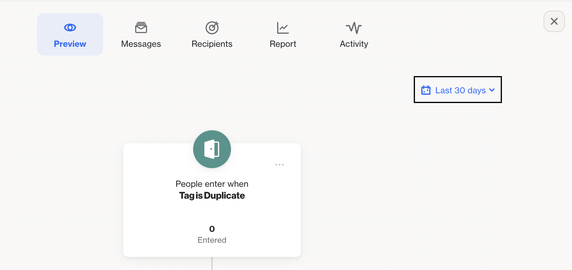
The journey Preview shows the shapes and pathway you have set up.
You can navigate the preview by clicking and dragging the journey, using your mouse scroll wheel to scroll, or using the zoom icons (+/-) to adjust zoom levels. Use the location icon to return to the start of the journey.
Once your journey is switched ON, you can preview key activity analytics related to shapes. This includes insights like the number of people who have opened and clicked on email messages within the journey. To specify the timeframe for viewing journey activity analytics, click on the calendar icon and select your desired date range.
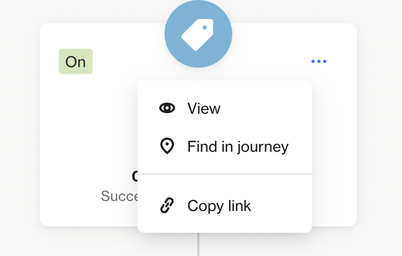
More (…) options in preview
In the preview section you can also select more (…) on the shapes. The options available will vary depending on the type of shape.
Common options include viewing the shape, locating it within the journey (which opens the journey editor), or copying the link to share with another user in your account for specific shape or journey viewing.
- To Edit shapes you will need to select Edit in the journey panel or select Find in journey.
Messages
View all the email, SMS and push messages that will be sent as part of your journey. Click on the picture icon (top right) for a visual view of your messages or the list icon for a list view.
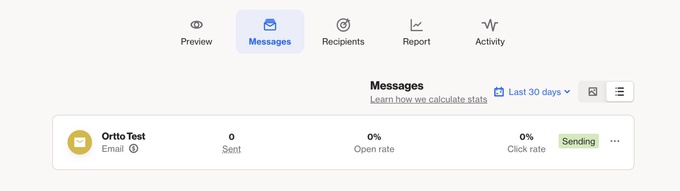
Click on an individual message to view its design, audience, report and activity.
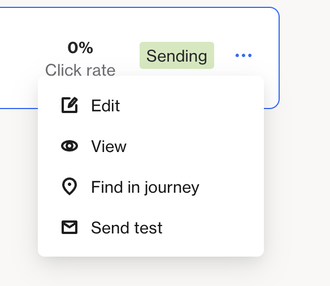
More (…) options
The more (…) options on a message enable you to Edit, view, locate within the journey, or send a test (email only).
Learn more about how we calculate message stats.
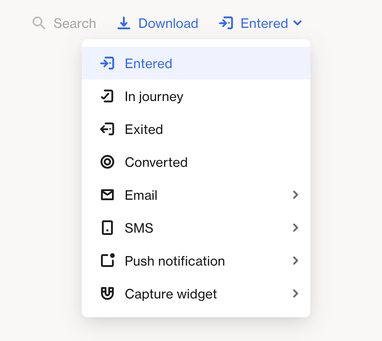
Recipients
View the people who are in the journey’s audience.
To view the Recipients in your journey, click on Entered and select a different option to filter who you see.
- This feature allows you to track:
- People who have entered the journey.
- Those currently active in the journey.
- Individuals who have exited or completed the journey.
You can also monitor specific message interactions:
- Sent email.
- Opened email.
- Clicked email.
- Widget displays.
- Opt-ins.
- Widget dismissals.
NOTE:
- The list displays data from the past 90 days.
- You can search for specific contacts and download the list if needed.
Report
View the key details of the journey performance, email summary, SMS summary, push summary and reactions.
Click Download > Download PDF to receive an email containing a link to a PDF report at the email address connected to your Ortto account.
Activity
View a list of the activity associated with the journey, including links to click and view the people and messages linked to the activity. Click Filter activity to change what activities you see.