Journey actions
Overview
Journeys allow users to use system and data source actions to update contacts as they move through the journey flow.
Accessing Journey actions
To access Journey actions, go to Marketing > Campaigns > Select your Journey > Edit > + > Action.
Managing Journey actions
Add tag
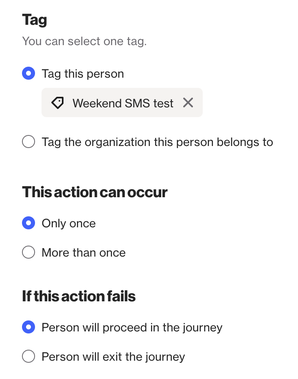
The Add tag action lets you:
- Tag this person: This action lets you tag a person with one tag at a time.
- Tag the account this person belongs to: This action lets you tag the Account this person belongs to with one tag at a time.
Depending on your Journey settings, you can specify how often the tag can be added and what happens if the action fails.
NOTE: A tag can only be re-added if it has been removed first.
EX: If a tag triggers another Journey, you must first remove it and then re-add it for the contact to enter that journey. You can use the Remove tag shape in a Journey to facilitate this.
NOTE: If you need to add multiple tags, you’ll need to use multiple Add tag shapes.
Remove tag
Just like adding a tag, you can only remove one tag at a time using the Remove tag shape.
The Remove tag action lets you:
- Tag this person: This action lets you remove a Tag from a person with one tag at a time.
- Tag the account this person belongs to: This action lets you remove a Tag from the Account this person belongs to with one tag at a time.
Depending on your Journey settings, you can specify how often the tag can be removed and what happens if the action fails.
Update field
The Update field action allows you to update system or custom fields in Ortto.
Depending on the field type you will have a few different options:
- Set new value.
- Clear value.
- Set value with merge tags.
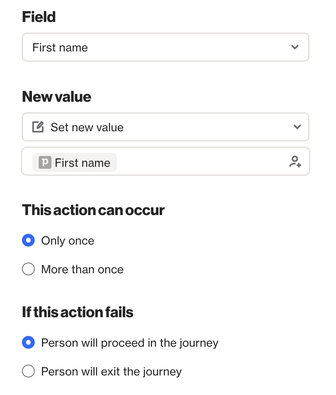
EX: In the image above, you can see that we're updating the First name (system field) with the value from the First name field in Pipedrive.
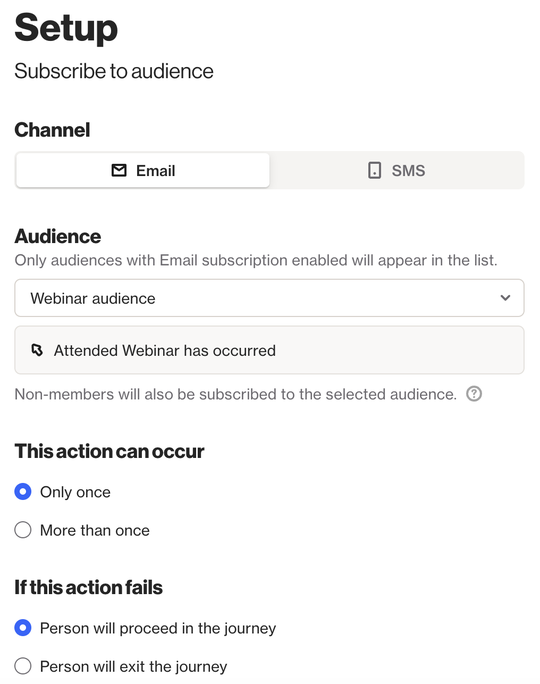
Subscribe to audience & Unsubscribe from audience
The Subscribe to audience and Unsubscribe from audience actions let you subscribe or unsubscribe contacts from the selected audience for Email or SMS.
A key use case for these actions is importing existing subscriber preferences from external systems. You can add a contact to an audience and immediately unsubscribe them using the journey action, preserving their preference while still allowing future changes.
Key points:
- These action shapes do not add contacts to the selected audience; contacts must still meet the audience’s entry criteria to become members.
- If a contact is not a member of the audience when they pass through the shape, they can still be subscribed or unsubscribed, but the change will only take effect once they become a member (i.e., they will then be able or unable to receive messages accordingly).
- Only audiences that are part of the preference center are available. Learn more about adding an audience to the preference center.
Notification email
The Notification email action lets you send emails to users within your Ortto account.
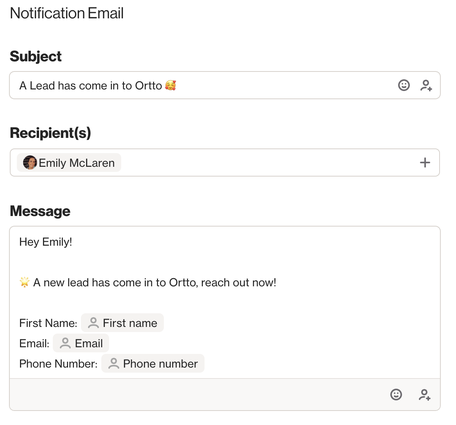
IMPORTANT:
- With this action, a notification will be sent each time a contact passes through the shape. The notification email does not consolidate information for multiple contacts by default. To do this, enable the batch notifications option.
- This action shape is not designed for large volumes in a short space of time, as this may cause issues in your email client.
- This action has a rate limit of 100 actions per 1 minute.
- The From Name will always appear as Ortto and the From Email address will follow this format: [Ortto account name]@[defaultdomain].
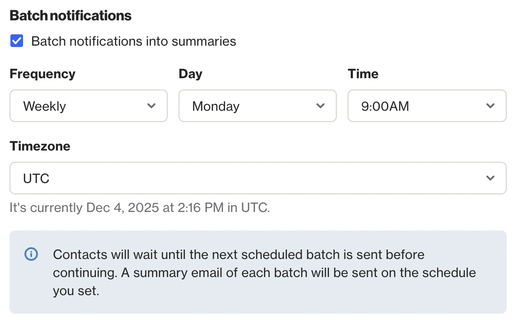
Batch notifications
The Batch notifications option allows you to group multiple notifications into a single scheduled email rather than sending individual notifications in real time. When enabled, you can choose a hourly, daily or weekly schedule, including the specific day of the week and time of day the summary email should be delivered. The summary email includes a link to download a CSV file containing all notifications included in that batch.
Send to webhook
Learn more about configuring a webhook.
Archive contact
The Archive contact action lets you archive contacts based on criteria such as unsubscribing or being unengaged after receiving multiple emails without opening them.
The archive action lets you either archive a contact or archive and suppress them.
- Archive: The contact is archived and will be deleted after 90 days unless reinstated.
- Suppress: The contact is archived and added to the Email suppression list.
- Even if reinstated, they won't receive future emails unless removed from the suppression list.
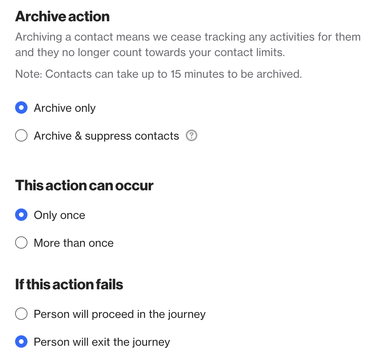
Archive contact settings. NOTE: If contacts are deleted from the Customer Data Platform (CDP), they will remain on the suppression list.
- In the setup, you can control how often a contact can be archived—such as if they are reinstated and need to be archived again—and specify what happens if the action fails.
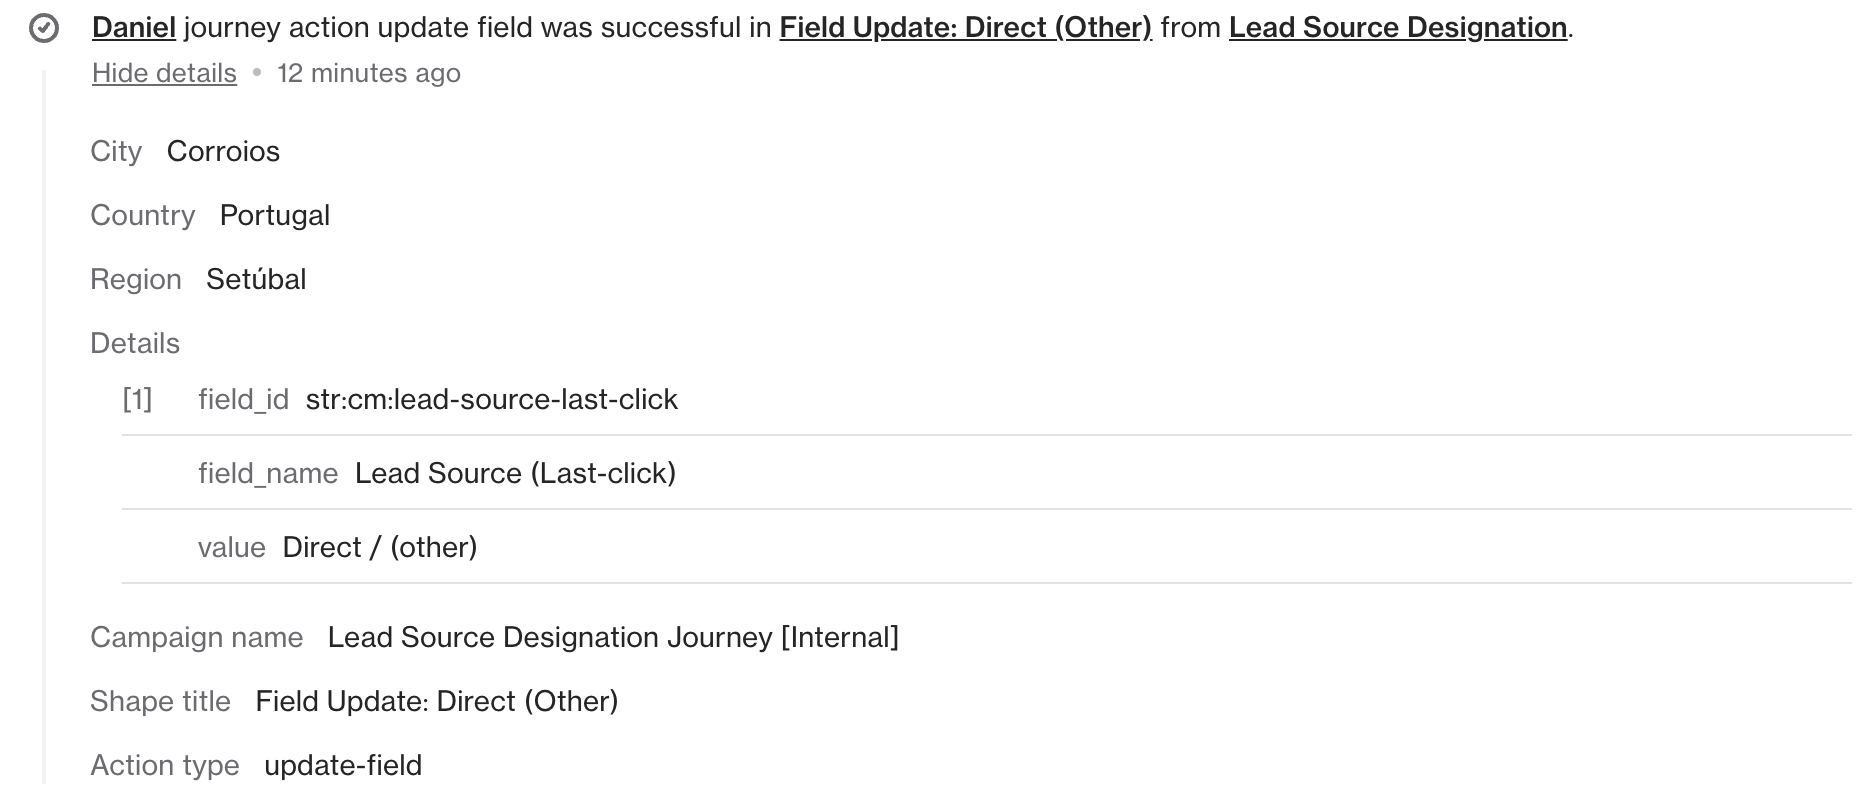
Reviewing the completed action results
For every action that successfully completes, the matching "Successful journey action" activity will contain a Details attribute including the full details of what data was used to complete that action. This can be particularly useful in validating that the merge tag data you inserted into your action was populated as expected.
Data source actions
Data source actions are specific to the sources you’ve connected to your Ortto account.
NOTE: Occasionally, certain action shapes in a journey may fail temporarily due to various factors. In such cases, instead of marking the shapes as failed immediately, they will be reprocessed automatically up to 12 times. Learn more about how failed journey actions are retried.
Modifying actions
All system actions have the same options in the editor view. Click the three dots in the top right corner of the shape to see the available options.
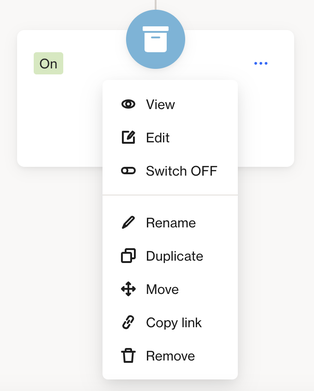
- View: View the shape’s settings.
- Edit: Edit the shape’s settings.
- Switch Off: Turn off the shape.
- Rename: Rename the shape.
- Duplicate: Create a copy of the shape, keeping or changing the settings.
- Move: Move the shape to a different location in the journey.
- Copy Link: Copy the link to share with colleagues.
- Remove: Delete the shape from the journey.
Action shape settings
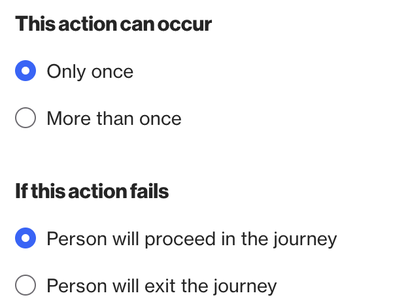
When configuring an action shape, you will have the option to determine whether an action can occur only once or more than once.
This action can occur:
- Only once means that if a contact enters the action shape more than once, the action will fail.
- More than once means that contacts can enter the action shape multiple times and the action can occur again.
If this action fails:
- Person will proceed in the Journey means that the contact will receive a failed journey action activity, but will continue onto the next shape in the journey.
- Person will exit the journey means that the contact will receive a failed journey action activity and exit the journey immediately.