
Facebook Ads integration
Overview
When connecting a Facebook business account, users can select Facebook as a data destination for their Ortto audiences and update their Facebook audiences directly from Ortto.
Accessing Facebook Ads
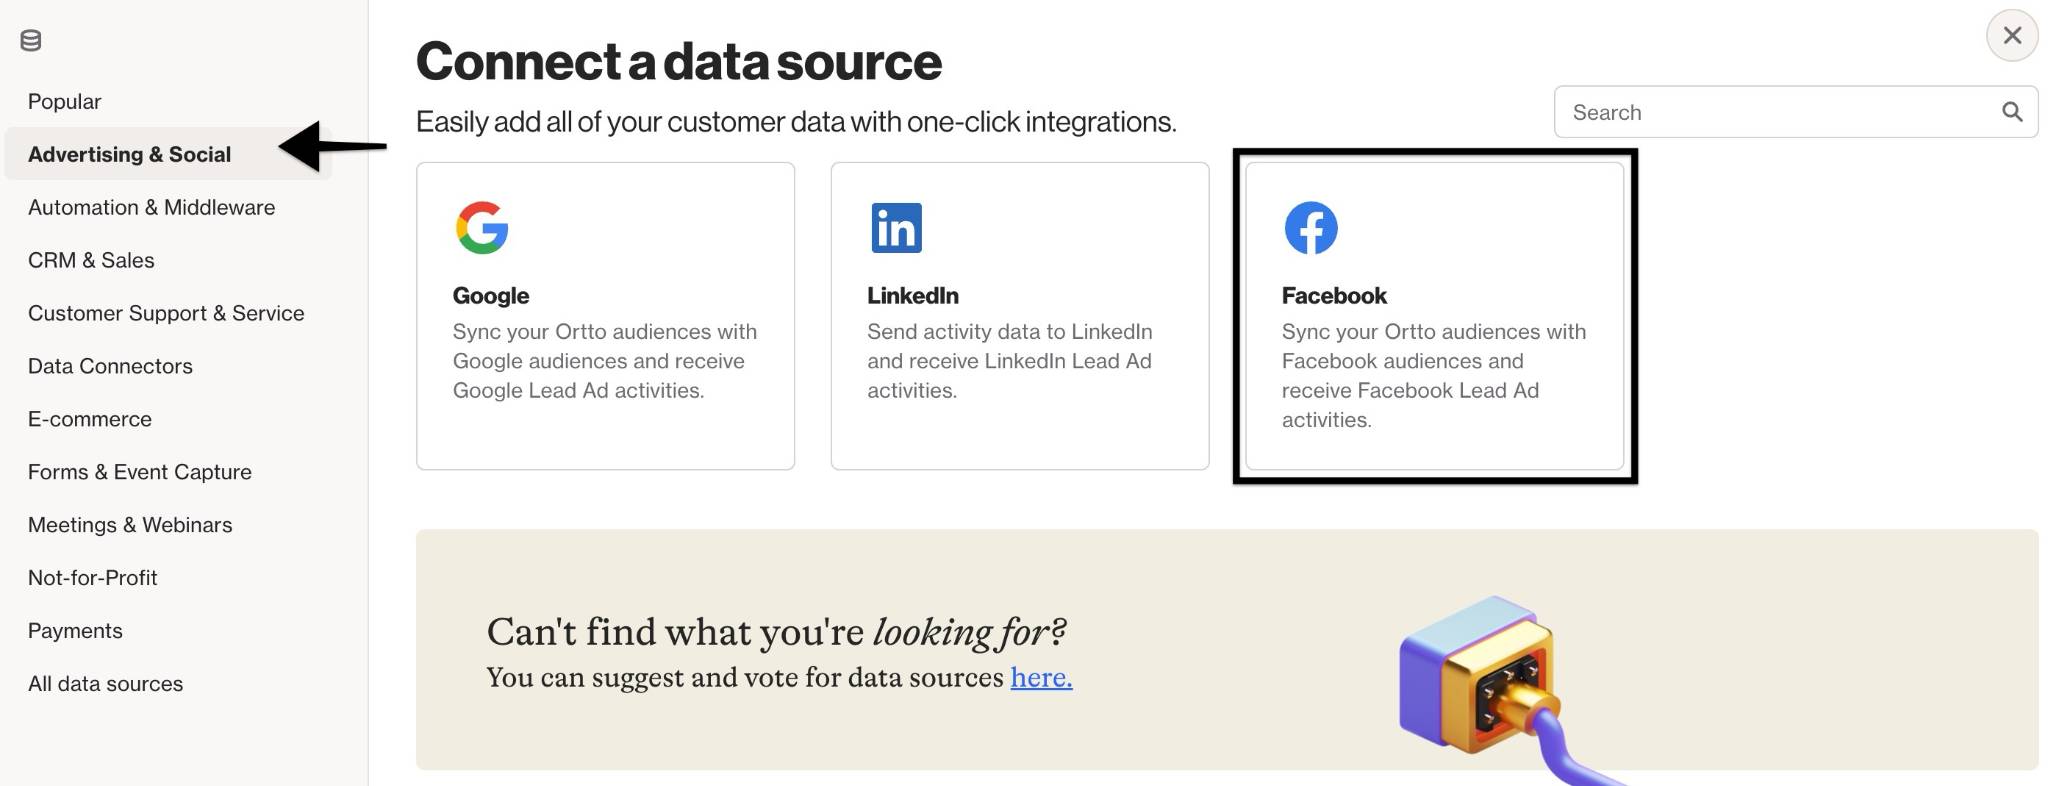
To access the Zendesk data source, go to CDP > Data sources > + New data source > Advertising & Social > Facebook.
Facebook prerequisites
To integrate, you need a Facebook business account with access to Facebook Ads Manager.
Connect from Ortto
To connect to Facebook Ads, follow these steps:
- Go to CDP > Data sources > click New Data Source.
- Under Advertising or All Data Sources, select Facebook and click Get Started.
- On the Connect to Facebook page, choose your Data Retention Period and click Connect.
- On the Configure page, select:
- One or more Advertising Accounts.
- The Facebook Page you want to use.
- Click Sync to proceed.
- Click Done to finish the setup.
NOTE: After connecting Facebook Ads to Ortto, make sure to enable permission for Ortto's system user to access lead data in your Facebook Ads Manager.
Enable the Autopilot System User for Lead Access
When you connect your Facebook Ads account to Ortto, a system user called Autopilot System User is automatically added to your Facebook business account. This user allows Ortto to access data from your Facebook Business Manager or Ads Manager, such as lead ad submission data.
However, the Autopilot System User does not automatically receive permission to access lead data. You’ll need to manually add it in your Business Manager (or Ads Manager) under Lead Access settings.
NOTE: To change the Lead Access settings, you must have full administrative access to the Facebook Business Manager.
To do so:
- Go to Business Settings in your Facebook Business Manager or Ads Manager.
- Click on Integrations, then select Leads Access.
- In the People tab, choose the option to assign people.
- In the popup, select the Autopilot System User and click Assign to confirm.
NOTE: If you already have a Facebook Ads connection with Ortto, please disconnect and then reconnect the Facebook Ads data source in Ortto to apply the changes.
How is the data synced from Ortto?
Once your Facebook business account is connected, you can select Facebook Ads as a destination for your Ortto audiences. This will add your Ortto audience to your Facebook Ads Manager, provided that Destinations is enabled.
NOTE: To select Facebook Ads as a destination, your Facebook business account must have write permissions (not read-only).
To sync your Ortto audiences to Facebook:
- Go to CDP > Audiences and select the audience you want to sync.
- In the left-hand details panel, click Edit under destinations.
- Select Facebook Ads. If you have multiple Facebook advertising accounts connected, choose the account(s) you want to send the audience data to.
- Click Save.
Your synced Ortto audiences will appear in Facebook Ads Manager as Custom Audiences, prefixed with Ortto:
Learn more about Facebook’s custom audiences.
NOTE: If your synced audience in Facebook Ads appears small, it may be because Facebook cannot match the customer data from Ortto, or the audience is still in the syncing process.
Learn more under troubleshooting Facebook Ads.
IMPORTANT: Connecting Facebook Ads as a data source will not send any Facebook data to Ortto.
Ongoing data sync
When you update an audience configured to send to Facebook Ads (by adding or removing people), these changes will automatically sync from Ortto to Facebook.
Resynchronizing data
Audience updates are sent to Facebook Ads when:
- The data source is reconnected after being disconnected.
- Destinations is re-enabled after being disabled.
What does the data source add to my account?
Integrating Facebook Ads allows you to:
- Use Facebook Ads as an audience destination.
- Access templates for:
- A playbook and journey to engage with contacts right after they submit an inquiry.
- Reports to track lead ad submissions.
- Playbook and journey actions.
Access the Facebook data source view
When a data source is connected, you are provided with a data source view. You can access its view via CDP > Data sources.
A data source’s view is the administration page where you can:
- Manage the data source in the left-hand details panel.
- View the following on the right-hand side:
- an Overview of the data source,
- an Activity feed, and
- an Audience table, which displays the people imported from Facebook.
Here’s what you can do:
- Rename the data source: Hover over the name, click the pencil icon, enter the new name, and click anywhere on the page to save.
- Disconnect the data source: Click Actions > disconnect.
- Configure if data source can modify CDP fields: If enabled, you can select the CDP fields the data source can overwrite.
- Select more than one advertising account: If the Facebook Business account has multiple ad accounts, you can select which ones to sync in Ortto.
- Configure data retention: Set the activity data retention period.
Learn more about the data source view.
Using Facebook in Ortto
Integrating Facebook in Ortto unlocks the ability to use Facebook as a data destination and Facebook-specific actions in journeys.
Learn more about using Facebook in Ortto.
Facebook activities
Activities from Facebook are automatically added to your Ortto account when integrating with Facebook.
Learn more about Facebook activities and attributes.
Troubleshooting Facebook
You can troubleshoot your Facebook data source in-app.
Learn more about troubleshooting Facebook.