
Managing journey shapes and paths
Overview
In Ortto, Journey shapes come with various editing options. This article explains how to view, edit, toggle on/off, and duplicate them, amongst other options. We’ll also cover how to join or connect pathways.
Accessing Journey shapes and paths
To access Journey shapes and paths, go to Marketing > Campaigns > Select your Journey.
Managing journey shapes
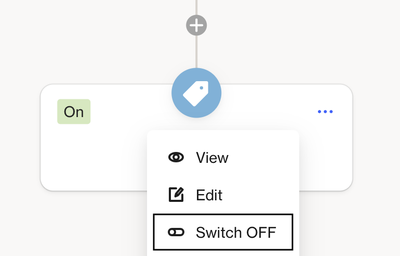
In the journey editor, click the …more icon to access options for each shape:
- View: See analytics (when the journey is active) and edit the shape settings, including how many times a person can receive a message and rate limits.
- Edit: Modify the shape setup, including conditions and SMS/email configurations.
- Switch OFF/ON: This option is available for email, SMS messages, push notifications, condition shapes, and action shapes. If switched off, contacts will wait until it’s turned back on or until they reach the journey's exit criteria (e.g., after 30 days).
- Duplicate: Click Duplicate and then use the small or large add icon (+) to place the duplicate shape in the path.
- Replace asset: Change the message to a new or existing one.
- Move: This option is not available for Condition or Split shapes. Use the small or large add icon (+) to place the shape in the path.
- Copy link: Create a link to share with others that directs them to the specific shape in the journey.
- Send test: Send a test email to a specified recipient.
- Remove: Delete the shape from the journey. If it has nested shapes (like Condition or Split), choose whether to remove one or both paths.
- Move waiting to next shape: Available for all shape types except Condition and Split. This lets you move contacts waiting at a shape (e.g., a Delay shape) to the next one. If this option is greyed out, it may be unavailable or there are no contacts waiting.
NOTE: The Move waiting to next shape action may take up to 5 minutes to execute.
Switching shapes OFF/ON
You can switch a shape OFF/ON where supported in the journey editor. In Edit mode, click the ... icon next to each shape to access its options.
When a shape is ON, this will provide you with an option to switch OFF.
When a shape is OFF, it will provide you with an option to switch ON.

To apply your shape changes, you’ll need to publish the journey.
Managing journey paths
Use the link icon to connect paths. In Edit mode, there are two options:
- Connect to path: This connects a path within the same group immediately after a shape, like a Condition or Split. This is useful for sending different messages based on user responses.
EX: Send an SMS to those subscribed (YES path) and an email to those not subscribed (NO path), then join the paths for the next actions.
- Jump to shape: This allows connections to any other shape in the journey (except the one directly before the jump).
EX: In an onboarding journey, if a contact starts down the path for Feature A but shows more interest in Feature B, you can jump them to the Feature B path. Multiple jumps can connect to the same shape, such as from both shape A and shape B to shape C.
NOTE: A contact can make up to 10 shape jumps per hour within a single journey run. If they exceed this limit, they will be removed from the journey with the reason: Loop detected. For more details, see the article on Journey Exit Reasons.
Delete a path link
Use the delete icon (x) to remove a path link. If you're deleting a link under a time Condition or Split shape that has subsequent shapes (not nested), you'll need to choose where to move those shapes:
- Connect YES: Moves shapes to the YES path.
- Connect NO: Moves shapes to the NO path.