
Magento 2 integration
Overview
Connecting your Magento 2 store view to Ortto allows you to access your customers' purchase, cart, order, and review data. This helps you create personalized messages throughout the customer journey and unlocks powerful data visualization and segmentation features.
Accessing Magento 2
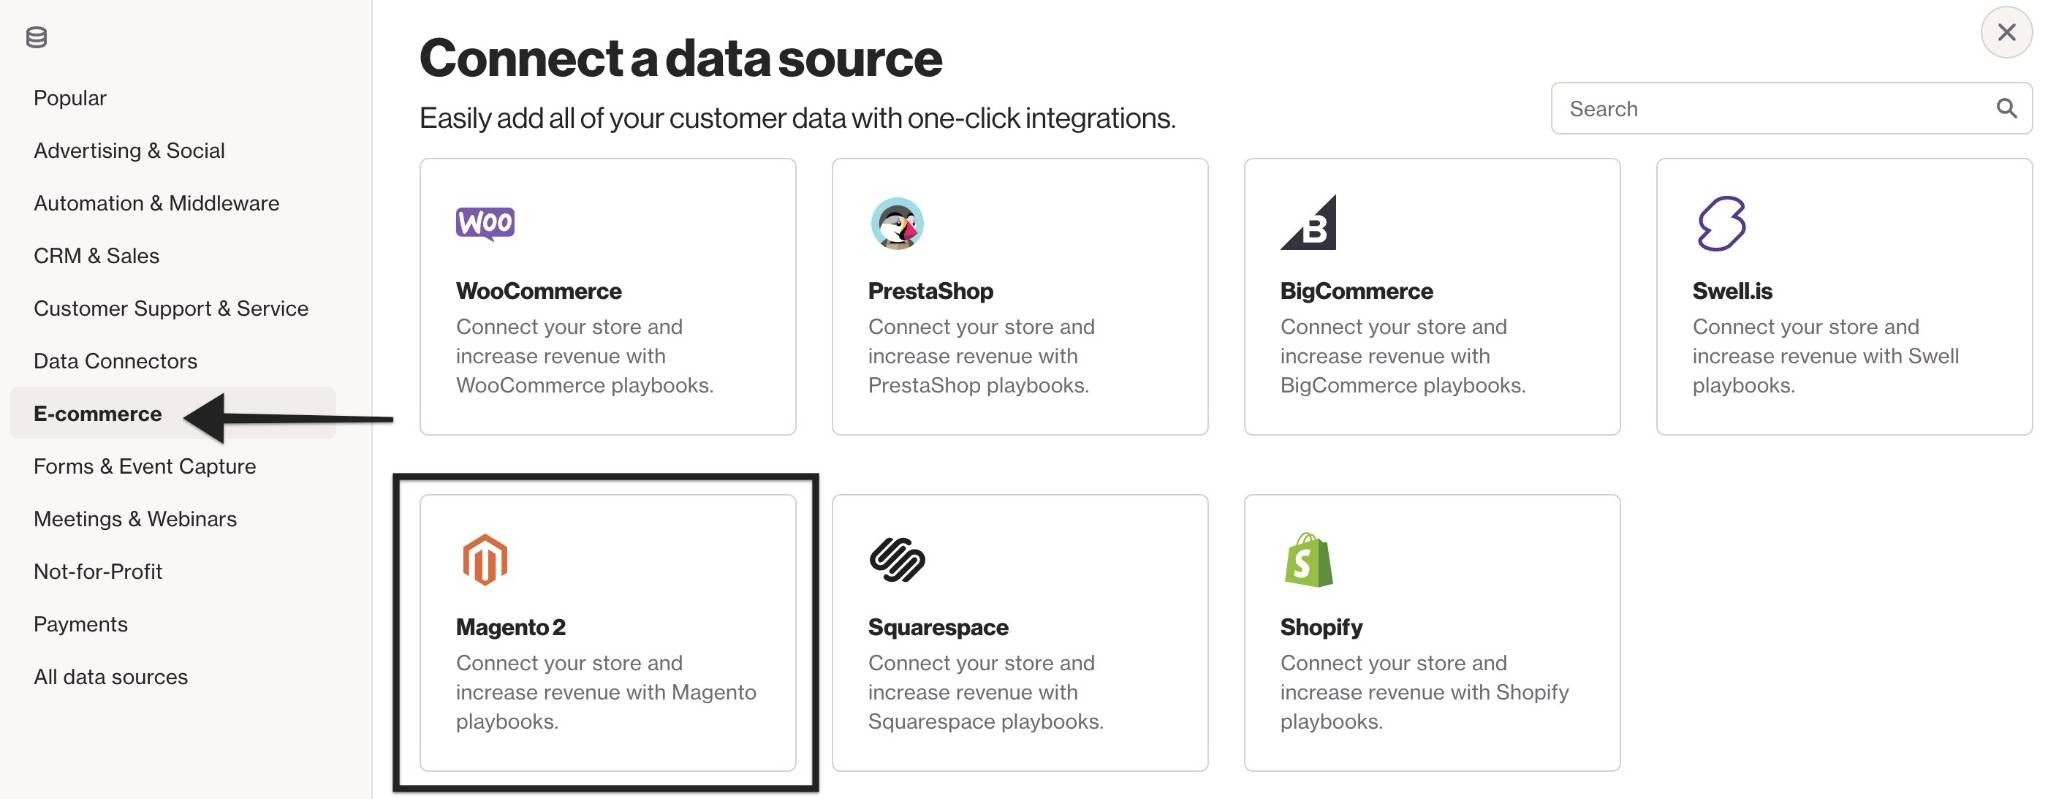
To access the Magento 2 data source, go to CDP > Data sources > + New data source > E-commerce > Magento 2.
Magento 2 prerequisites
IMPORTANT: Ortto currently only supports integrations with Magento version 2.
To integrate Magento 2 with Ortto, you need an active Magento store with a store view and a Magento 2 access token. The integration must be initiated from Magento 2 by:
Create your Magento 2 access token
In your Magento 2 account:
- Go to System > Integrations.
- Click Add New Integration.
- In the setup, enter the name, email address, and your Magento 2 account password.
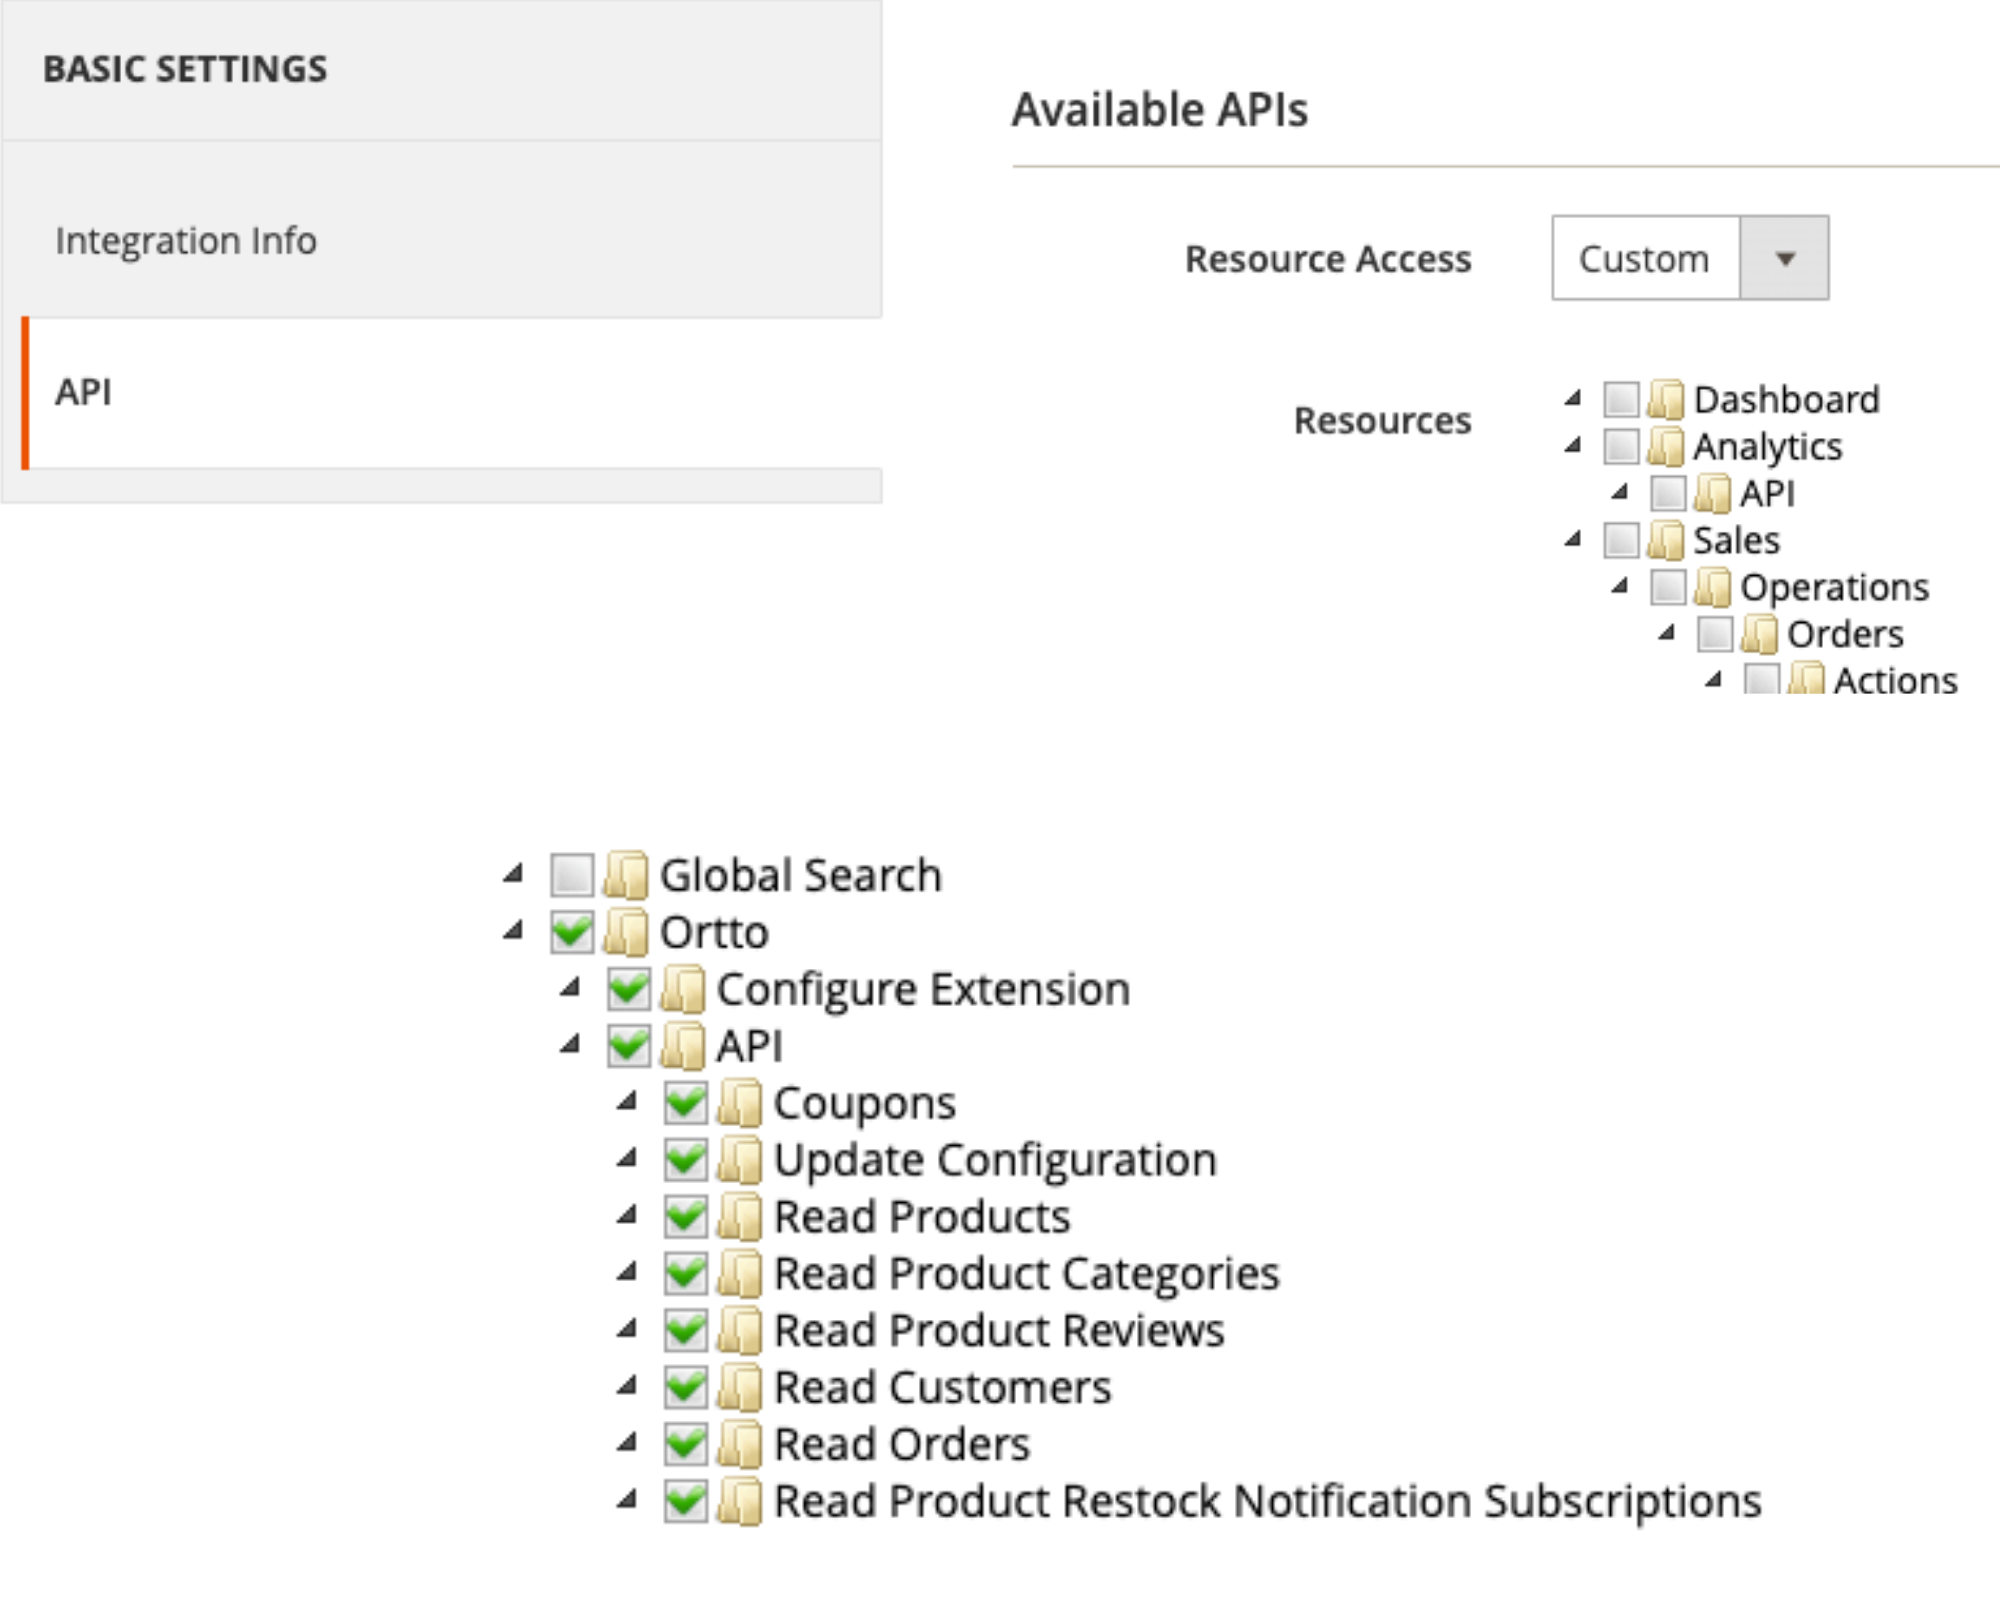
- Under API, select Custom for Resource Access. Scroll down and check the Ortto box.
- Click Save.
You’ll return to the Integrations page and see your Ortto integration. Click Activate next to your Ortto integration, then click Allow. Magento 2 will display your API credentials.
IMPORTANT: Copy and save the Access token key, as you’ll need it to connect Magento 2 to Ortto. You won’t need the Consumer key, Consumer secret, or Access token secret for this integration.
Connect to Ortto from Magento 2
IMPORTANT: While you can access Magento 2 from Data sources > New data source, connecting Ortto to Magento 2 is only performed from your Magento 2 account by:
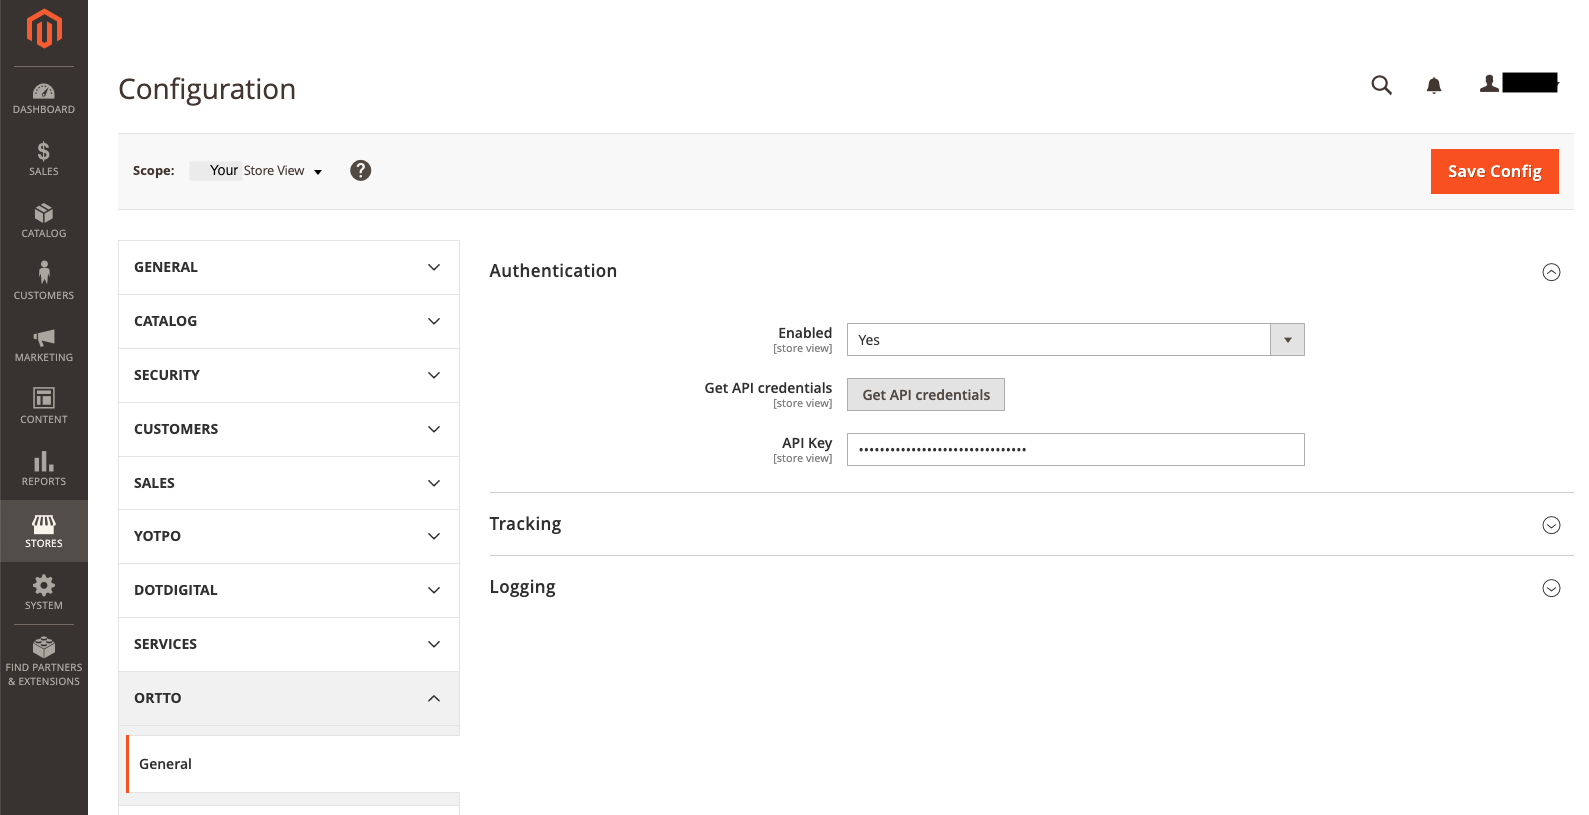
- In your Magento 2 account, go to Stores > Configuration.
- Under Scope, select the store view you want to integrate with Ortto and click Confirm. Ortto will appear in the left-hand panel.
- Click Ortto to expand the section, then click General.
- Expand Authentication, then set Enabled to Yes.
- Click Get API credentials. A pop-up will ask you to select the Ortto account to connect with (you may need to log in to Ortto first).
- On the Connect to Magento 2 page, enter the access token you created earlier (from step 7 in Create your Magento 2 Access Token).
- Under Data Retention, choose either:
- Store only the last 90 days of activity, or
- Select a custom time frame and specify which activities to store.
- If needed, click Advanced options to:
- Choose which CDP fields can be modified by Magento 2, or
- Choose not to modify existing CDP fields.
- On the Merge page, select your preferred strategy for merging customer data into Ortto’s CDP.
- On the Enable page, Ortto will provide an API key for the Magento 2 data source. Copy and save this key for the final steps.
- Click Done to close the pop-up. Magento 2 is now connected to Ortto.
- To complete the integration, return to your Magento 2 account.
- In Authentication settings on the Stores Configuration page, enter the API key you copied from Ortto (step 10).
- Click Save Config.
Your Ortto and Magento 2 integration is now complete!
NOTE: It's best to set data retention limits when setting up your data source. Updating these limits later will require a resync, which may impact audiences and campaigns in your customer data platform (CDP).
Learn more about configuring data retention.
NOTE:
The merge options:
- Import and merge new records only
- Import and overwrite existing records
- Import new records only
are equivalent to the following people merge strategies:
- Append only
- Overwrite existing
- Ignore
How is the data merged into Ortto?
Data is first merged from Magento 2 to Ortto during the initial connection and then whenever an event occurs in Magento 2.
When a new person is synced from Magento 2 and doesn’t already exist in your CDP, they are added as a new contact. New contacts are automatically subscribed to email communications, but are unsubscribed from SMS by default. This behavior applies when your Magento 2 data source is configured to import new records under its merge strategy.
If a contact already exists in Ortto, their email and SMS preferences will remain unchanged, as set in Magento 2.
Initial data sync
During the initial sync, customer details from Magento 2, including customer fields, cart, order, review, and product view data, are merged into Ortto. The merge follows the strategy chosen during the connection setup. This sync also creates activities for store events like orders, price drops, reviews, product views, and stock updates.
Ongoing data sync
Magento 2 data syncs to Ortto shortly after (usually within minutes) when events like cart and checkout activities occur.
Resynchronizing data
When the data source is reconnected, Magento 2 data is synced from the point of the last sync. For example, if the source was disconnected for 24 hours, updates and events during that time will be synced once reconnected. If data retention settings are changed (e.g., extending the retention period), all data will be re-synced.
A resync may impact audiences and campaigns in the CDP by resetting person attributes and activities, potentially causing someone to re-enter an audience or campaign.
What does the data source add to my account?
The Magento 2 data source adds:
- Customer records and associated Magento 2-specific person fields to your CDP.
- Magento 2-specific activities from the last 90 days, including cart activity, orders, reviews, and product views. You can opt to store activity data for longer if needed (available on selected plans). Learn more about data retention.
- The ability to create new Magento 2 coupons.
- A tracking code for session tracking and capturing widgets on your Magento 2 site.
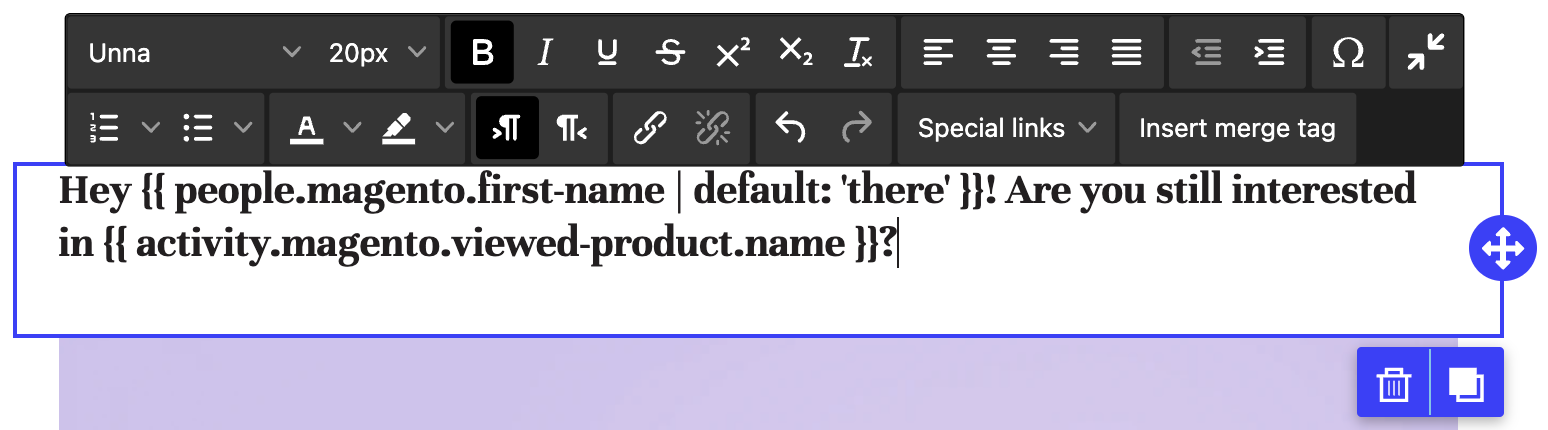
- The ability to personalize campaign messages using Liquid syntax with merge tags for Magento 2 customer fields and activity attributes.
- Learn more about personalizing content with Liquid.
NOTE: Deleting a Magento 2 data source connection will not remove existing people or activity entries in your CDP that were merged from that connection.
View Magento 2 fields in your CDP
Customize your CDP field visibility and add Magento 2 fields by following these steps:
- Navigate to the People page under the CDP section of the sidebar.
- Click on the the cog icon > select or clear the fields you want to show or hide.
Magento 2 fields are indicated with the small Magento icon.
Learn more about Magento 2 person fields.
Access the Magento 2 data source view
When a data source is connected, you are provided with a data source view. You can access its view via CDP > Data sources.
A data source’s view is the administration page where you can:
- Manage the data source in the left-hand details panel.
- View the following on the right-hand side:
- Overview of the data source
- Activity feed
- Audience table (shows the customers imported from Magento 2)
Here's what you can do:
- Rename the data source: Hover over the name, click the pencil icon, enter the new name, and click anywhere on the page to save.
- Disconnect the data source: Click Actions > disconnect.
- Configure the merge strategy: Learn more about data source merge strategies.
Learn more about managing data sources.
Using Magento 2
Learn how to maximize your Magento 2 integration with Ortto's filters, reports, dashboards, campaigns, and coupons for better insights and results.
Magento 2 activities
Activities from Magento 2 are automatically added to your Ortto account when integrating with Magento 2.
Troubleshooting Magento 2
Learn more about troubleshooting Magento 2.