
Using HubSpot in Ortto
This page helps you discover how you can get the most out of your HubSpot integration with Ortto’s filters, reports, and campaigns.
Filters
The HubSpot activities, person (contact) and organization fields that are added to your Ortto account can be used anywhere you can create a filter (such as in campaigns, to create an audience, or just to view a segment of people), as well as in reports and dashboards.
Use HubSpot activities and person fields as filter conditions:
- In a journey:
- As a an entry criteria when an activity occurs. For example, you could add contacts to a marketing qualified lead (MQL) nurture journey when the contact’s lead status is "MQL".
- Within a Filter or Condition shape to filter people in the journey using a HubSpot person or activity field. For example, your sales representative has a scheduled meeting with a lead, and the lead misses the meeting, so the representative marks the meeting outcome as "No show". You can then set conditions and criteria to define how long after the missed meeting the first email is sent and use integrations like Calendly to allow your lead to rebook their meeting with ease.
TIP: Using an occurs condition gives you a fresh data set, as people enter the journey when they perform the specified activity (as opposed to using has occurred, which qualifies people who have already performed an activity).
- To view a segment of people on the People page, such as people who are sitting at a particular stage within a deal pipeline (a segment from which you can create an audience, send a campaign, export, or archive).

Actions
Actions allow you to use Ortto to update data within a data source. One way to use HubSpot actions is to add an Action shape in a journey or playbook to create or update a record.
When you add an action to create or update an object record using the available fields in your CDP, you can also associate an object record with another object. For example, when making a sale you communicate via email with three contacts at the same company. You can then associate the deal (object) with the 3 contact records and their company record. The association will then show in the record details in your HubSpot account.
Learn more about setting up HubSpot actions in HubSpot actions.
The following are some additional examples of how you can use HubSpot actions.
- Create a playbook to welcome new subscribers. Within the playbook, add an action to add subscribers as contacts to your HubSpot account.
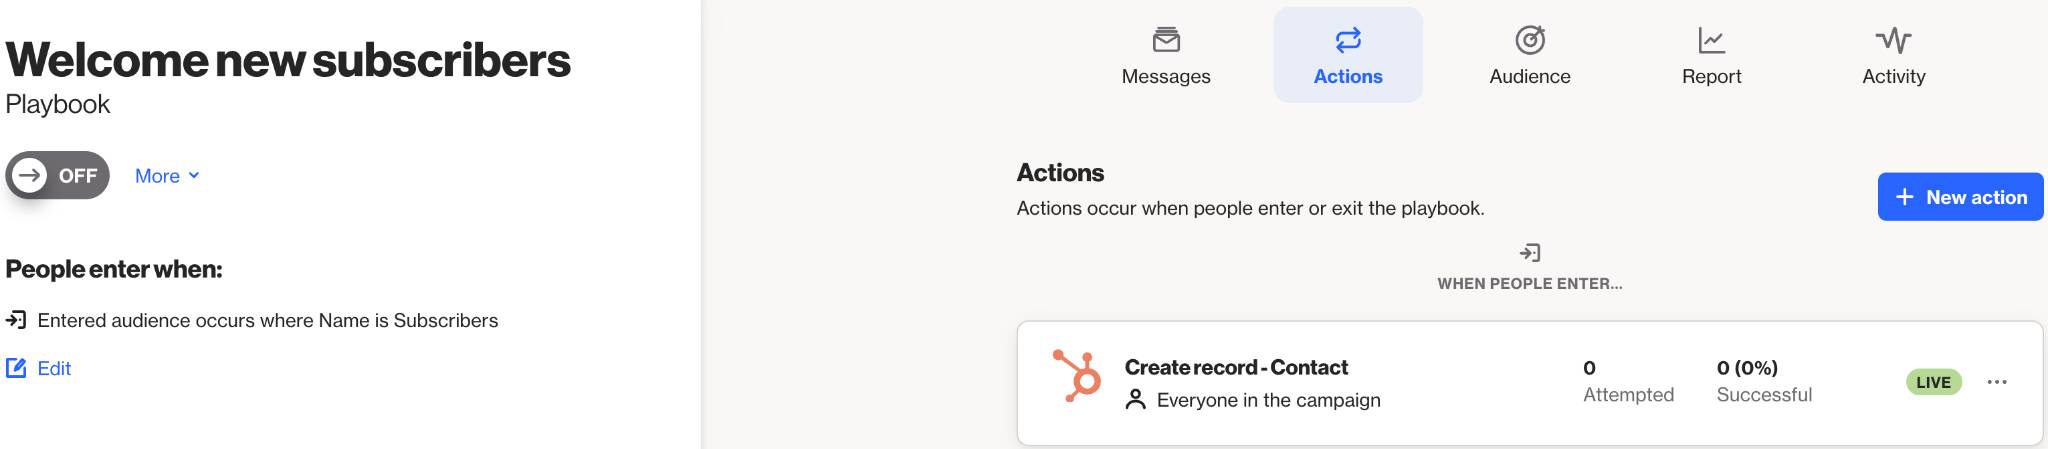
- For a journey, add the following Action shapes in your journey flow editor:
- Create a record with the Object type as Contact to add the contact to your account.
- Create a record with Object type as Task to create a task to email the contact to check in on them and see how they are going with their new subscription.Or reach out to a contact associated with a deal based on their campaign activity. In the task you can add merge tags to populate the task with the campaign name and email name to provide the deal owner with additional context.
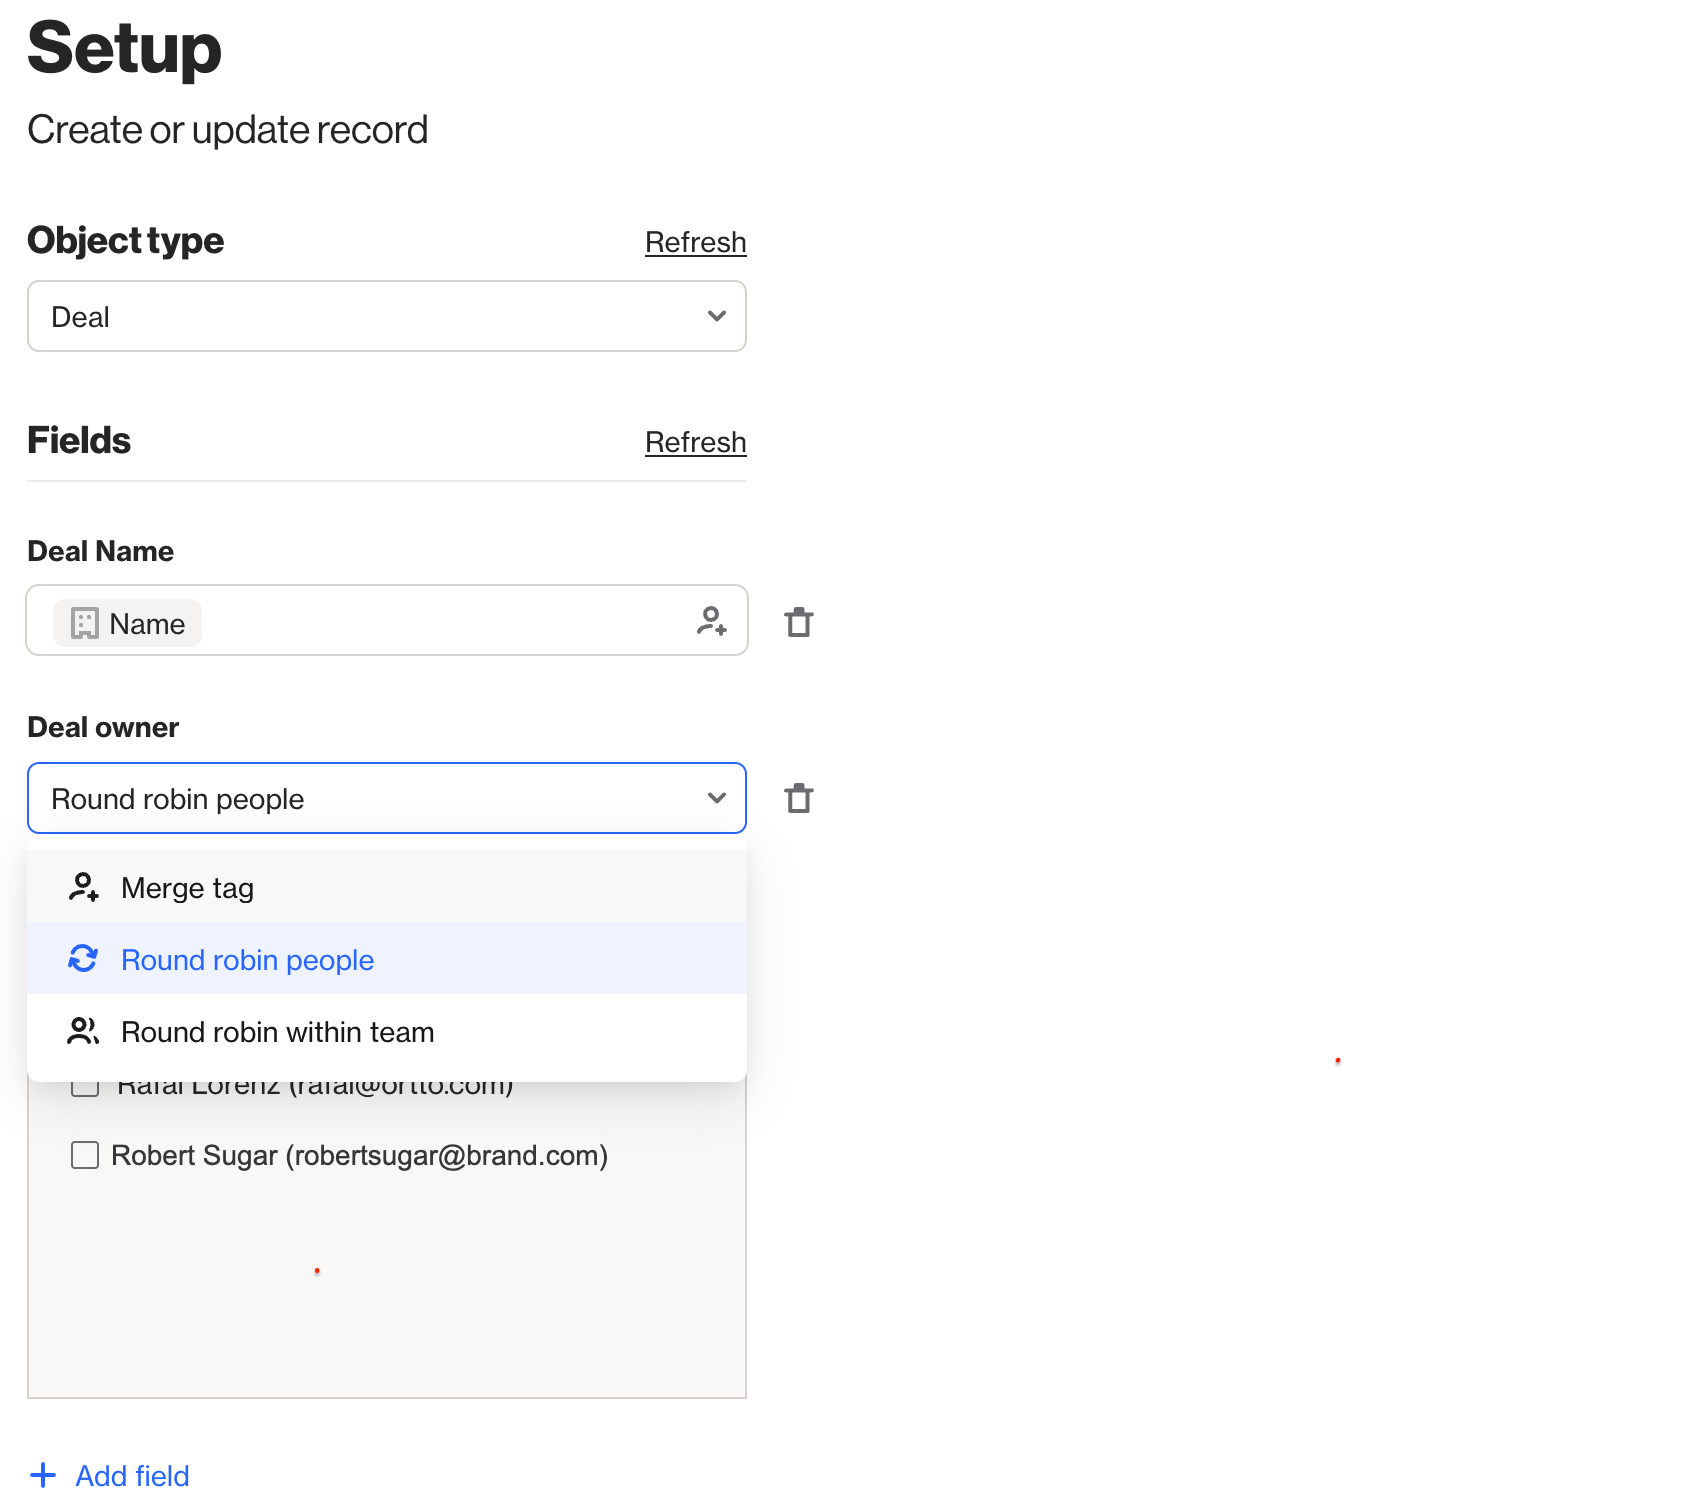
- Create or update a record with the Object type as Deal. In this shape you can set the deal name and assign the deal owner, including multiple people to round robin.
Reports
You can use Ortto’s powerful reports to gain insight into your HubSpot CRM activities.
Here are some ideas for creating HubSpot reports.
- See your total revenue from won deals:
- On the Reports page, click New report.
- Under on the Quick start tab, click Start from scratch.
- For the report type, select a Metric, then click Next.
- Give your report a name then click Add metric.
- For your Metrics:
- choose Deal property changed where Won is true for HubSpot
- Aggregate by Sum of attribute
- Attribute for aggregate Amount
- Edit any of the default settings a required, such as adding a revenue Goal,then click Create to view your report.
- Create a ledger of new deals, the owner and the amount:
- On the Reports page, click New report.
- Under on the Quick start tab, click Start from scratch.
- For the Type, select Ledger, then Next.
- Give your report a name then click Add metric.
- In Metrics, select the activity as Deal created.
- Add Columns such as Time, Name, Amount and Owner name, and adjust any other default report settings as required.
- Click Create to view your report.
Learn more about reports in Working with reports.