
Autopilot Journeys to Ortto welcome guide
Overview
Welcome to Ortto! This guide is for users whose Autopilot Journeys (referred to as Autopilot) account has been unified with Ortto.
You’ll find tips on how to make the most of the upgrade.
If you prefer not to make any changes, that’s okay, Autopilot will continue working as usual and can be accessed from the Ortto navigation drawer.
This guide provides information on:
Access a unified Autopilot account
When your Autopilot account has been unified with Ortto, by default you will continue to login to Autopilot using your regular credentials at the Autopilot login page. From there, you will be redirected to Ortto.
Some Autopilot accounts may be set in restricted mode where users can only login via the Ortto login page. This occurs where:
- It has been requested by the account owner and enabled by the Ortto team.
- Two/multi-factor authentication is enforced for all users (set via Settings > Privacy security and GDPR > Two-step authentication (2FA)).
- The user has enabled has two-factor authentication for themselves (via the Profile settings).
About this upgrade
Ortto is an entirely new product built from the ground up using feedback from Autopilot customers. It addresses years of feedback from customers, and builds on the features and functions of Autopilot.
Autopilot focused on being the best visual journey builder. Ortto expands on this by combining your customer data, messaging (campaigns), and analytics into a single platform.
New feature highlights include:
- a new user interface and faster experience,
- customer data platform (CDP),
- advanced segmentation with frequency, time and geo,
- report and dashboard builder,
- email, SMS and playbook campaign types,
- dynamic content,
- capture widgets,
- custom lead and product scores,
- enhanced security and privacy features,
- enhanced tracking code that cannot be blocked,
- and so much more!
How does the upgrade work?
This upgrade retains everything you have in Autopilot, with access to all the new features of Ortto.
The upgrade does the following:
- Retains your existing Autopilot account which is now accessed through the Ortto interface.
- Converts all users from Autopilot into Ortto users.
- Migrates your billing to Ortto with no changes to your subscription.
- Migrates your email domain, IPs and sender reputation.
- Creates a data source with all of your existing Autopilot customer data in Ortto.
- Creates Autopilot activities to represent email opens, clicks, etc.
- Adds default reports and a dashboard for existing Autopilot data.
Learn more about your Ortto plan in Unified Ortto account plans.
Your Autopilot data
When your Autopilot account was unified with Ortto, the previous 90 days of activity data was captured and synced to Ortto. In your unified Ortto account, your Autopilot data will continue to be synced to Ortto on an ongoing basis.
NOTE: All data source activities and their attributes are retained in Ortto for 90 days. The 90-day limit means that Ortto does not retain data that, in some cases, passes its period of usefulness. This could impair the performance of filters, journeys, audiences and other areas of Ortto over time. In some cases, storing an activity and its attribute data may be necessary for longer than 90 days. In such cases, Ortto provides a mechanism for customers to opt-in to store their select activity data for longer.
This is known as data retention.
When data retention is enabled, activity data will be stored for the defined period to be referenced against. Learn more about configuring data retention.
Your Autopilot data can be used in Ortto’s features, such as filters and reports.
Because Autopilot and Ortto operate as different systems, you may see some differences in contact data and insights/reports between Autopilot and Ortto. Each system handles duplicates, erroneous data and some situations differently. Additionally, a delay in syncing Autopilot contact data to Ortto (such as when a contact is removed from Autopilot and then archived in Ortto) may yield unexpected results. As such, there won't always be a 1-to-1 match in results for Autopilot and Ortto.
Quick setup checklist
To get the most from Ortto, it’s recommended you complete the following steps. These steps are not necessary if you only intend to use existing Autopilot features.
- The new tracking code tracks website and user sessions like Google Analytics, capture forms, and allows you to display capture widgets and identify known users.
- Set up the brand book — The brand book configures default styles, fonts and colors for the system. This is the default brand style used for email templates, widgets and hosted pages such as the email preference center.
- Connect data sources — Even though you may already have your CRM connected to Autopilot, we recommend connecting all of the apps you use to Ortto directly to benefit from the enhanced integrations. You can leave your existing Autopilot integrations in place. Duplicates will not be created as Ortto will automatically recognize and unify each contact.
- Your team can use their favorite authenticator app or SMS for two factor verification.As detailed under Access a unified Autopilot account, your Ortto account may be operating in restricted mode, where two factor authentication is already in place.
Ortto data model
To understand the upgrade, it’s important to understand the changes in the Ortto data model. In Autopilot there was a single flat file model we called contacts. This led to fields being created to help represent usage e.g. “Logins last 30 days” and booleans to represent activity e.g. "Added profile picture" = true/false.
Ortto’s new data model is based on a modern customer data platform (CDP) design. It’s flexible and adapts to the customer data connected to it.
The CDP is made up of:
- objects
- activities
The default objects are:
As you connect data sources (think of these as integrations), the data model adapts and adds new objects and activities related to that data source.
Filters allow you to segment using:
- demographics,
- firmographic,
- behavior,
- frequency and time, and
- geographic data.
To demonstrate the benefit let’s look at a simple example:
In Autopilot, using a smart segment, you might query Has opened any email AND has visited the pricing page AND title = CEO AND city is San Francisco to find matches.
In Ortto, you can use filters, for example, Opened email more than 5 times in the last 7 days AND user session has occurred more than 2 times where page URL contains 'pricing' AND title is CEO AND proximity is within 20kms of San Francisco.
How do I access my Autopilot contacts in Ortto?
Autopilot data is accessed through the Autopilot object as shown below. It’s treated as a unique object in the data model and has unique activities from Autopilot.
You can now access Autopilot activities in the Ortto filter menu to segment using frequency and time. This is a new ability previously unavailable in Autopilot.
Are email permissions in sync between Ortto and Autopilot?
For simplicity, email permissions are kept in sync between Ortto and Autopilot. This means that if someone unsubscribes in Autopilot, they will be unsubscribed in Ortto and vice versa.
Autopilot integrations and Ortto data sources
Since you can’t access the Ortto CDP from within Autopilot, it’s important you leave integrations connected that your journeys rely on. If you intend to migrate journeys over to Ortto over time, you may eventually be able to disconnect integrations that you no longer require.
If you intend to use Ortto for future journeys, campaigns, analytics and dashboards it’s advised you set up your CDP with all of your customer data. This means in some cases connecting to data sources you may already have connected in Autopilot, e.g. Salesforce.
Since the Ortto CDP unified customer data, you will not create duplicates by doing this dual connection, the customer profile will simply be enhanced by the additional data from the data source.
Filters, tags & audiences: where are lists and segments?
All of your existing lists and segments are accessible in Autopilot. Ortto does not have the concept of lists or segments. Filters, tags and audiences replace the concept.
Create a smart segment in Ortto
Audiences and filters in Ortto replace the concept of Autopilot’s smart segments. Audiences are designed to represent key lifecycle stages of the customer journey.
Filters allow you to segment people and accounts (previously organizations) for insight into your customers, to tag, to send a campaign, to start a journey, and to build a report. Filters are saved within the context they are required (for example, used to create a campaign audience) and allow you to gain quick insights into customer data without the need to create an audience. It’s best to create an audience if you find yourself wanting to access that group of customers over and over again.
Create a list in Ortto
There is no concept of a list in Ortto. If you wish to save a static “list” of people an alternative is to use tags which function the same way as lists.
To add people to a tag, on the People page, create a filter to find the people you wish to add, then select all and click Tag.
Learn more about tagging people and accounts.
How to reference segments and lists in campaigns
To determine your campaign recipients, you can reference your contacts using a tag, a specific audience, or use filter criteria to reference a people’s field or activity attribute values.
If you imported your contacts into Ortto from a spreadsheet (.csv file), then at the Tag step of the import process a tag will have been applied to those contacts (based on the title of the spreadsheet). For example, you imported a spreadsheet of people who are “slipping customers”.
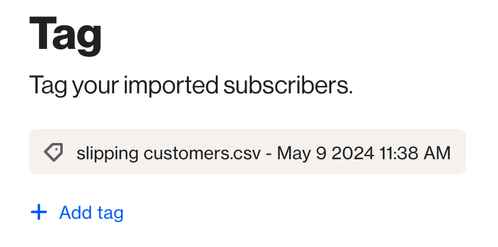
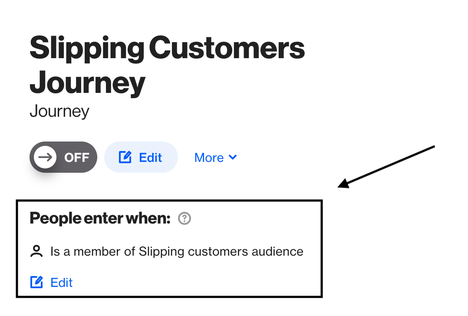
You can then use this tag to build your campaign recipients list (for email and SMS campaigns) or as the campaign entry criteria (for playbooks and journeys).
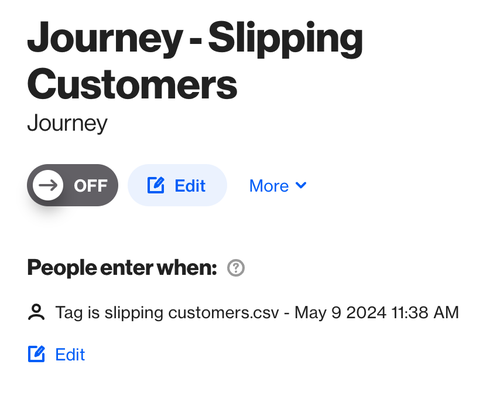
A tag can also be used to create an audience, which you can then select for the campaign recipients.
Using our “Slipping customers” example above, we can create an audience using the tag that was added when we imported the contacts.
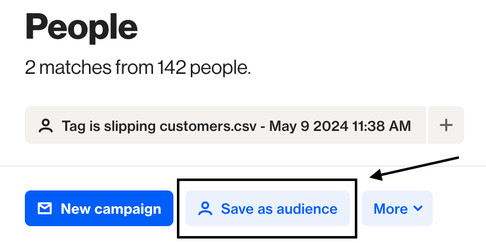
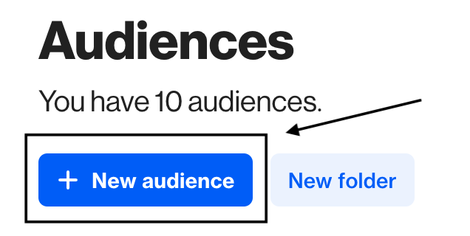
You can do this 2 different ways
- From the People page, create a filter using the “Slipping customers” tag as the criteria. This will display all the people who are associated with the tag. Then click Save as audience and complete the steps in the save audience popup.
- From the Audiences page, click New audience. Then, create a filter using the “Slipping customers” tag as the criteria. Follow the remaining steps to save your new audience.
 Once you have your “Slipping customers” audience, you can use it as your campaign recipients list (for email and SMS campaigns) or as the campaign entry criteria (for playbooks and journeys).
When your contacts are in Ortto, you can reference them in campaigns by their field or activity attribute values instead of using a tag or audience.
For example, instead of using the “Slipping customers” tag or audience, you might want to enter people into a journey based on the time since they last engaged with your product or content (e.g. their “Last seen” value or the amount of time since they clicked on an email).
Discover your Autopilot data with report builder
Ortto features a powerful report builder that can be used to analyze and understand all of your Autopilot data using activities.
Each upgraded account ships with a default dashboard that breaks down your activities from Autopilot. You can also create your own reports and modify the existing dashboard.
Create a report with Autopilot data
Navigate to Reports in Ortto and select New report. You can select a template or create from scratch. Search for activity from Autopilot and you’ll see the last 30 days previewed automatically.
By default, each new report is created as a snapshot, which captures data from up to the last 90 days only. If you want to track the data over longer periods, after you save a report switch it to dynamic by selecting More > Switch to dynamic.
You can pin reports to a dashboard to monitor them over time.
Learn more about reports and dashboards in Ortto.
Headsup in Ortto
Headsup is still available in Autopilot. Many Autopilot customers created users in Autopilot for the sole use of using those people in headsup messages. Now you’re upgraded, all users have been copied over to Ortto. You can set users' permissions and add/change/delete them in Settings > User management.
At this point in time you can delete any of the users on the Ortto side who were in Autopilot. Those users will stay in Autopilot for the purpose of being used in headsup messages.
You can continue to add users into Autopilot for the purpose of headsup but they will not be able to login to Ortto. To represent this change, My Team is now called Headsup Users.
Capture forms in Ortto
Your existing captured forms in Autopilot will continue to work and you can capture new forms in Autopilot.
Ortto has a new version of form capture. The benefit of capturing forms in Ortto is taking advantage of the updated tracking code which cannot be blocked by Adblock and therefore reduces the amount of potential missed form submissions.
To track a form in Ortto, select Capture > New widget > Start from scratch > Tracked form. Learn more about tracked forms in Creating a new capture widget.
Tracked forms in Ortto create unique activities and allow you to use those activities to create reports on form submissions.
Autopilot email in Ortto
You’ll notice a distinction between Autopilot campaigns and Ortto campaigns. Autopilot campaigns house your email assets (templates), whereas Ortto campaigns contain your email, SMS, playbook and journey campaigns. Within an Ortto email, playbook or journey campaign you can add existing Autopilot email assets. In Ortto, you can also upload any existing HTML email files you have to create an email message.
When your account is upgraded to Ortto, your email domain and IP addresses remain the same, so you retain your sender reputation.
IMPORTANT:
- Merge tags from Autopilot are not supported in Ortto. You must adjust the merge tags correctly before uploading. Learn more about using merge tags and Liquid syntax in Ortto in Personalizing campaign content with Liquid.
- Any custom variables declared within campaign messages, including JSON endpoints, must begin with
varso that Ortto can recognize it as a declared variable. Learn more about variable tags.
More detailed information about using and managing Autopilot emails in Ortto is located in Autopilot email in Ortto.
SMS in Ortto
Autopilot allows you to add a custom Twilio account to send SMS in your journeys. You can continue to use these SMS features in Autopilot.
If you chose to use SMS in Ortto the SMS system no longer supports a custom account. Ortto handles number management, regulatory bundles, subscription management and other important SMS settings automatically. By using the new SMS features you will benefit from SMS widgets such as coupons, confirmations and surveys.
If you use SMS in Ortto you will need to subscribe to an SMS rate plan and pay for line rental. This is all done from Ortto.
Learn about SMS in Ortto under SMS setup.
Manage Autopilot contacts in Ortto
Autopilot contacts are synced to Ortto (to become Ortto contacts or people) on an ongoing basis.
Learn more about managing contacts (people), including archiving and deleting, in Managing people.
NOTE: Autopilot contacts in Ortto cannot be archived. The reason for this is that the contacts would be re-synced from Autopilot to Ortto, which would cause duplication issues.
Delete Autopilot contacts from Ortto
If you wish to delete Autopilot contacts from Ortto you will need to:
- In the Ortto navigation drawer, click Autopilot > Contacts.
- Select and delete the relevant contacts from Autopilot.
- The deleted Autopilot contacts will be automatically archived in Ortto.
- To view the archived contacts, in Ortto, on the right-hand side of the People page, click All > Archived.
WARNING: Archived contacts will automatically be deleted after 29 days (deleted on day 30).
Delete Autopilot contacts but keep them in Ortto
If you wish to delete contacts from Autopilot but keep them in Ortto:
- In the Ortto navigation drawer, click Autopilot > Contacts.
- Select and delete the relevant contacts from Autopilot.
- In Ortto, on the right-hand side of the People page, click All > Archived. Use the checkboxes to select the contacts to restore, then click Restore.
- Restored Autopilot contacts will return to the Ortto contact list and they will no longer be associated with Autopilot. (They will be Ortto contacts only.)