
Consent, opt-out and default responses
Overview
The SMS consent, opt-out, and default response page allows configuring Ortto's standard SMS branding and interactive message responses for SMS messages sent from both SMS and journey campaigns.
Accessing consent, opt-out and default responses
To access the consent, opt-out and default responses page, go to Settings > Channels > SMS > Consent, opt-out and default responses
Managing consent, opt-out and default responses
The consent, opt-out and default responses page allows users to:
Saving changes
After making any changes to these settings, remember to click Save at the bottom of the page to apply your updates.
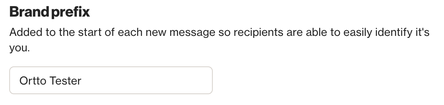
Brand prefix
The Brand prefix field lets you set your organization’s name or brand as the beginning of every SMS message sent by Ortto.
When you first create your Ortto account, it automatically uses your Business name as the default prefix. You can easily change this default to reflect your brand.
Remember, the Brand prefix field is required. To keep your SMS messages shorter, consider using a shorter version of your brand name.
Opt-in consent
The Opt-in consent field allows you to customize the SMS message your customers receive when they opt-in to receiving SMS messages from you.
By default, the following message is provided:
Reply YES to confirm opt-in to SMS. Msg rates may apply. Reply HELP for help. Reply STOP to opt out.
You have the option to modify this message. If you decide to change it, we recommend including brief instructions for the default responses:
- HELP / INFO
- STOP / UNSUBSCRIBE / CANCEL / END / QUIT
This helps your customers understand how to get assistance or opt out if they choose to do so.
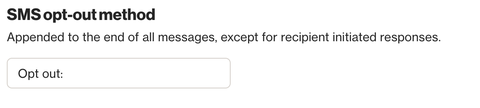
SMS opt-out method
The SMS opt-out method field customizes the text that prefixes the link to Ortto’s web pages for opting out of selected audiences and all SMS messaging features. This link is included at the end of each Ortto-generated SMS message, providing customers/recipients a straightforward way to opt out of Ortto’s SMS messaging features.
NOTE:
Recipients can opt-out of all Ortto-generated SMS communication by sending one of the predefined STOP replies as an SMS message. Once opted out, their status may show as invalid SMS or blacklisted in our records, indicating they no longer receive these messages.
Default message responses
The Default message responses feature lets you set up automatic replies that Ortto sends when your customers reply with specific words to an Ortto SMS message.
Each group of required reply words has its own response, which you can customize. Required reply words are those that recipients can send to receive a response from Ortto.
You can also create, edit, and delete custom reply words along with their responses.
NOTE: These replies are case-insensitive, meaning recipients can type their replies in any case.
STOP, UNSUBSCRIBE, CANCEL, END, QUIT
If a contact replies with STOP, UNSUBSCRIBE, CANCEL, END, or QUIT, they will be unsubscribed from SMS messages. They won’t receive any more messages from you. To start receiving messages again, contacts can simply reply with START.
- The default message response to a recipient typing any of these reply words is:
You are unsubscribed from SMS. No more messages will be sent. Reply START to re-subscribe.
NOTE:
If the Sender ID is enabled, and:
- Click tracking is enabled, SMS messages will include the opt-out link and recipients can unsubscribe via this link.
- Click tracking is disabled, SMS messages will include “
Reply STOP to (+00) 123 456 789 to opt out”. This is because recipients cannot reply to a Sender ID. The phone number placeholder will be replaced with the account’s phone number upon sending. This opt-out message will override the custom opt-out message (if enabled).
If Sender ID is disabled, and:
- Click tracking is enabled, SMS messages will include the opt-out link automatically. Recipients can still unsubscribe by replying with one of the opt-out keywords. Above. Recipients can unsubscribe either by clicking the opt-out link or by replying.
- Click tracking is disabled, SMS messages will include the default opt-out message or the custom opt-out message (if enabled).
HELP, INFO
If contacts reply with HELP or INFO, they will receive instructions on how to unsubscribe.
- The default message response to a recipient typing any of these words is:
Reply STOP to unsubscribe. Msg&Data Rates May Apply.
START, YES, Y, UNSTOP
Contacts can reply with START, YES, Y, or UNSTOP to start receiving messages again. They will receive a confirmation message and can reply with HELP for more information or STOP to unsubscribe.
- The default message response to a recipient typing any of these words is:
You have successfully been re-subscribed to messages from this number. Reply HELP for help. Reply STOP to unsubscribe. Msg&Data Rates May Apply.
Modify a reply’s default response
- Navigate to Consent, opt-out and default responses.
- Scroll down to the Default message responses section.
- Expand the desired set of words.
- Modify the text in the Respond with field.
- To enhance your message, consider:
- Inserting a link: Click where you want the link, provide the URL, and click Insert.
- Adding an emoji: Click to select an emoji from the popup.
- Including a field or activity's attribute value: Choose from the options in the popup and click Save.
- Remember to click Save at the bottom of the page to apply your changes.
NOTE: When selecting an activity attribute as your merge tag:
- For individual contacts, we use their latest activity.
- For journey SMS messages with entry criteria of type X activity occurs, we use the activity that caused entry, even if subsequent activities occurred.
- Activity must be within 30 days to be used. For longer availability, save the value into a custom field and use that as your merge tag.
Create a custom reply and response
- Navigate to Consent, opt-out and default responses.
- Scroll down to the Default message responses section.
- Click Add response.
- Enter the specific reply word/s (separated by commas) in the When someone replies field to trigger the response.
- Type your response in the Respond with field.
- To enhance your message, consider:
- Inserting a link: Click where you want the link, provide the URL, and click Insert.
- Adding an emoji: Click to select an emoji from the popup.
- Including a field or activity's attribute value: Choose from the options in the popup and click Save.
- Remember to click Save at the bottom of the page to apply your changes.
NOTE: Ortto automatically converts your words to ALL CAPITALS in the When someone replies field. However, replies from recipients are treated in a case-insensitive manner, meaning they can be typed in any case as long as the spelling matches exactly.
NOTE: When selecting an activity attribute as your merge tag:
- For individual contacts, we use their latest activity.
- For journey SMS messages with entry criteria of type X activity occurs, we use the activity that caused entry, even if subsequent activities occurred.
- Activity must be within 30 days to be used. For longer availability, save the value into a custom field and use that as your merge tag.
Delete a custom reply and response
- Navigate to Consent, opt-out and default responses.
- Scroll down to the Default message responses section.
- Expand the custom reply you want to delete.
- Click the bin icon on the right to delete the custom reply and response.
- Remember to click Save at the bottom of the page to apply your changes.
NOTE: Responses marked with a lock emoji cannot be deleted because they are required default message responses.
TCPA compliance
TCPA compliance is a requirement for SMS messaging. We provide sample consent disclosures and terms for your review with legal counsel. Please note that Ortto does not assume responsibility or liability for these documents. Customization to fit your specific needs is essential before adoption.