The spreadsheet (CSV) file data source allows you import your customer/people and accounts (previously organizations) data from a CSV file to your Ortto account’s customer data platform (CDP).
Important: From September 2025, spreadsheet imports are automatically archived and eventually deleted to help keep your data sources clean and current:
New spreadsheet imports are automatically archived after 90 days.
Existing imports older than 90 days will also be archived.
Archived imports are retained for 365 days total, after which they are permanently deleted.
Note:
Restoring an import from Archive will keep it permanently.
Archiving a CSV import does not archive or remove the contacts/data that were uploaded, and it does not remove any tags linked to that import.
CSV file prerequisites
Before you upload a CSV, make sure:
The file is in CSV format, with the first row matching field names for people and/or accounts in your Ortto CDP.
Each column contains values for one field, and all rows use the same number of commas.
You don’t need to include every CDP field, just the ones relevant to your data.
TIP: If you're using a spreadsheet, export each sheet as a separate CSV file and upload them individually to Ortto.
NOTE: The field names in your CSV header don’t need to exactly match those in your CDP. Ortto will try to match them automatically during import.
Just make sure the data in each column is valid for the field listed in the first row.
NOTE: The max file size is 500 MB.
People only
If your CSV contains People data only, make sure:
At least one column matches a unique identifier for People (set in Settings > Customer data > Unique identifiers > People).
Date values match the date format set in your General settings.
If you're setting a language, use a valid ISO language code (e.g. en for English, es for Spanish, or en-gb for British English).
Accounts (previously organizations) only
If your CSV contains Account data only, make sure:
At least one column matches an Account unique identifier (set in Settings > Customer data > Unique identifiers > Accounts).
Date values follow the date format set in your General settings.
Accounts and people
When importing People and Account data together, each person must be linked to an account.
Make sure your CSV meets the following:
Includes at least one People unique identifier (set in Settings > Customer data > Unique identifiers > People)
Includes at least one Account unique identifier (set in Settings > Customer data > Unique identifiers > Accounts)
To link multiple people to the same account, use the same account identifier for each person in the CSV.
EX: If the Accounts unique identifier is Name, we can format the CSV as follows:
Name, Email
My Company, chris@example.com
My Company, alex@example.com
Since the unique identifier for the Account matches on both contacts, they will both be linked to the same Account (My Company).
Upload your spreadsheet (CSV) file
To import your CSV file into Ortto:
From the New data source page, go to Popular / CRM > Spreadsheet import and click Get started.
On the Upload spreadsheet page, either:
Drag and drop your CSV file into the upload area, or
Click or browse for the file on your computer to select it manually.
Click Next to go to the Map the columns to a field page.
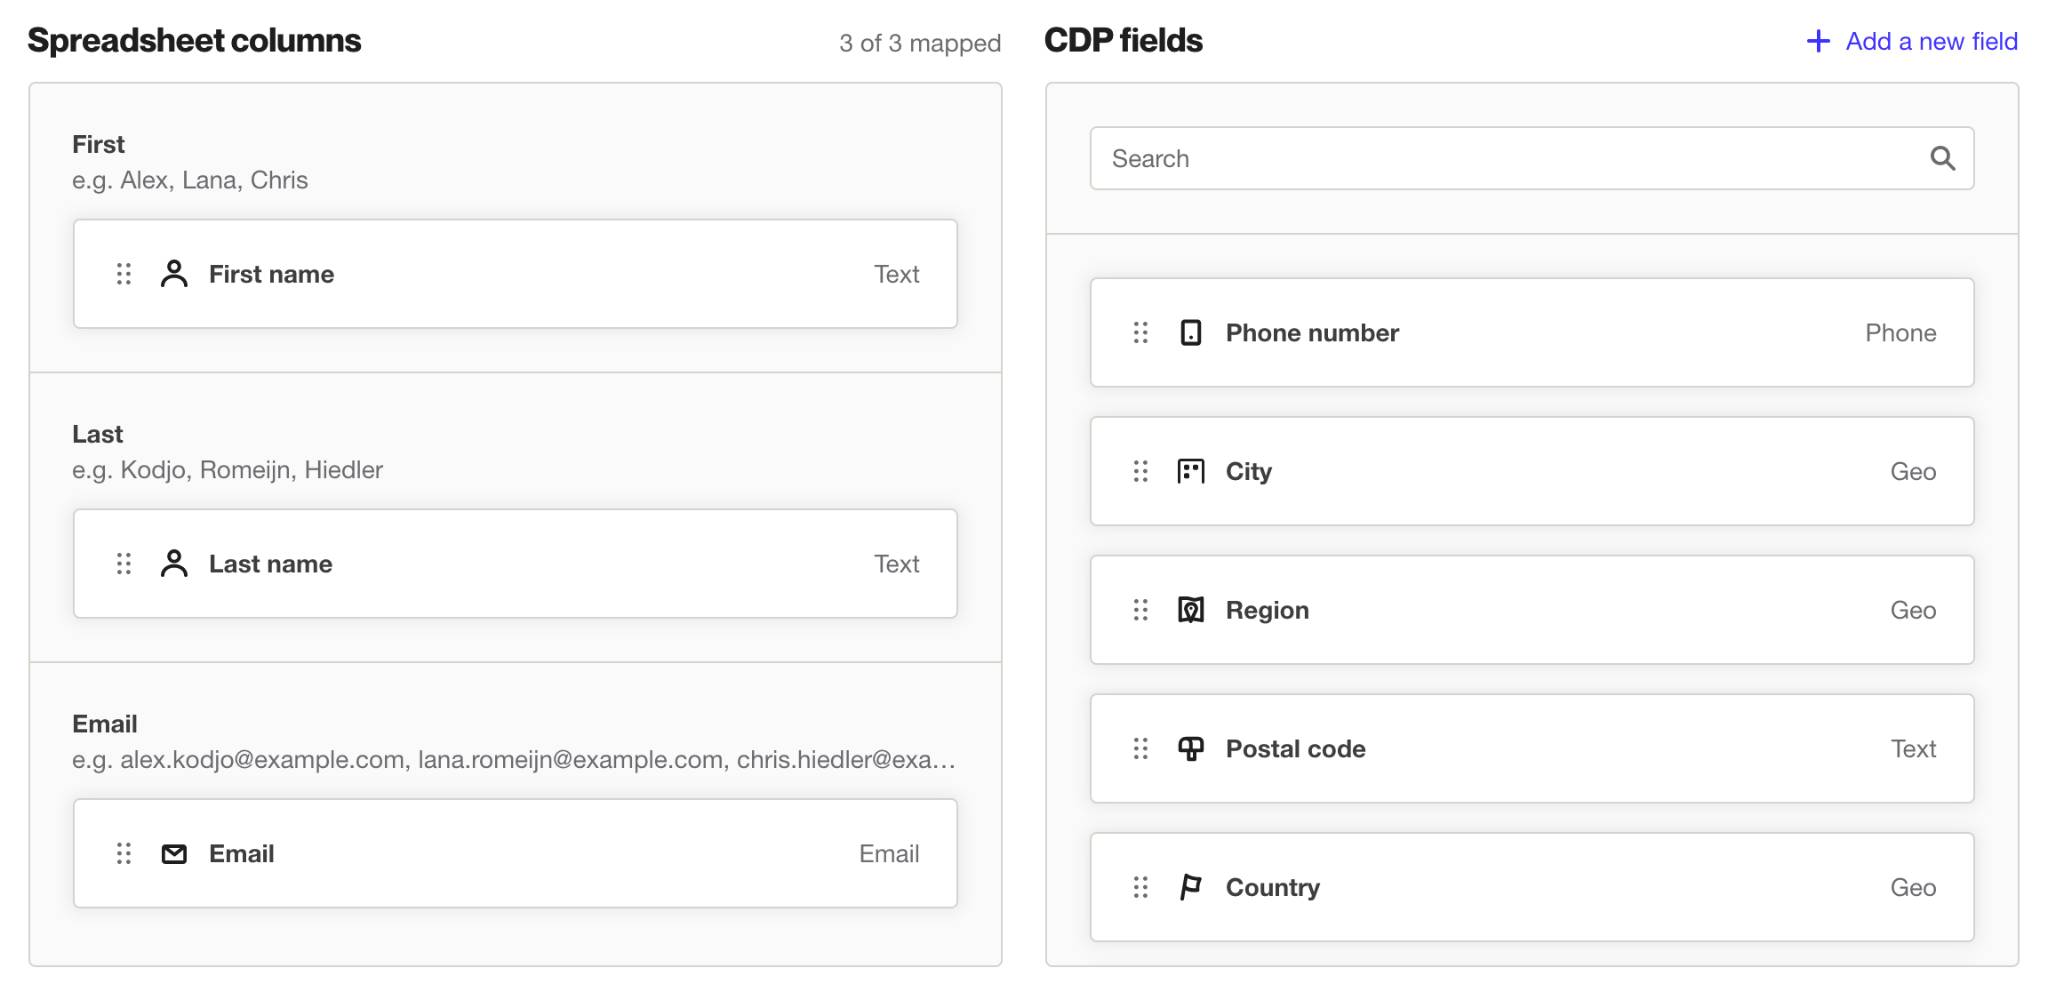
Ortto will automatically try to match your CSV’s column headers to fields in your CDP. Any matches will appear under the Spreadsheet columns section.
If a field match is incorrect, you can fix it by dragging the correct CDP field from the CDP fields section and dropping it over the mismatched field in the Spreadsheet columns section.
This will replace the incorrect match, and the original CDP field will return to the list.
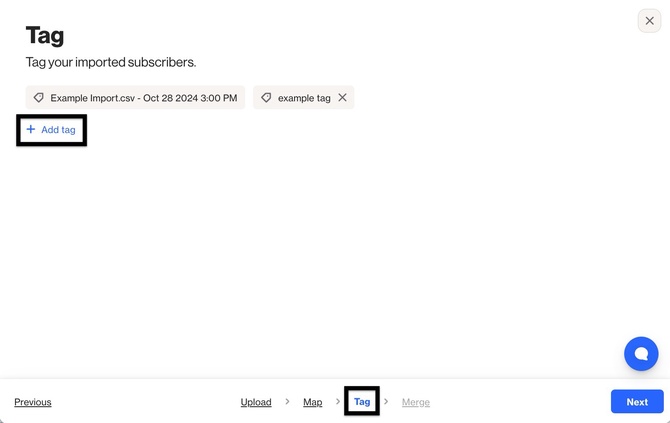
On the Tag page, click Add tag to begin adding a new tag (by typing its text and clicking Create to create the new tag) or selecting one from the existing list of tags.
TIP: A default tag with the file name, date, and time is automatically added. If you choose to add more tags, you can remove the default one.
If you map an Accounts field, you’ll also be able to add tags to the imported Accounts. These may differ from the tags applied to Contacts.
Click Next.
On the Select a merge option page, choose the appropriate merge option and merge key strategy to determine how Ortto behaves when integrating any existing people or organization data in your CSV file into Ortto. Learn more about the merge options.
Click Done to start the import.
Once the import process starts and your CSV data is initially uploaded, then synced, and completed when Import complete is shown, click Done again (or X at the top) to return to the Data sources page.
NOTE: If your CSV file is large and the syncing process takes a while, you can click Done again (or X at the top) from when the syncing process beings to return to the Data sources page. Syncing will complete in the background and Ortto notifies you of when the import is completed.
Merge options
Import and merge new data only (recommended)
When a record exists only new data will be added. If the record doesn't already exist, it will be created.
EX: Consider an existing contact with the following fields:
First Name: John
Last Name: Perez
Country: Mexico
If you map any columns from your CSV file to these fields, the existing values will remain unchanged. For instance, if your CSV includes:
First Name: (new value)
Last Name: (new value)
Country: (new value)
Ortto will not update John's first name or last name, and the country will remain as Mexico. By selecting this option, you can only populate fields that are currently empty. This allows you to update your contact data without risking the loss of existing information.
Import and merge new data for existing records only
The key distinction between this option and the previous one is that it does not create new records. If a record cannot be matched using your unique identifiers, it will be ignored during the import process.
Import and overwrite any data that exists
When a record exists all mapped fields will be overwritten. If the record doesn't already exist, it will be created.
WARNING: Exercise caution when using this option, as all mapped fields will overwrite existing data. If you're unsure whether this is the best option for your needs, we recommend exporting all your contact data before proceeding with this import option. This way, you'll have a backup of your data in case you need to restore it. Learn more about how to export records.
EX: With this option, all mapped fields will overwrite any existing data in your records. For example, consider an existing contact with the following fields:
First Name: Sarah
Last Name: Johnson
Country: Canada
If you map any columns from your CSV file to these fields during the import process, the existing values will be replaced.
Any fields that you map on the mapping page will completely overwrite the existing data in the contact profile.
There are two scenarios where existing values will not be updated during the import process (this applies regardless of the merge option you've selected):
The field in the CSV file is empty: If the corresponding field in your CSV file is empty and you map it to a field that already has a value, the existing value will remain unchanged. In this case, the field will not be overwritten and will not become empty.
The field in the CSV file was not mapped: If you choose not to map certain fields from your CSV file, those fields will not be updated in Ortto. Only the fields that you map will be considered during the import.
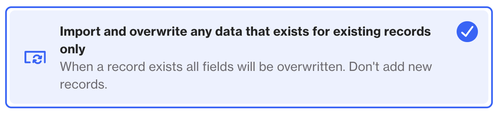
Import and overwrite any data that exists for existing records only
The key distinction between this option and the previous one is that it does not create new records. If a record cannot be matched using your unique identifiers, it will be ignored during the import process.
Import new records only
If a record already exists, it won’t be modified. This option only imports new records.
Searching existing CDP fields
If the list of CDP fields is extensive, you can filter this list itself by typing one or more consecutive letters into the Search box, and any of these fields whose names do not match these letters are dynamically excluded from the list as you type.
You can then select and/or clear the remaining CDP fields on this list.
Clearing the Search box, or clicking X restores all CDP fields to the list.
Adding a new CDP field
If your Ortto account’s existing CDP fields are not suitable for one or more columns of data in the CSV file you are importing, you can create a new CDP field to map to your CSV file column.
To do so:
Click Add a new field.
In the New custom field dialog, specify the Field name and Field type for your new CDP field.
Click OK and the new CDP field appears at the top of the CDP fields section list.
You can now drag this field across to the appropriate CSV file column in the Spreadsheet columns section of the page.
Field formatting recommendations
Here are the formatting guidelines for Ortto's supported field types during import.
Text fields
Text field values must be 500 characters or fewer. Values longer than 500 characters will be truncated. For longer text, use a Long Text field.
Date & Time and date fields
To import date or time values correctly, use the format set in your account settings.
You can find this under Settings > General > Date and Time.
Boolean fields
Values can be formatted as Yes/No, True/False, or 1/0. These are not case-sensitive.
NOTE: When mapping a boolean field to the Email Permission or SMS Permission fields, only Yes/No and True/False values are accepted.
Phone number fields
You can import phone numbers with or without a country code. During the import process, the map step lets you choose how to handle phone numbers without an explicit country code.
You can decide whether to import the numbers as they are (without a country code) or have the first digits interpreted as the country code.
Single-select & Multi-select fields
Values must already be added to the field before importing. Unrecognized values will not be accepted.
Link fields
URLs must include "https://" to be accepted.
Adding contacts into an audience
Contacts enter an audience based on the audience's entry conditions.
If an entire CSV of contacts needs to enter a specific audience, one option for doing so is to use a tag.
To do so:
Update the audience's People enter when: settings to include the Tag is [Tag-Name] condition, replacing the placeholder value with the tag that you'd like to use.
During your import, apply that tag to the contacts in the Tag step of the import.
This will allow all of the contacts in the CSV file to meet the audience's entry condition for the tag once the import has completed.
Example of the Add tag option in the Tag step of an import.
Important: From September 2025, spreadsheet imports are automatically archived and eventually deleted to help keep your data sources clean and current:
New spreadsheet imports are automatically archived after 90 days.
Existing imports older than 90 days will also be archived.
Archived imports are retained for 365 days total, after which they are permanently deleted.
Note: If you want to retain your data, we recommend downloading or re-uploading before the 365-day limit.
Troubleshooting CSV file imports
Common issues can occur when importing CSV file imports.