
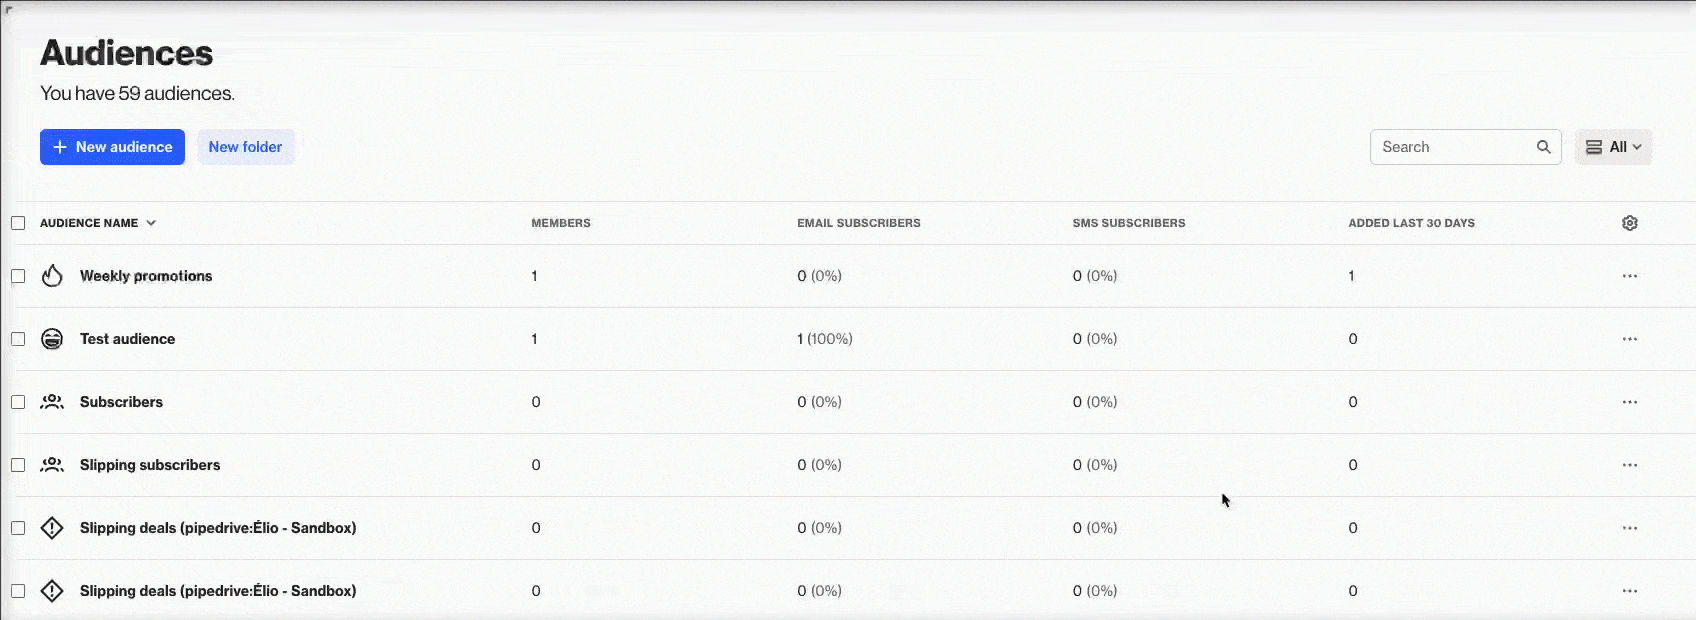
Managing audiences
The Audiences page provides you with access to all your audiences, which allows you to view a specific audience and edit it.
View an audience
To view an audience:
- On the Audiences page, click the audience to view.
- Click X to exit the audience view.
An audience’s view is the administration page where you can:
- view and manage the audience in the left-hand details panel, and
- under the relevant tabs on the right-hand side, view:
- an Overview of the audience,
- audience Members,
- audience Demographics,
- Campaigns the audience is part of, and
- Activities associated with audience members.
Edit the audience
In the details panel, you can rename the audience. To do so, hover over the name and click the pencil icon, then type the new name and click on a blank area of the page to save the name.
Click New campaign to create a new campaign for the audience.
Click Archive to archive the audience. Once an audience is archived, it can be restored or deleted. To delete an audience:
- Archive the audience in the audience’s view or on the Audiences page via the more icon, then Archive.
- On the Audiences page, click All > Archived.
- To the right of the audience name, click the … more icon, then Delete.
IMPORTANT: Deleting an audience cannot be undone.
Audience entry and exit criteria
People enter when and People exit when display the conditions by which people become members of the audience (or leave it). Edit the conditions to change the audience membership criteria.
IMPORTANT: By default, the exit criteria is set to: They no longer meet the entry criteria.
Replacing this with a filter will keep people in the audience even if they no longer meet the original criteria. Similarly, if you update the entry criteria with a new filter, contacts won’t be ejected if they don’t meet the new criteria. As a result, some contacts might stay in the audience even if they no longer fit the intended conditions.
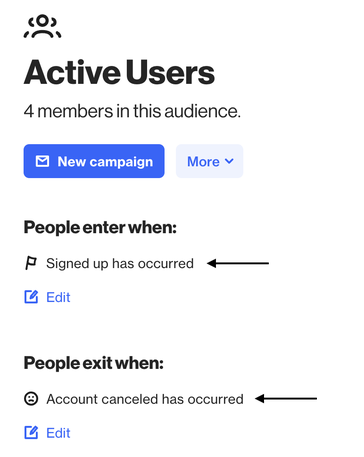
EX: Let’s say you have an audience called Active Users, which tracks people who created an account in your app.
Entry criteria: Signed up has occurred.
If the exit criteria is left to the default option (They no longer meet the entry criteria), users who cancel the account remain in the audience since they still match the original entry criteria (i.e., they signed up).
To automatically remove users from this audience after they cancel, simply add an exit condition: Account canceled has occurred.
By doing this, you'll ensure that your audience includes only users who still have an active account in your app.
TIP: If a contact doesn’t meet the audience conditions, you can still add them manually by using a tag. Just add the tag to the audience’s entry conditions, then apply it to the contacts you want to include.
Learn more about adding contacts to an audience via import using tags.
Customers on selected Ortto plans are able to edit the audience criteria to use data that is more than 90 days old. These are referred to as retention audiences.
NOTE:
- Data retention must be enabled for activities used in audience entry/exit criteria. Learn more about configuring an activity’s data retention period.
- You can create a maximum of 10 retention audiences.
- Retention audiences are included in your overall audience limits.
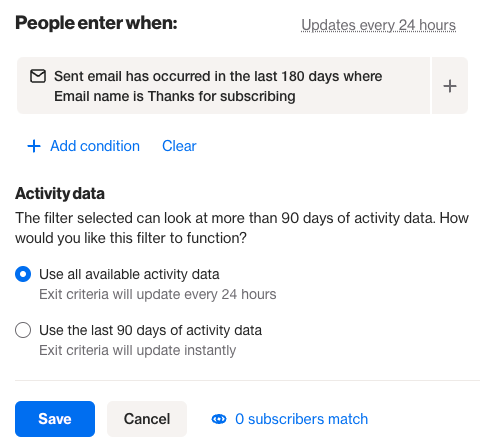
To edit your audience to become a retention audience:
- Under People enter when and/or People exit when, click Edit.
- If necessary, modify the filter conditions to include an activity and attribute more than 90 days old.
- Select Use all available activity data, then Save.
Learn more about retention audiences under Retention audiences in Creating a new audience.
Preference centers
This section provides an overview of whether or not the audience is enabled or disabled for the email or SMS preference centers.
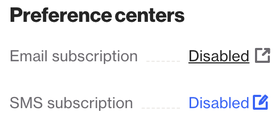
For Email subscription, click on the edit icon to be taken to the email preference center settings to manage the audience visibility, public name and description.
For SMS subscription, click on the edit icon to edit the audience visibility, public name and description.
Destinations
This is where you can send your audience data to your Google Ads or Facebook Ads advertising account/s.
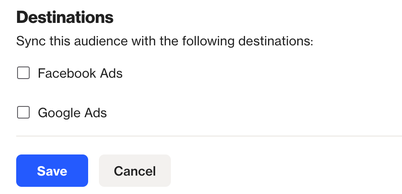
Updates to the audience in Ortto will be synced to the data source destinations you have configured.
NOTE: If an audience synced to Facebook Ads or Google Ads appears small, it may be due to the data source being unable to match customer data sent from Ortto, or the audience has not finished syncing. Learn more under Troubleshooting Facebook Ads and Troubleshooting Google Ads.
Details
This section shows the user who created the audience, when it was last edited and when it was created. The Created by name will be Ortto if the audience is a default data source audience.