Fields
Overview
Ortto’s Fields feature displays all people and accounts (previously organizations) fields within the Ortto account, including those integrated from data sources. Users can create new custom data fields for individuals or accounts within the CDP. Access these records from the People and Accounts pages.
Accessing fields
To access the fields page, go to Settings > Customer data > Fields.
Managing fields
The fields page allows users to:
Using fields in API calls
If you need to include a field in an API call, you can find the field’s ID (e.g., str::first for First Name) in the field list, located on the far right of the field’s name or by clicking on the field’s name.

NOTE:
- Custom fields are only associated with person and organization records, and are independent of activities and their attribute fields.
- New custom fields can also be created from views of an individual person’s or accounts record, through the People and Accounts pages, respectively.
Field limits
Field limits per plan level:
Custom person fields
- Professional: 100
- Business: 150
- Enterprise: 200
Custom account (previously organization) fields
- Professional: 25
- Business: 25
- Enterprise: 25
NOTE: The limits on legacy plans may differ. Contact support for help.
Field activity tracking
Ortto allows field activity tracking for system, custom, and data source fields, except for account fields and multi-select or aggregate type fields.
Learn more about field activity tracking.
Create a new person or accounts (previously organizations) custom field
Users can create new custom data fields for individuals or accounts within the CDP.
Learn more about creating custom fields.
Supported data types
Learn more about the supported data types for fields.
Edit an existing custom field
You can only modify custom fields to enable or disable the Field tracking feature or to add/edit the field description. Once a custom field is created, its name, type, and values cannot be edited.
Learn more about editing an exisiting custom field.
Learn more about adding a field description.
Learn more about adding new selectable values to single or multi-select fields.
Learn more about adding, editing or deleting previously added values in single or multi-select fields.
Edit a data source field
While you cannot make direct modifications to the data source fields, you can edit a data source field to enable/disable fields trakcing
- Navigate to the Fields page.
- Locate the relevant field and click on its name or the ... icon, then select Edit.
- Choose whether to enable or disable the Field activity feature.
- Click OK to confirm your changes.

Delete an existing custom field
Deleting a custom field removes it from the records of relevant individuals or accounts, accessible via the People and Accounts pages, respectively, along with all associated data.
To delete an existing custom field:
- Navigate to the Fields page.
- Locate the relevant custom field and click on its More icon > Permanently delete option.
- In the confirmation dialog box, type
PERMANENTLY DELETEin capital letters, and click OK to proceed with the deletion.
NOTE: Custom fields must be deleted individually, as bulk deletion isn't available. This helps prevent issues if the fields are used in journeys or audiences.
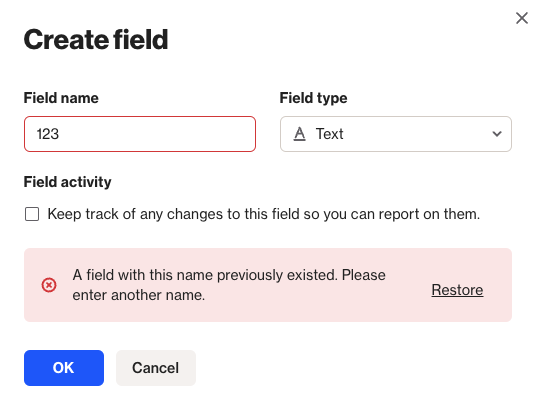
Restore a deleted custom field
It is indeed possible to restore a deleted custom field along with its values.
- Navigate to the Fields page.
- Select Add custom field
- Choose a Person or Account field, ensuring it matches the same type as the one previously deleted.
- Enter the field name and click OK.
- After selecting OK, a message will appear; choose Restore from the options provided.
NOTE:
- Upon restoration, the values will reappear for the contacts that had a value present previously.
- Once a field has been restored, it is not possible to alter the name, field type or values. Only Single and Multi-Select fields can be altered.
- If such a field is recreated without the Restore link, then no CDP data was associated with that custom field previously.
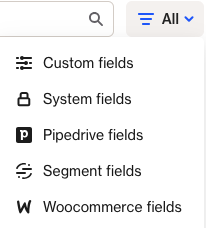
Filtering fields
On the Fields page, you have the ability to search via field type or through system fields, custom fields, or fields from your connected data sources, making it easier to find and modify them. Additionally, you can filter by people and accounts (previously organizations) fields to further streamline your search process.