
Stripe integration
Overview
When you connect to Stripe, you will unlock all of your customer, trial, subscription, charge and invoice data. It gives you the ability to craft highly personalized and relevant messages across the customer journey and unleashes powerful data visualization and segmentation.
Accessing Stripe
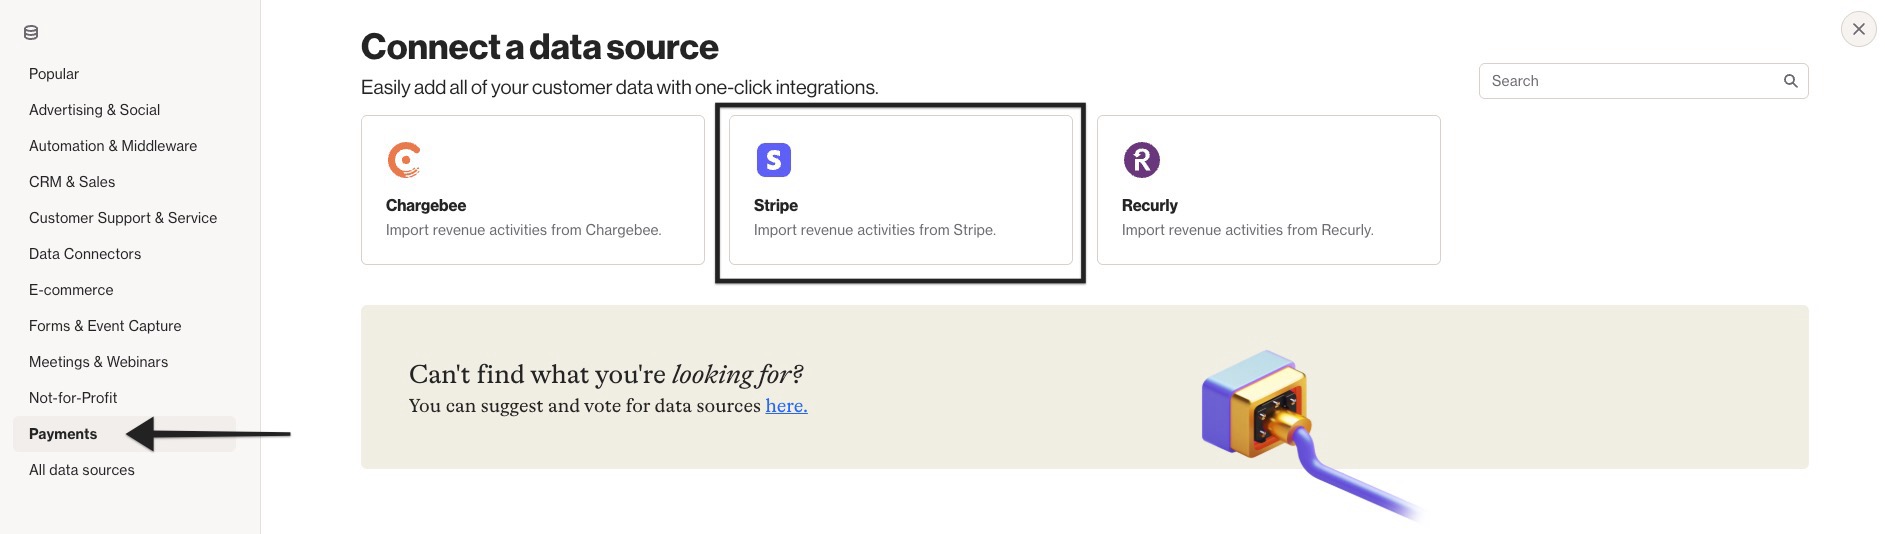
To access the Stripe data source, go to CDP > Data sources > + New data source > Payments > Stripe.
Stripe prerequisites
This integration process requires having a Stripe account which you have the authority and access credentials, including a restricted API key.
Set up your Stripe restricted API key
NOTE: A restricted API key is highly recommended when connecting your Stripe account to Ortto.
When you setup the Stripe data source you will be asked for an API key. There are two types of API keys in Stripe:
- Standard keys and
- Restricted keys.
We recommend that customers setup a Restricted key which offers greater security and requires only the needed scope of permissions.
To create a restricted API key in Stripe, follow these steps:
- Login to Stripe.
- Navigate to Developers > API Keys.
- On the API keys tab, click Add API Key.
- Under Restricted keys, click Create restricted key.
- Give the key a memorable name.
- Set the permissions as follows:
- All core resources:
- Charges = Read
- Customers = Read
- Products = Read
- All Billing resources:
- Coupons = Write
- Promotion Codes = Write
- Invoices = Read
- Prices = Read
- Subscriptions = Read
- All Connect resources = Read
- All webhook resources = Write
- The remaining permissions can be set how you like.
- Click Create Key and you will be shown the API key you need to use for your integration with Ortto.
Webhook limitations in Stripe
Stripe supports up to 16 webhooks. In the unlikely case you are using all of your webhooks you will need to remove existing web hooks before being able to complete the connection process. Ortto requires 1 available Stripe webhook to function.
Connecting to Stripe
NOTE: The Stripe data source is a read only data source. We will not write anything back to Stripe. We require write access for web hooks in order to create the required web hook for the integration.
To connect to Stripe, follow these steps:
- On the Data sources page, click New data source.
- Under Payments or All data sources, select Stripe, then Get started.
- Enter your restricted API key.
- Now, select your desired choice for Data retention to either:
- store only the last 90 days of activity data, or
- select the time frame for the data stored, and the activities which will be stored.
- Select Advanced options to:
- Choose which CDP fields can be modified from the Stripe data source, or
- Choose not to modify CDP data fields that already have a value.
- Click Connect to import and synchronize data from Stripe.
- After the sync completes, a summary of the sync will appear click Done.
Your Ortto account is now connected with Stripe.
NOTE: Depending on the amount of records in your Stripe account the initial sync may take several hours. You can view the state of the connection on the data source screen.
NOTE: You can connect your Ortto account to more than one Stripe data source (account) at a time.
You can also connect one Stripe data source to more than one Ortto account. Simply follow the connection steps outlined in this guide for the relevant Ortto account.
How is the data merged into Ortto
Data is merged from Stripe to Ortto on the initial connection and subsequently, when an event occurs within Stripe.
When a person is added from the Stripe data synchronization, they are subscribed to receive email communications. No change is made to the person’s subscription to SMS notifications.
Initial data sync
People details for the Stripe customers, including the customer fields in Stripe, subscriptions and invoice data are merged into the Ortto CDP.
Ortto activities store data for each trial, subscription, charge and invoice event.
Ongoing data merge
Stripe data is merged in real time (synchronously) to Ortto.
Resynchronizing data
Stripe data is resynchronized when the data source is reconnected and when the data retention limits are adjusted. A resync of the Stripe data may affect the audiences and campaigns within the CDP by resetting the attributes for the person, and activities. Causing a person to potentially re-enter an audience, or campaign within the CDP.
NOTE: A data resync may reset a person’s Email permission attribute to subscribed after they have unsubscribed from receiving email communications.
What does the data source add to my account?
The Stripe data source adds:
- Stripe customer records and their associated fields to your CDP (known as people or contacts in Ortto).
- Stripe activities from the last 90 days including trials, subscriptions, transactions and invoices. In some cases, however, it may be necessary to store an activity and its attribute data for longer. Therefore, Ortto provides a mechanism for customers to opt-in to selectively store their activity data for longer. Learn more about data retention under configuring data retention.
- The ability to use Liquid syntax in campaign messages to personalize your messages using merge tags for Stripe person fields and activity attributes. Learn more about using Liquid syntax under personalizing campaign content with Liquid.
NOTE: Deleting a Stripe data source connection will not remove the current entries in the CDP for people or activities that were merged from that Stripe connection.
View Stripe fields in your CDP
Customize your CDP field visibility and add Stripe fields by following these steps:
- Navigate to the People page under the CDP section of the sidebar.
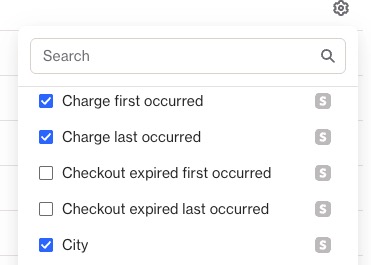
- Click on the the cog icon > select or clear the fields you want to show or hide.
Stripe fields are indicated with the small Stripe icon.
Learn more about Stripe person fields.
Access the Stripe data source view
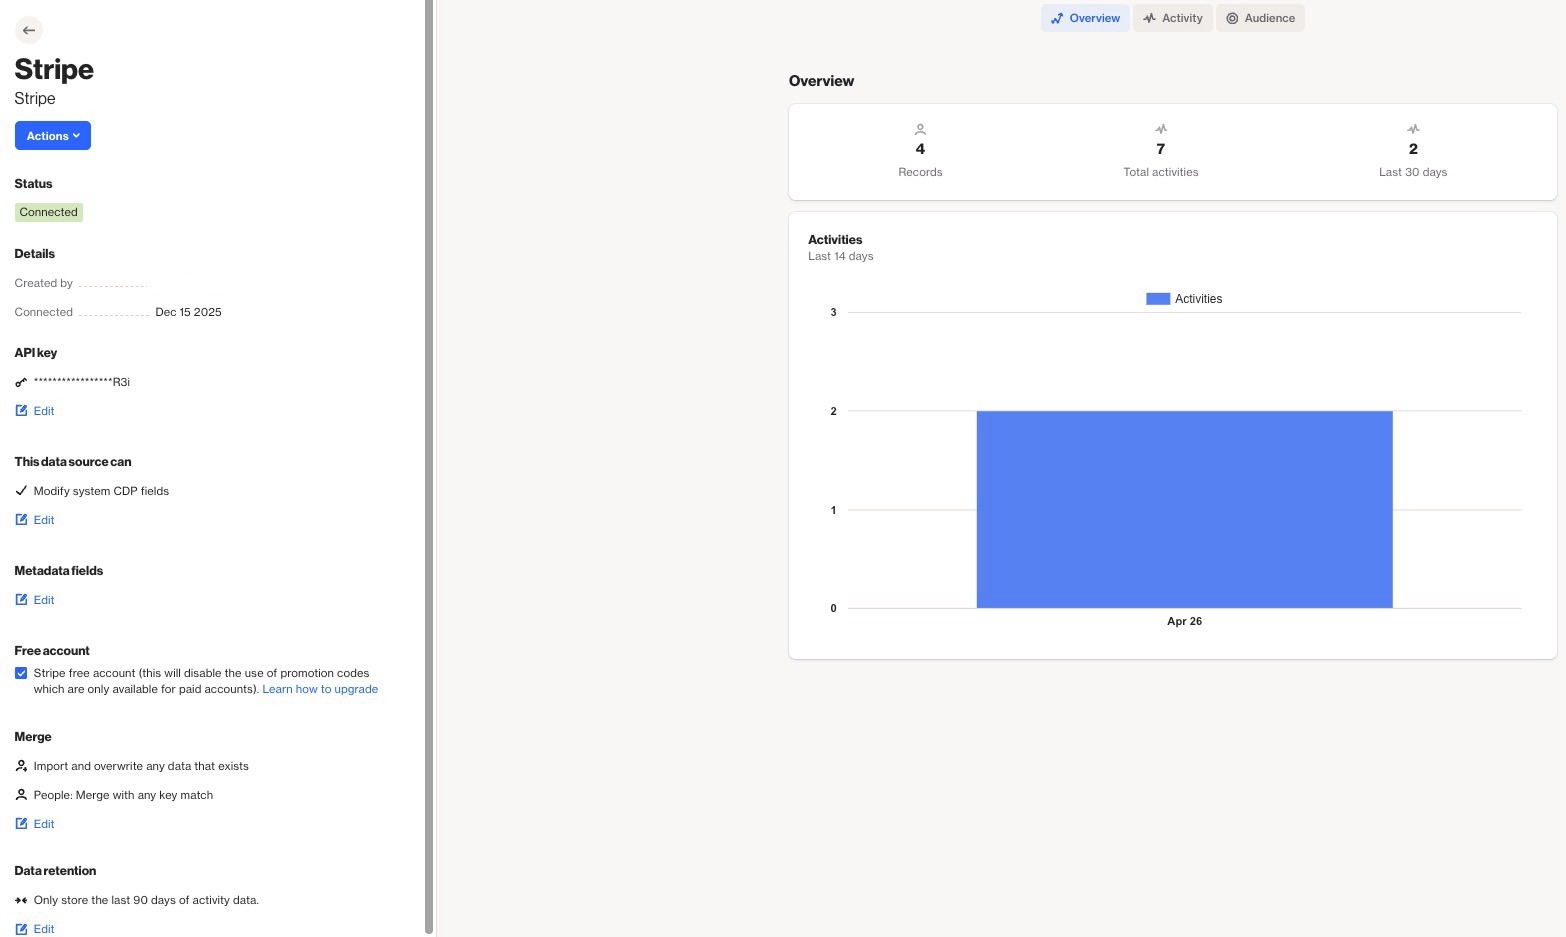
When a data source is connected, you are provided with a data source view. You can access its view via CDP > Data sources.
A data source’s view is the administration page where you can:
- view and manage the data source in the left-hand details panel, and
- under the relevant tabs on the right-hand side, view:
- an Overview of the data source,
- an Activity feed, and
- an Audience table, which displays the people imported from Stripe.
In the details panel, you can give the data source a new name (this will not affect your Stripe account settings). To do so, hover over the name and click the pencil icon, then type the new name and click on a blank area of the page to save the name. You can also disconnect the data source, and:
Here's what you can do:
- Rename the data source: Hover over the name > click the pencil icon > enter the new name > click anywhere on the page to save.
- Disconnect the data source: Click Actions > Disconnect.
- API Key: Edit the API key used for the connection.
- Configure if data source can modify CDP fields: If enabled, you can select the CDP fields the data source can overwrite.
- Manage Metadata fields from Stripe,
- Confirm whether the Stripe account is free or not,
- Configure the merge strategy: Learn more about data source merge strategies.
- Configure data retention: Set the activity data retention period.
Learn more about the data source view under managing data sources.
Using Stripe
Learn how to maximize your Stripe integration with Ortto's filters, reports, and campaigns for better insights and results.
Stripe activities
Activities from Stripe are automatically added to your Ortto account when integrating with Stripe.
Learn more about Stripe activities, their attributes and field types.
Troubleshooting Stripe
You can troubleshoot your Stripe data source in-app.
Learn more about troubleshooting Stripe.