
Chargebee integration
When you connect to Chargebee, you will unlock all of your customers, trial, subscription, charge and invoice data. It gives you the ability to craft highly personalized and relevant messages across the customer journey and unleashes powerful data visualization and segmentation.
Included are templates for audiences, dashboards, reports and playbooks to help you get started. The templates cover everything from SaaS analytics to playbooks that help onboard and welcome new customers.
Chargebee prerequisites
This integration process requires having a Chargebee account for which you have authority and access credentials, including a full-access API key.
Set up your Chargebee full-access API key
IMPORTANT: A full-access key is required when connecting your Chargebee account to Ortto.
When you setup the Chargebee data source you will be asked for an API key. There are three types of API keys in Chargebee:
- publishable keys
- full-access keys, and
- read-only keys.
To create a full access API key in Chargebee:
- Login to Chargebee.
- Navigate to Settings > Configure Chargebee > API Keys and Webhooks.
- Click API Keys.
- On the API keys tab, click Add API Key.
- Select Full-Access Key, then select All.
- Give the key a memorable name.
- Click Create Key and you will be shown the API key you need to use for your integration with Ortto.
Connect from Ortto
To connect to Chargebee:
- On the Data sources page, click New data source.
- Under Payments or All data sources, select Chargebee, then Get started.
- Enter your Chargebee domain name.
- At Secret key, Enter your full access API key (details on how to create one in Chargebee can be found in the section beneath).
- Select the API version of your Chargebee account. Learn more about the Chargebee API version in the Chargebee documentation.
- Now, select your desired choice for Data retention to either:
- store only the last 90 days of activity data, or
- select the time frame for the data stored, and the activities which will be stored.
- If needed, select Advanced options to:
- Choose which CDP fields can be modified from the Chargebee data source, or
- Choose not to modify CDP data fields that already have a value.
- Click Next.
- On the Setup page, the values you’ll need to enter when configuring your Chargebee webhook are pre-populated for you.
- Click Next.
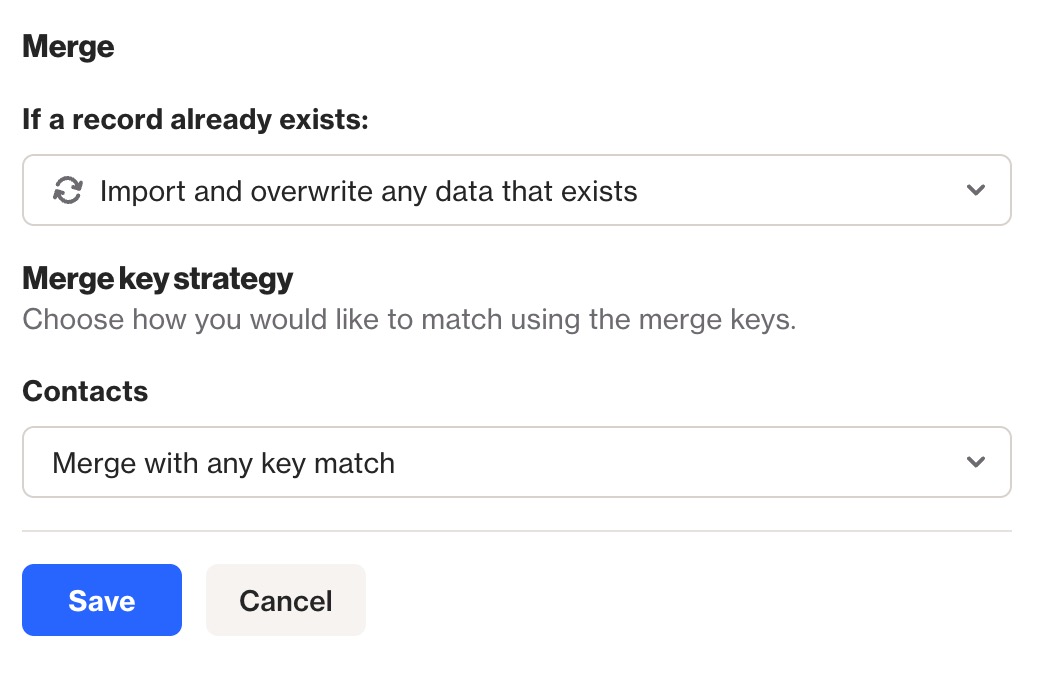
- On the Merge page, select the appropriate strategy by which people’s (customers') data is merged from Chargebee into your Ortto’s CDP.
- Click Next to import and synchronize data from Chargebee.
- After the sync completes, a summary of the sync will appear click Done.
Your Ortto account is now connected with Chargebee.
NOTE:
- If you select API Version 1.x, you must configure a Version 2 webhook to ensure that you can access all activities available with this integration.
- There is a difference in how the Subscription plan ID value is populated in Ortto between Chargebee API Versions 1.x and 2.x. In Version 1.x a contact’s plan ID will be populated in the Subscription plan ID field in your CDP. In Version 2.x, a contact’s plan ID will be populated in the Subscription item price IDs field.
NOTE: It is recommended to set the data retention limits while setting up the data source. Updating the data retention limits in the future will require a resync of the data source, which may affect multiple audiences and campaigns within your customer data platform (CDP). Learn more about configuring data retention under Configuring data retention.
IMPORTANT: Copy and store the webhook values displayed, as you will need them in order to set up your webhook in Chargebee.
- Webhook Name,
- Webhook Url,
- Username, and
- Password.
Setting up the webhook will ensure that data is synced in real time between Chargebee and Ortto.
NOTE:
The merge options:
- Import and merge new records only,
- Import and overwrite any records that exist, and
- Import new records only
are equivalent to the respective emerge strategies for people:
- Append only,
- Overwrite existing, and
- Ignore
NOTE: Depending on the amount of records in your Chargebee account, the initial sync may take several hours. You can view the status of the connection on the Data sources page. Learn more about data source statuses under Data source status in Managing data sources.
Set up your Chargebee webhook
NOTE:
- Creating a webhook in Chargebee is necessary in order for new activity data to sync to your Ortto account once new activities occur in real time, after the initial connection has been made.
- If you selected API Version 1.x during the data source setup, you must configure a Version 2 webhook to ensure that you can access all activities available with this integration.
If you have not added a webhook already, complete the following steps in Chargebee to get started.
- Login to Chargebee.
- Navigate to Settings > Configure Chargebee > API Keys and Webhooks.
- Click Webhooks.
- On the Webhooks tab, click Add Webhook.
- Enter the Webhook Name and Webhook URL generated by Ortto during the connection to Ortto.
- Toggle-on the Protect webhook URL with basic authentication then enter the Username and Password generated by Ortto during the connection to Ortto.
- For API Version, select Version 2 from the drop-down link (if not already selected).
- Under Events to Send, select the events you wish to send to Ortto. All Events is selected by default, however, you can deselect and select events as required.
- Click Create to finish. New Chargebee events will be displayed in your Ortto account when they occur.
How is the data merged into Ortto?
IMPORTANT: The default merge key strategy for accounts (previously organizations) is Match only if previous key is empty.
However, account and contact merge key strategies are linked. This means the merge key strategy selected in the Merge settings for the Chargebee data source will also apply to incoming account data from Chargebee.
By default, the unique identifier for an account is the Chargebee account-level Customer ID (str:ocb:o_customer_id) field.
However, this may vary based on the unique identifiers configured in your account settings for account records. If a different account field is selected there, it will override the default Chargebee account-level Customer ID field.
Data is merged from Chargebee to Ortto on the initial connection and subsequently when an event occurs within Chargebee (provided that you have set up your Chargebee webhook).
When a person is added to your CDP from the Chargebee data synchronization, they are automatically subscribed to receive email communications. No change is made to the person’s subscription to SMS notifications.
Initial data sync
People details for the Chargebee customers, including the customer fields in Chargebee, subscriptions and invoice data are merged into the Ortto CDP. The merge follows the data merge strategy selected during the initial connection with Chargebee. Ortto activities store data for each trial, subscription, charge and invoice event.
Ongoing data merge
Chargebee data is merged in real time (synchronously) to Ortto, due to the webhook that was configured during the data source integration.
Resynchronizing data
Chargebee data is resynchronized when the data source is reconnected and when the data retention limits are adjusted. A resync of the Chargebee data may affect the audiences and campaigns within the CDP by resetting the attributes for the person, and activities, causing a person to potentially re-enter an audience or campaign within the CDP.
NOTE: A data resync may reset a person’s Email permission attribute to subscribed after they have unsubscribed from receiving email communications.
What does the data source add to my account?
The Chargebee data source adds:
- Chargebee customer records and their associated fields to your CDP (known as people or contacts in Ortto).
- Chargebee company records and their associated fields to your CDP (known as accounts in Ortto).
- Chargebee activities from the last 90 days including trials, subscriptions, transactions, coupons and invoices. In some cases, however, it may be necessary to store an activity and its attribute data for longer. Therefore, Ortto provides a mechanism for customers to opt-in to selectively store their activity data for longer. Learn more about data retention under Configuring data retention.
- Templates for:
- Audiences, based on a subscription business model (these can be removed where they are not relevant)
- Playbooks and journeys
- Dashboards, both Performance and SaaS metrics.
- The ability to use Liquid syntax in campaign messages to personalize your messages using merge tags for Chargebee person fields and activity attributes. Learn more about using Liquid syntax under Personalizing campaign content with Liquid.
- Default Chargebee coupons and the ability to create a new Chargebee coupon.
NOTE: Deleting a Chargebee data source connection will not remove the current entries in the CDP for people or activities that were merged from that Chargebee connection.
View Chargebee fields in your CDP
Customize your CDP field visibility and add Chargebee fields by clicking the cog icon, then select or clear the fields you want to show or hide. Chargebee fields are indicated with the small Chargebee icon.
Access the Chargebee data source view
When a data source is connected, you are provided with a data source view. On the Data sources page, click the data source you wish to view.
A data source’s view is the administration page where you can:
- view and manage the data source in the left-hand details panel, and
- under the relevant tabs on the right-hand side, view:
- an Overview of the data source,
- an Activity feed, and
- an Audience table, which displays the people (customers) imported from Chargebee.
In the details panel, you can give the data source a new name (this will not affect your Chargebee account settings). To do so, hover over the name and click the pencil icon, then type the new name and click on a blank area of the page to save the name. You can also disconnect the data source, and modify the data retention period.
Learn more about the data source view under Managing data sources.
Using Chargebee
Learn about how you can use Chargebee with Ortto’s filters, reports, dashboards, campaigns, and coupons to get the most out of your integration under Using Chargebee in Ortto.
Troubleshooting Chargebee
For help with common questions or issues you may encounter when using Chargebee as a data source, view Troubleshooting Chargebee.