Push notifications SDK for Android
This page details how to install Ortto’s Android software development kit (SDK) in your app to deliver push notifications to contacts.
NOTE: The following instructions assume your app is built using Gradle.
If your app is developed using Flutter, you can find a combined push notification and in-app notification SDK here.
Each of the code snippets provided is copyable. Simply hover over the snippet and click the copy icon in the top-right corner.
These instructions cover the key steps to installing the Ortto Android SDK and configuring your app to handle Ortto’s push notifications:
Once you complete these key steps, you’ll be ready to create and send push campaigns.
Prerequisites
There are two prerequisites to installing Ortto’s Android SDK:
- Create a new (or use an existing) Firebase project and configure Google Cloud roles and permissions.
- Upload the
.jsonfile created in your Firebase project to Ortto, so that Ortto’s notifications APIs can access your Firebase data.
Learn about creating the Firebase project and enabling access in Ortto in Firebase cloud messaging setup.
Install
There are three key elements to the SDK installation:
- Install and initialize the SDK — enable access to the Maven Central repository, install the SDK, and initialize Firebase Cloud Messaging (FCM) and the SDK.
- Deep links — enable deep linking in push notifications.
- Authorization — register the contact’s device with Ortto.
NOTE: Unless otherwise stated, all objects and functions described are to be added to your app’s build.gradle script.
Install and initialize the SDK
- The Ortto Android SDK utilizes the Maven Central repository. In your
settings.gradlefile, addmavenCentral()to your list of repositories.
groovy
pluginManagement { repositories { gradlePluginPortal() google() mavenCentral() } } dependencyResolutionManagement { repositoriesMode.set(RepositoriesMode.PREFER_SETTINGS) repositories { google() mavenCentral() } }2. Install Ortto’s Android SDK (
androidsdk) in your app-levelbuild.gradlefile (e.g. at<your-app>/android/app/build.gradle) by adding to your list of dependencies. Replace<version>with the current version of the SDK, found at: https://github.com/autopilot3/ortto-push-android-sdk/releases.groovy
dependencies { // ... implementation 'com.ortto:androidsdk:<version>' //... }3. You need to initialize FCM and Ortto’s SDK before you can use them.
To do so, override the onCreate method in your Application class (located similar to
/app/src/main/java/<namespace-path>/app.java) as follows:java
public class App extends Application { @Override public void onCreate() { super.onCreate(); FirebaseApp.initializeApp(this); FirebaseMessaging.getInstance().setAutoInitEnabled(true); OrttoConfig config = new OrttoConfig( "<Application key>", "<Ortto Push API endpoint>", //see note below regarding endpoint regions true // shouldSkipNonExistingContacts ); Ortto.instance().init(config, app); } }Your
<Application key>value can be found in your Ortto account, at Settings > Push notifications > Android notifications > Application key.The
<Ortto Push API endpoint>value can be found in your Ortto account, at Settings > Push notifications > Android notifications > API endpoint.NOTE: Ortto’s default push API service endpoint is: https://capture-api.autopilotapp.com/.
Ortto customers who have their instance region set to Australia or Europe will use specific push endpoints relative to the region:
Learn more about
shouldSkipNonExistingContactsunder Skip non-existing contacts in the Identify people section.Deeplinks
Enable contacts to access deeplinks in your app via push notifications.
In the
/app/src/main/java/<namespace-path>/app.javafile, implement theCustomDeeplinkCallbackinterface andcreateTaskStackFromPayloadmethod, then register this object as the deep link activity handlerOrtto.instance().setDeeplinkHandler(this);in theonCreate()method:java
public class App extends Application implements CustomDeeplinkCallback { @Override public TaskStackBuilder createTaskStackFromPayload(Context context, String deepLink, PushNotificationPayload payload) { Intent intent = new Intent(this.getApplicationContext(), DeepActivity.class); intent.setPackage(context.getPackageName()); intent.setFlags(Intent.FLAG_ACTIVITY_NEW_TASK | Intent.FLAG_ACTIVITY_CLEAR_TOP | Intent.FLAG_ACTIVITY_SINGLE_TOP ); intent.putExtras(payload.extras); intent.putExtra("link", deepLink); intent.putExtra("payload", payload); return TaskStackBuilder.create(context) .addNextIntentWithParentStack(intent); } }NOTE: Implementing
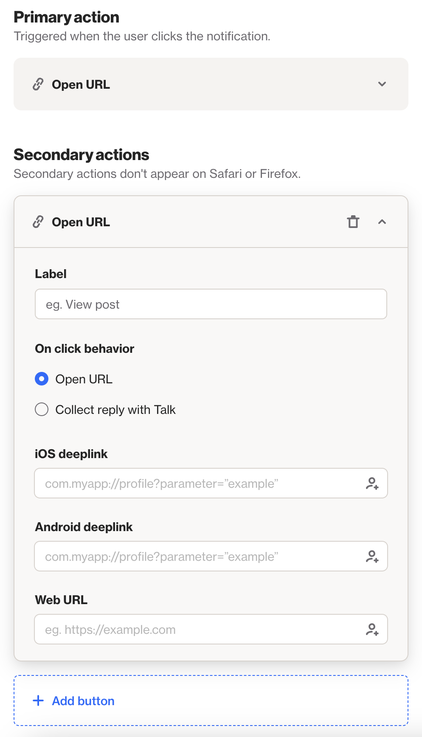
CustomDeeplinkCallbackis optional if you want to customize theIntentthat is passed to the activity associated with the deeplink filter inAndroidManifest.xmlThe
"link"value is what will be used when creating a push campaign with button that has an Android deeplink destination (at the Content step).
Authorization
Authorization is required to register the contact’s device with Ortto and enable push notifications for the device. This is handled by passing a Firebase token to Ortto to recognize a contact on their device.
Authorization is automatically requested when calling
Ortto.instance().init(<datasource_id>, <endpoint>)(in theApplicationsubclass described under Install and initialize the SDK) but you can request permissions again if required by calling:java
Ortto.instance().requestPermissions();Fetch the current Firebase token (generated when you created the Firebase project) and pass it onto the Ortto identity API using the following method:
java
Ortto.instance().dispatchPushRequest();This method should be called in an activity where you have identified the contact using
identify()so Ortto can register which contact the push notification token is attached to.Tokens are refreshed in the background automatically by Ortto as long as the contact opens the app. Should you wish to update the contact data yourself, use an
identify()call where appropriate:java
Ortto.instance().identify(id);Identifying contacts is described more under Identify people.
Identify people
A contact is considered anonymous when they are not logged in to the app or they cannot be identified using the identify function.
While push notifications can be sent to anonymous contacts, we recommend identifying your contacts so they can be linked to your existing CDP records. This then gives you the opportunity to personalize push notifications based on that contact’s data
The identify method identifies contacts who are subscribed to push and recognizes them when they log in to your app. Once logged in, the contact can receive notifications.
Identifying people is also necessary for tracking events.
The identify method can capture the following contact attributes:
firstName,lastName,contactId,externalId,phone, andacceptsGDPR.IMPORTANT: You must identify contacts by a minimum of 1 of the following attributes:
phonecontactId, orexternalId.Additional attributes are optional.
To identify contacts, create a
UserIDobject:java
// Non-Fluent UserID user = new UserID(); user.email = currentUser.getEmail(); user.firstName = "Annie"; user.lastName = "Bennett"; user.acceptsGdpr = false; Ortto.instance().identify(user);If you prefer a fluent interface, use this option:
java
// Fluent UserID user = UserID.make() .setExternalId(currentUser.getUid()) .setEmail(currentUser.getEmail()) .setName(null, null) .setPhone(currentUser.getPhoneNumber()) .setAcceptsGdpr(true); Ortto.instance().identify(user);The
UserIDobject:
android-sdk).NOTE: The contact’s device must be authorized before you can identify them (using
identify()). Otherwise, Ortto’s API will not be able to handle the identify request.The SDK can only identify one contact at a time, and will save the most recently identified contact. For example, if Jane Smith is initially identified, and then the identify function calls John Smith, the SDK will consider John Smith the contact using the app.
Ortto’s SDK caches contact information to be sent in token registrations. If you need to clear this data (such as when a contact logs out of your app), call:
java
Ortto.instance().clearData();Unidentified users
Unidentified users are people who have allowed push notifications but for whom you do not yet have any identifying information.
You have the option to store an unidentified user as a contact immediately when they provide push permission, and be able to send them push notifications, however the contact will have no identifying information.
Or, you can choose to save the contact’s push permission but only record them as a contact once you receive identifying information, and you won’t be able to send messages to them until their identity is confirmed.
Managing unidentified users is performed in the Ortto app, at Settings > Push notifications > Android notifications > Unidentified users.
Permission prompts
Android push notification permissions are obtained via a specific channel in the notification settings of your app (that a contact can access via the app settings on their device).
To obtain a contact’s Android push notification permission, you need to create an Ortto push notification-specific channel in the notification settings (which will be named as appropriate to your organization, e.g. Deals and promotions or Travel ideas).
If the contact has not yet accepted the Ortto-specific notification permission, Android will prompt the user to accept it. To enable this, call:
java
Ortto.instance().requestPermissions();When the method is called it will result in a modal requesting permission to send push notifications. The method can be called at a time that is suitable to your app and user experience. We recommend calling this method when you are confident the user will accept the push notification permission request.
Set push permission
We give you more control over a contact’s push notification permissions with the
setPermission(Permission)method. Use this method if you want further control around how Ortto understands your contacts' messaging preferences.Call
setPermission(Permission)in theApplicationsubclass (described under Install and initialize the SDK).java
// Let the SDK determine if the contact has granted permission (Default) Ortto.instance().setPermission(Permission.Automatic) // The contact has explicitly granted permission Ortto.instance().setPermission(Permission.Accept) // Opt the contact out of push notifications Ortto.instance().setPermission(Permission.Deny)These methods will send a contact’s push permission value to Ortto.
Skip non-existing contacts
The
OrttoConfigclass (described under Install and initialize the SDK) accepts a third parameter namedshouldSkipNonExistingContactswhich controls whether the Ortto API should ignore all permission requests for contacts it cannot identify.This value is optional and defaults to
false.java
// Ignore all requests for contacts that do not exist in your Ortto CDP OrttoConfig config = new OrttoConfig( this.getString(R.string.ortto_datasource_id), this.getString(R.string.ortto_api_endpoint), true );Track actions and events
Delivery events
Push message delivery (receipt) is automatically tracked in the Ortto SDK. Delivery events will be reflected in the Ortto app as a Delivered Push activity associated with a contact.
Click tracking
Within your deep link activity handler, call the Ortto instance
trackLinkClickwith the link that was inserted into the deep link activity.This method will send a message to Ortto’s servers with the tracking information and return a
LinkUtmobject with campaign, medium, source and content attributes you can use for marketing data analysis.The
trackLinkClickaccepts two arguments, one with a deeplink string and anotherOnTrackedListenerasync callback function.java
Ortto.instance().trackLinkClick(bundle.getString("link"), new Ortto.OnTrackedListener() { @Override public void onComplete(LinkUtm utm) { utmValuesTextView.setText(utm.toString()); } });This method will populate the Clicked push activity for a contact, including the deep link URL in the activity attributes.
Ortto setup
If you didn’t already add the
.jsonfile to the Android notifications setup in Ortto after configuring your Firebase project, do so now.To download the required
.jsonfile, follow these steps:
In Settings > Push notifications > Android notifications > Setup, upload the Service account .json file. This file is available from your Firebase project.
Firebase needs this file to get the required contact credentials used to register device authorization tokens with the Firebase Cloud Messaging Service.
Once the SDK installation and configuration is complete, and you have have provided the required credentials in the Ortto setup, Ortto will wait until it detects activity from your app before your Android platform can be switched ON. Ortto needs to receive an initial request from your app to enable push permissions for a contact (via the permission prompt or an explicitly set push permission), which confirms that your app is correctly configured and is ready to deliver notifications to subscribers. Once the activity is successfully detected, Ortto sets your Android notifications to ON, and you can select the platform when creating a push campaign.
Action index
The action index is not a requirement of the SDK but can be helpful for testing or tracking where contacts are clicking links in your app.
Ortto passes along the index of the action the user took when interacting with the push notification. This can be retrieved in the deep link handler intent under the key
action_index. The index value identifies where on a page the contact clicked, where0= left,1= center,2= right.java
protected void onCreate(Bundle savedInstanceState) { Intent intent = getIntent(); Bundle bundle = intent.getExtras(); Uri data = intent.getData(); if (bundle.containsKey("action_index")) { Integer number = bundle.getInt("action_index"); } }