
Firebase Cloud Messaging setup
Ortto’s mobile push notifications are enabled using the Firebase Cloud Messaging (FCM) framework.
Configuring a new (or existing) project in Firebase is a prerequisite to installing the Android or iOS SDK to get your app ready to deliver push notifications.
Once the Firebase project is configured it needs to be added to your app then set up in Ortto by adding the Firebase details to your account. Following this, you’ll install Ortto’s Android or iOS SDKs.
NOTE: Instructions on this page are primarily written for apps built using Gradle (Android) or Xcode (iOS). Where possible, links and notes are provided for other app build options, such as Flutter and React Native.
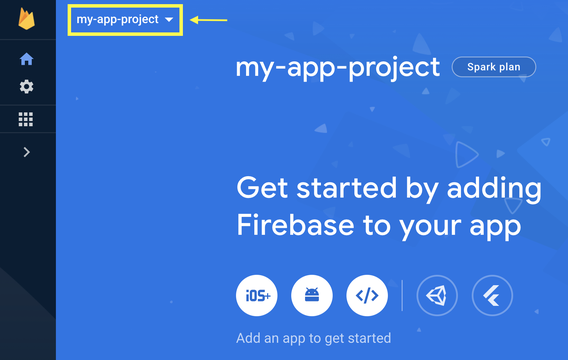
Create a Firebase project
To create a new Firebase project:
- Visit the Firebase console: https://console.firebase.google.com/.
- Depending on whether you have existing projects, you may see different project creation options in Firebase. Click Create a project or Add project to start a new project.
- Enable and configure Google Analytics if required.
- Google will confirm your new project is ready to be used.
NOTE: If you wish to use an existing project, there is no configuration required at this stage.
Set up Firebase for iOS
In your Firebase dashboard, ensure you are viewing the dashboard for the project you wish to use.
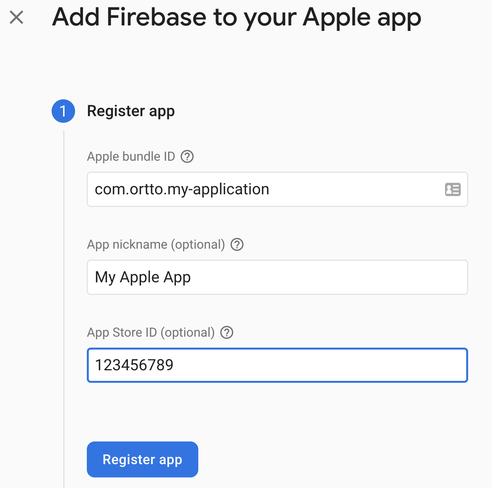
Click iOS to add Firebase to your iOS app.
Populate the app registration fields. Ensure these details exactly match your app settings in Xcode and the Apple Developer Portal. Click Register app.
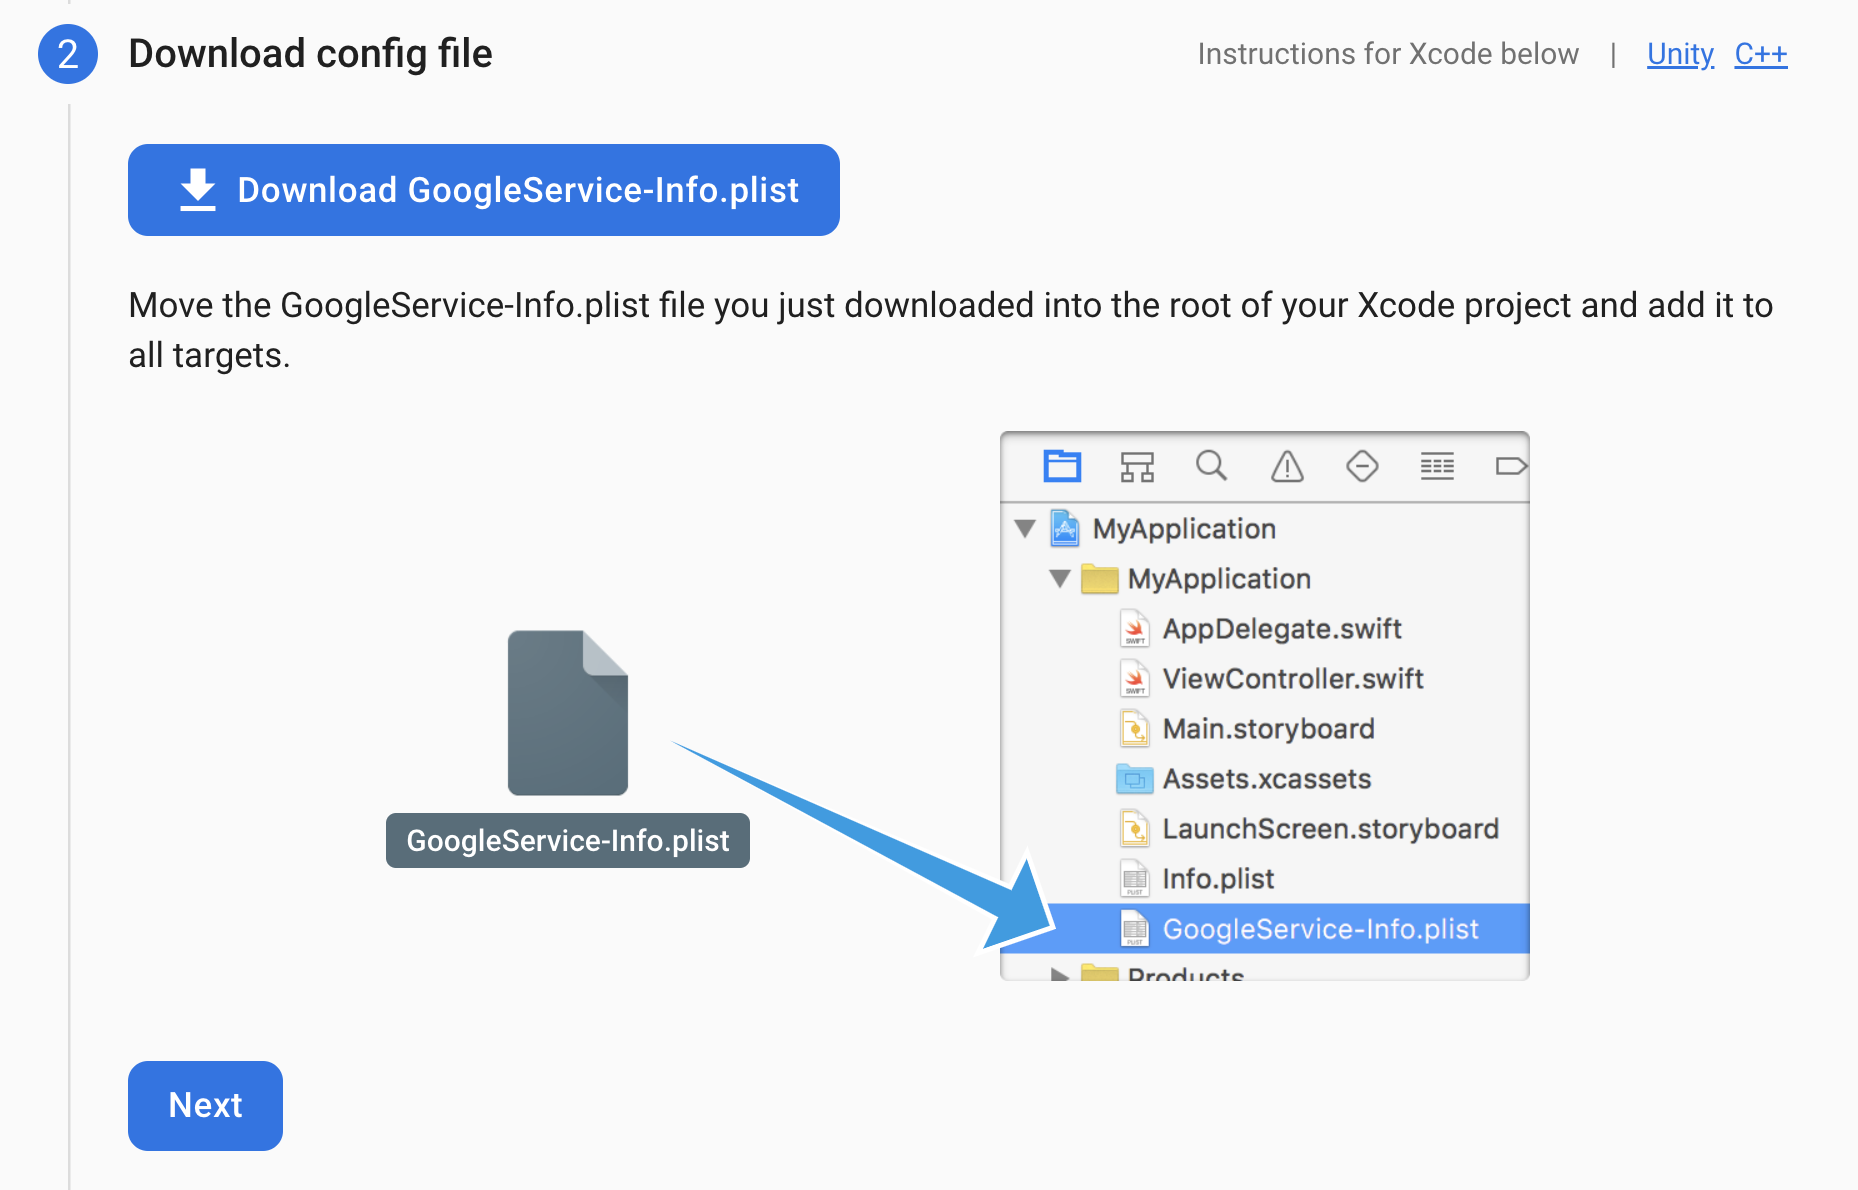
Download the GoogleService-Info.plist file and save it to the Xcode project directory as instructed by Firebase.
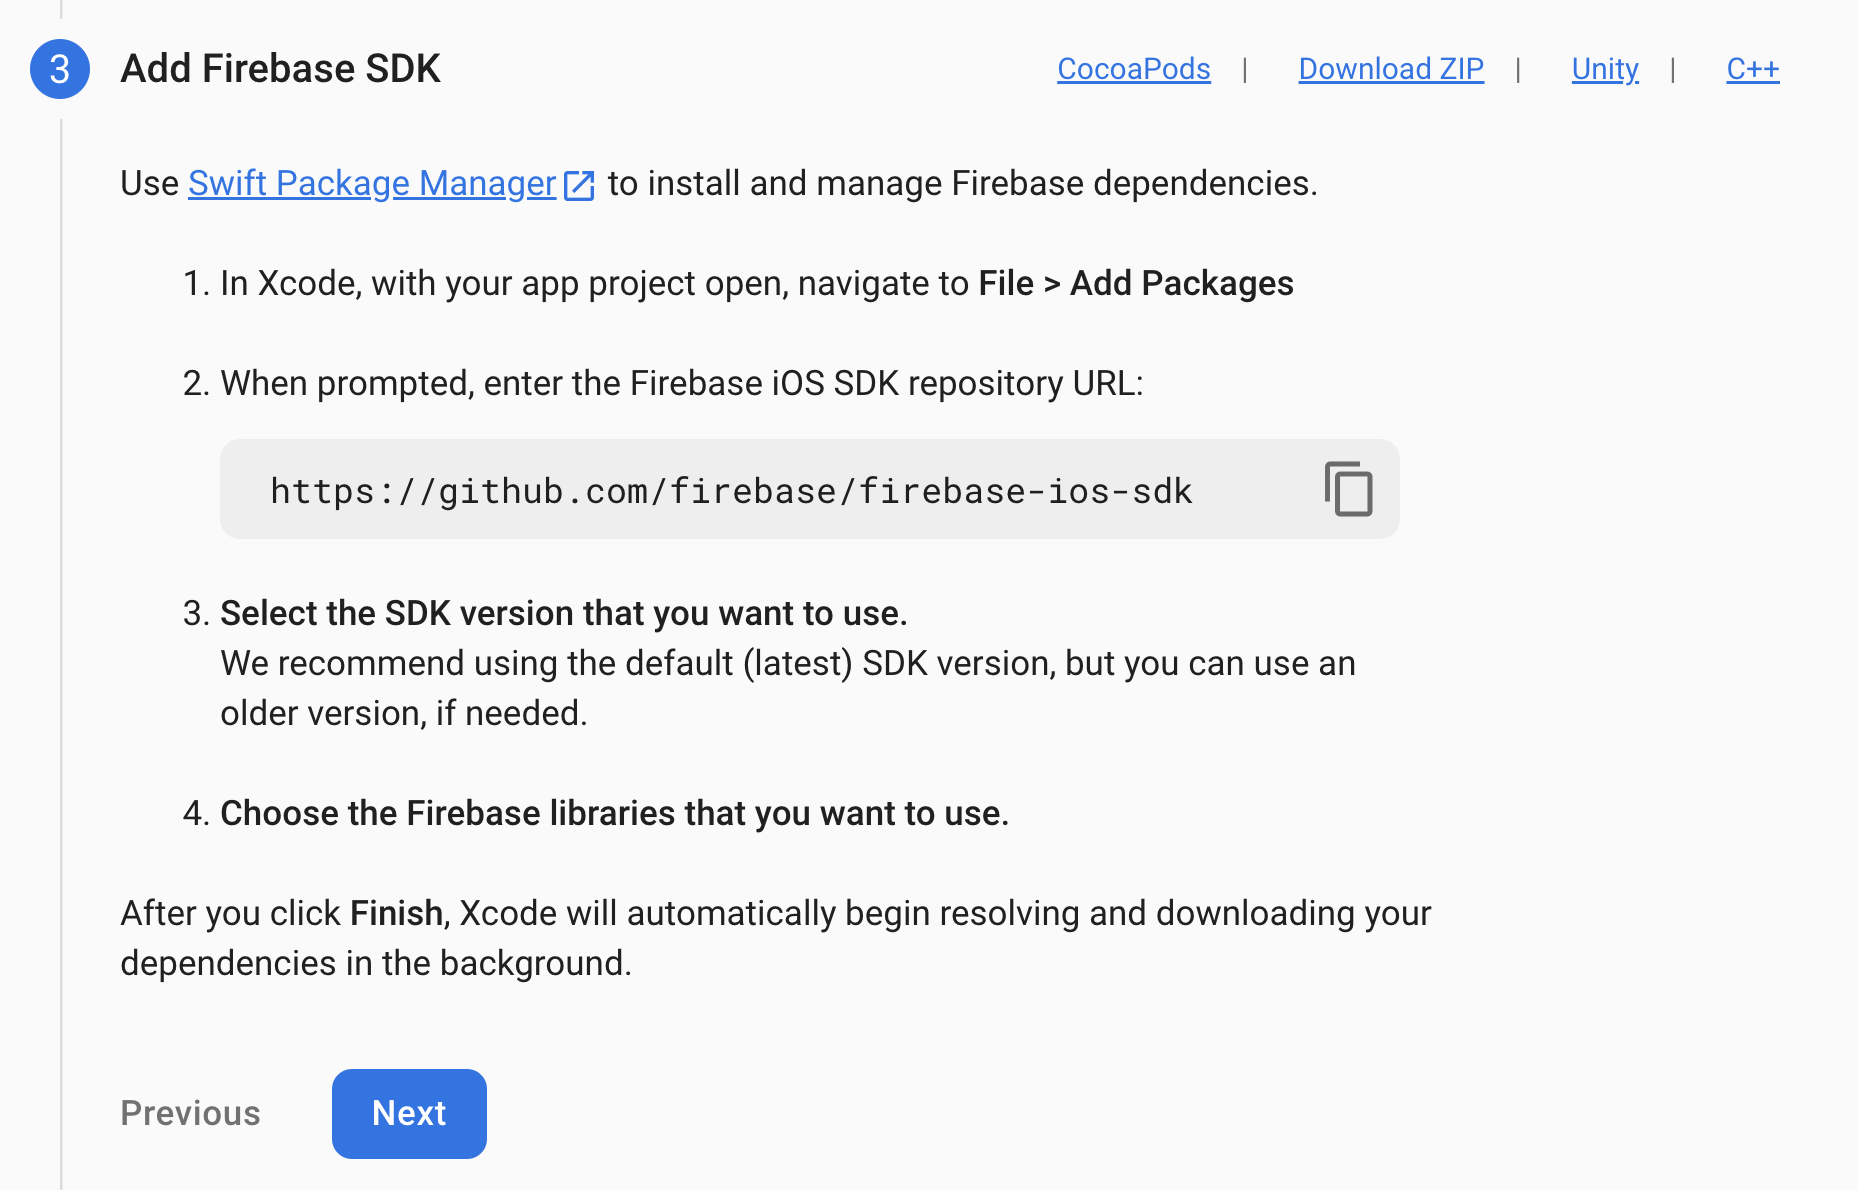
Follow the Firebase instructions to install the Firebase SDK.
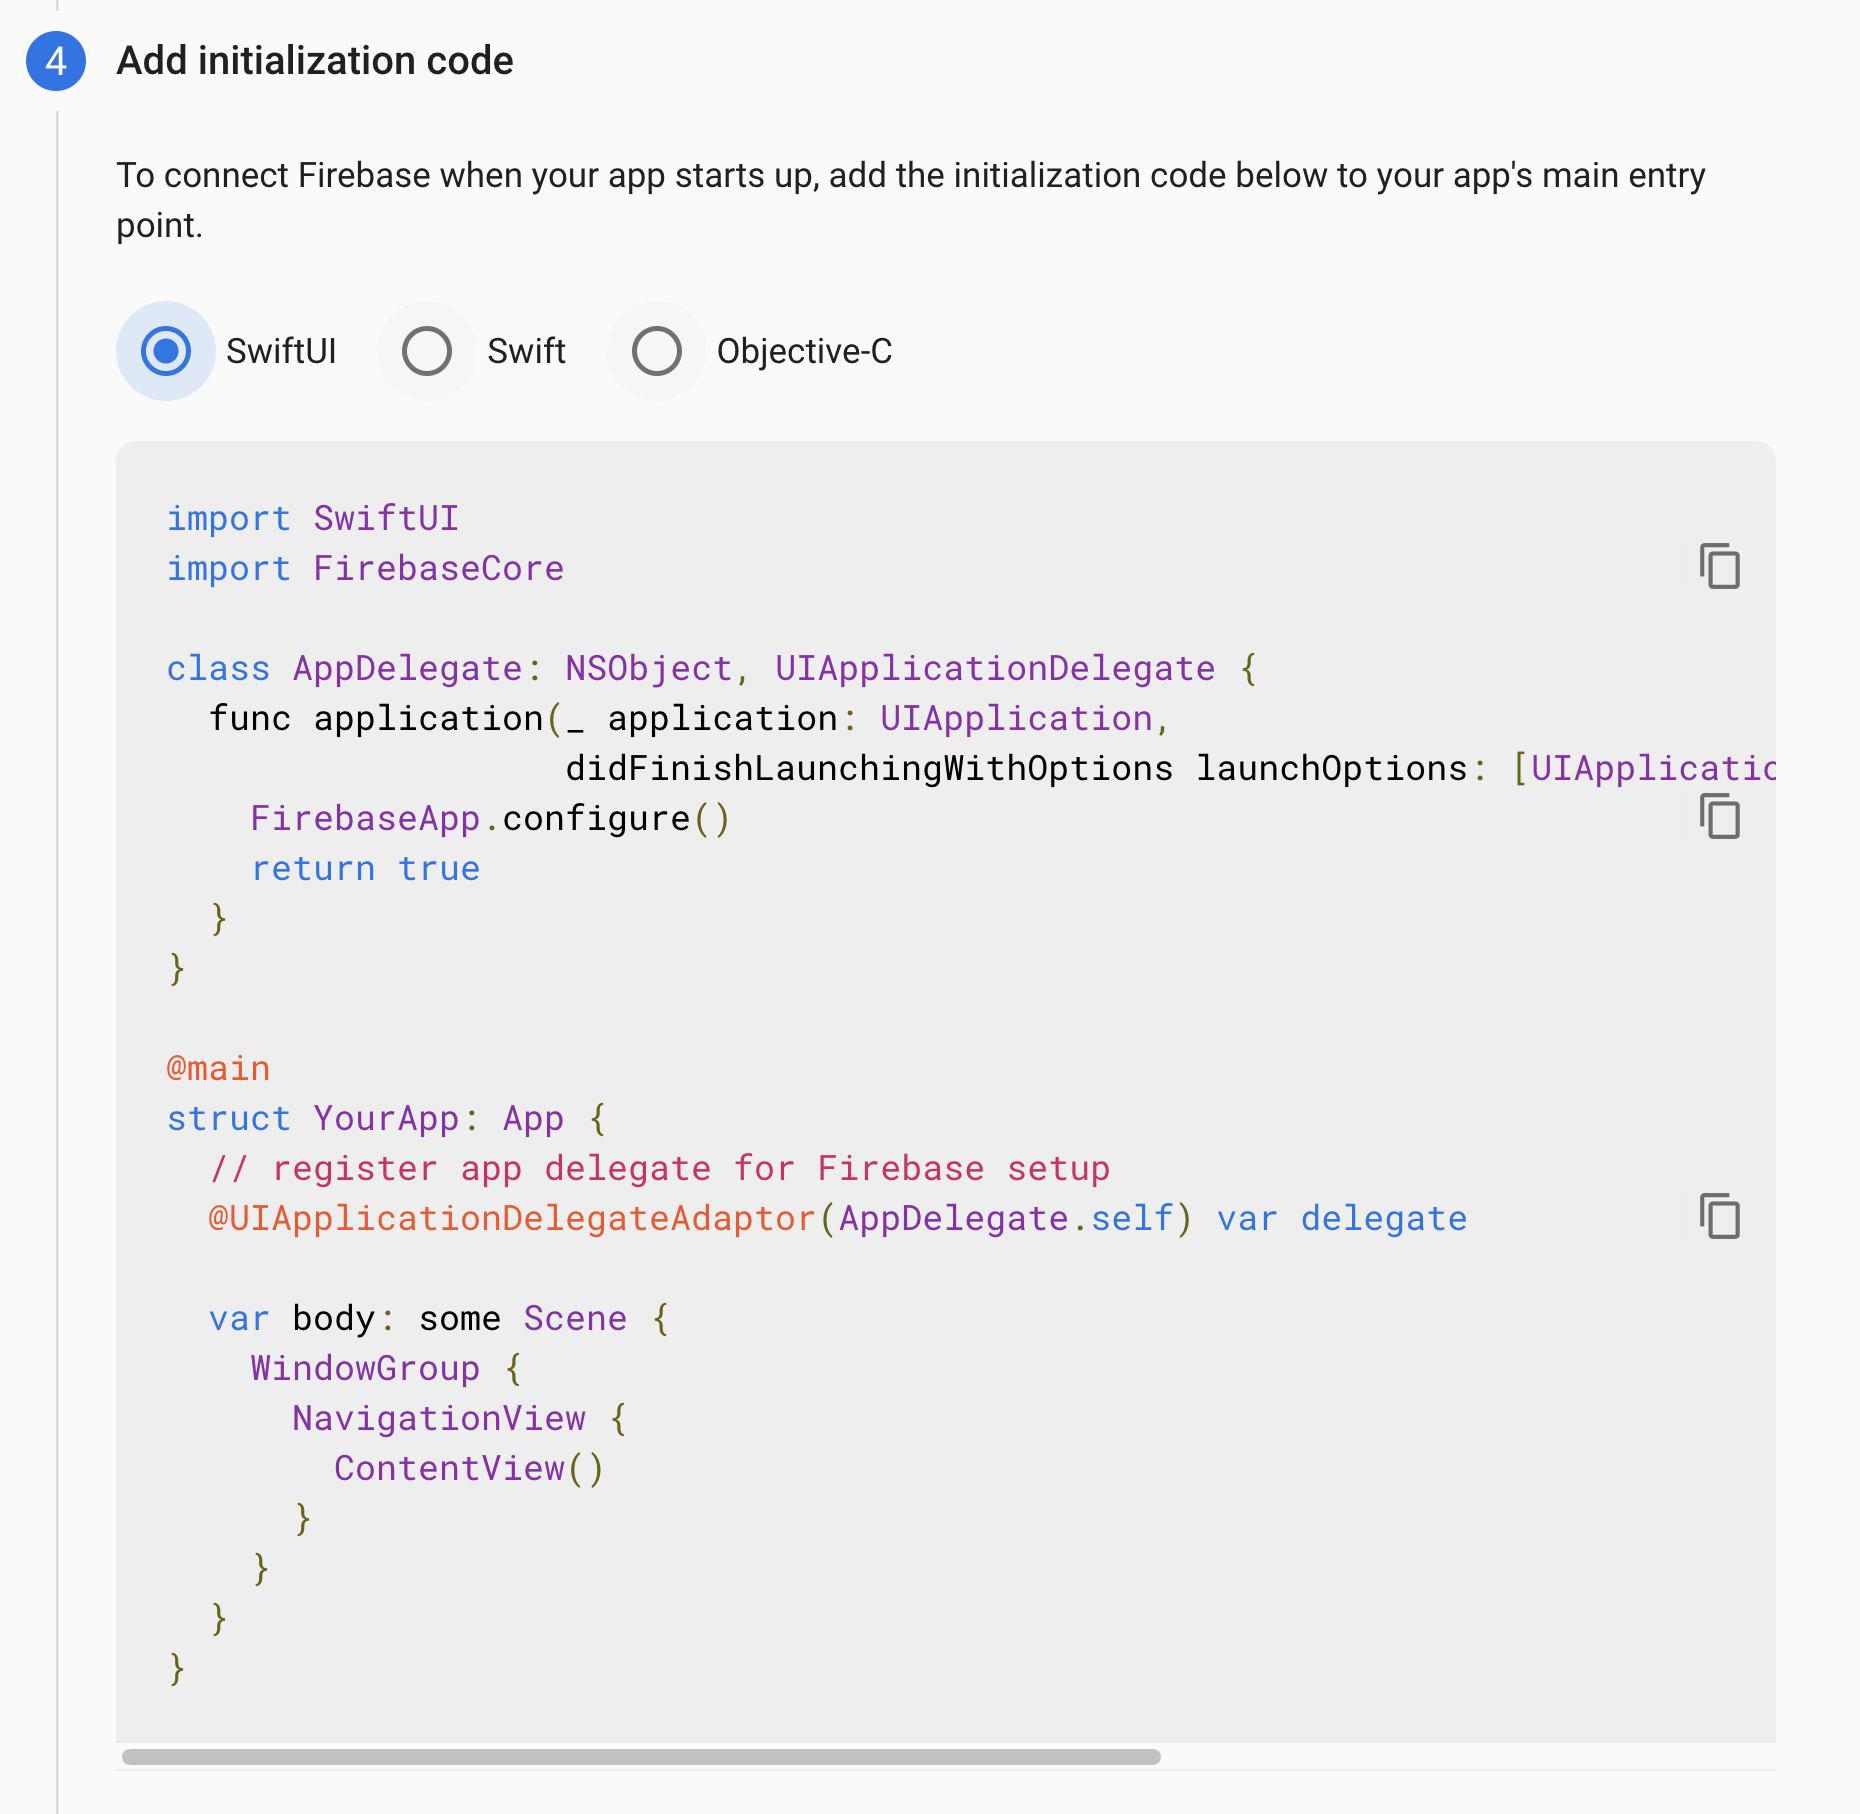
Add the initialization code as instructed by Firebase.
Firebase has now been added to your app. Return to the project console to continue the rest of the setup.
Navigate to your Firebase project’s Project settings (if you weren’t already directed there after adding Firebase to your app).
Click the Cloud Messaging tab.
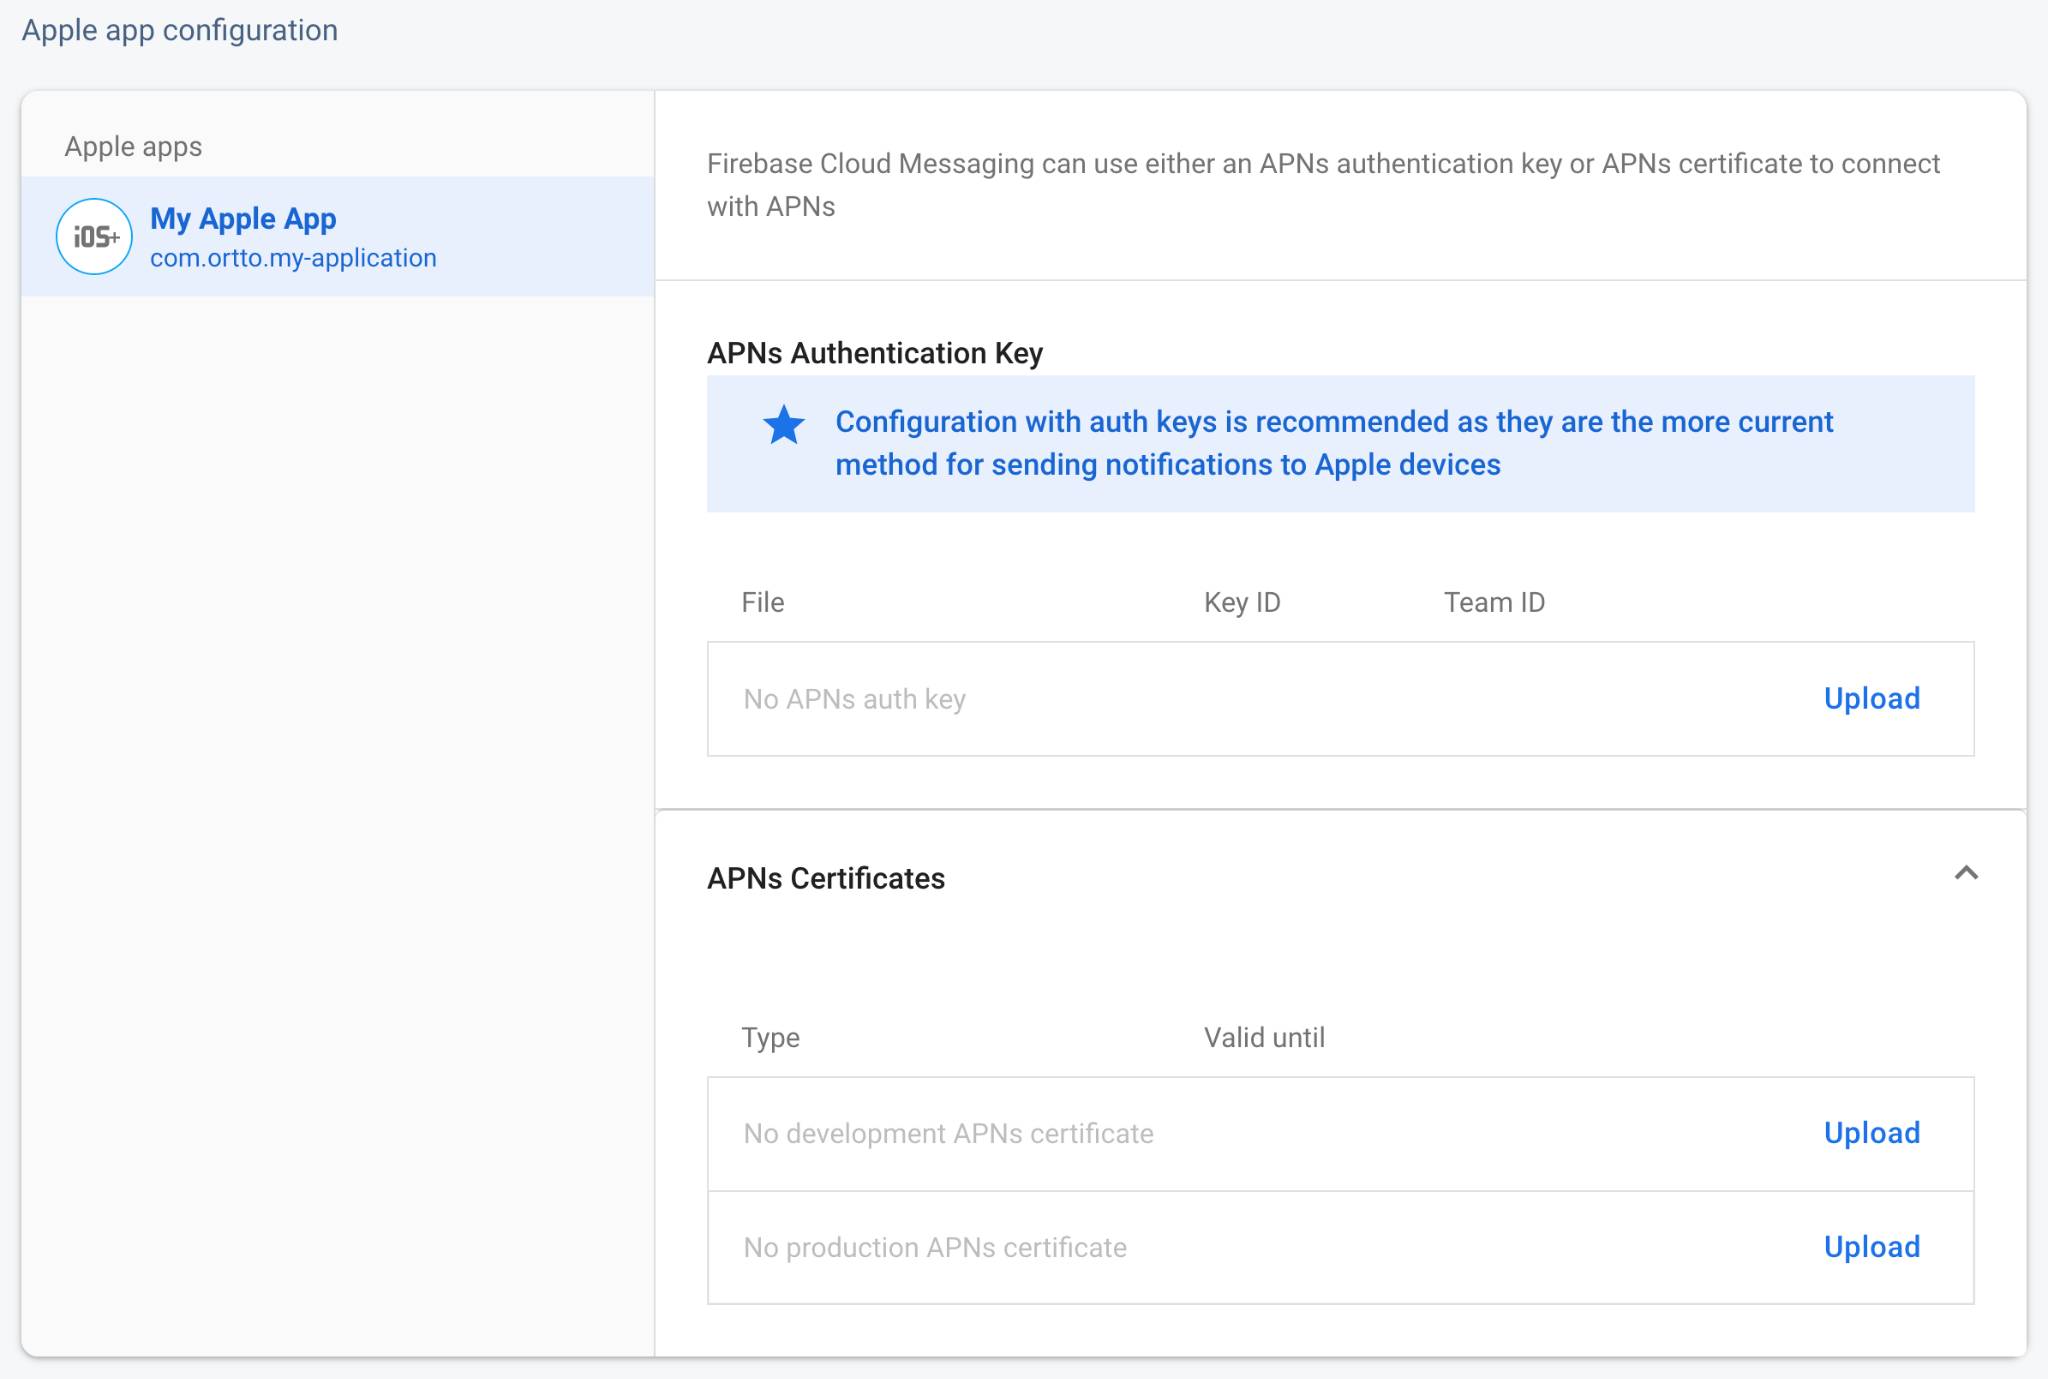
At Apple app configuration, upload the relevant APNs Authentication Key (recommended) or APNs Certificates to the console.
Your project configuration is now complete. The next step is to Enable Ortto access to Firebase.
Set up Firebase for Android
In your Firebase dashboard, ensure you are viewing the dashboard for the project you wish to use.

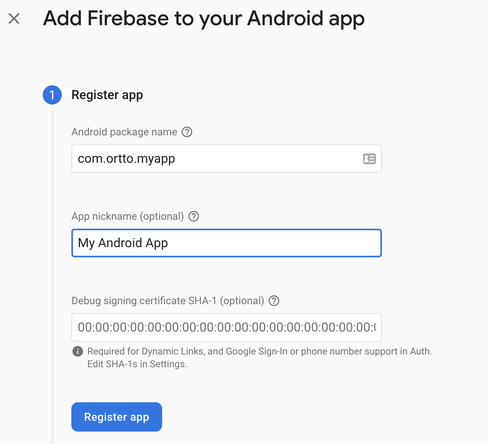
Click the Android icon to add Firebase to your Android app.
Populate the app registration fields.
Add the package name that corresponds to your Android app in Android Studio.
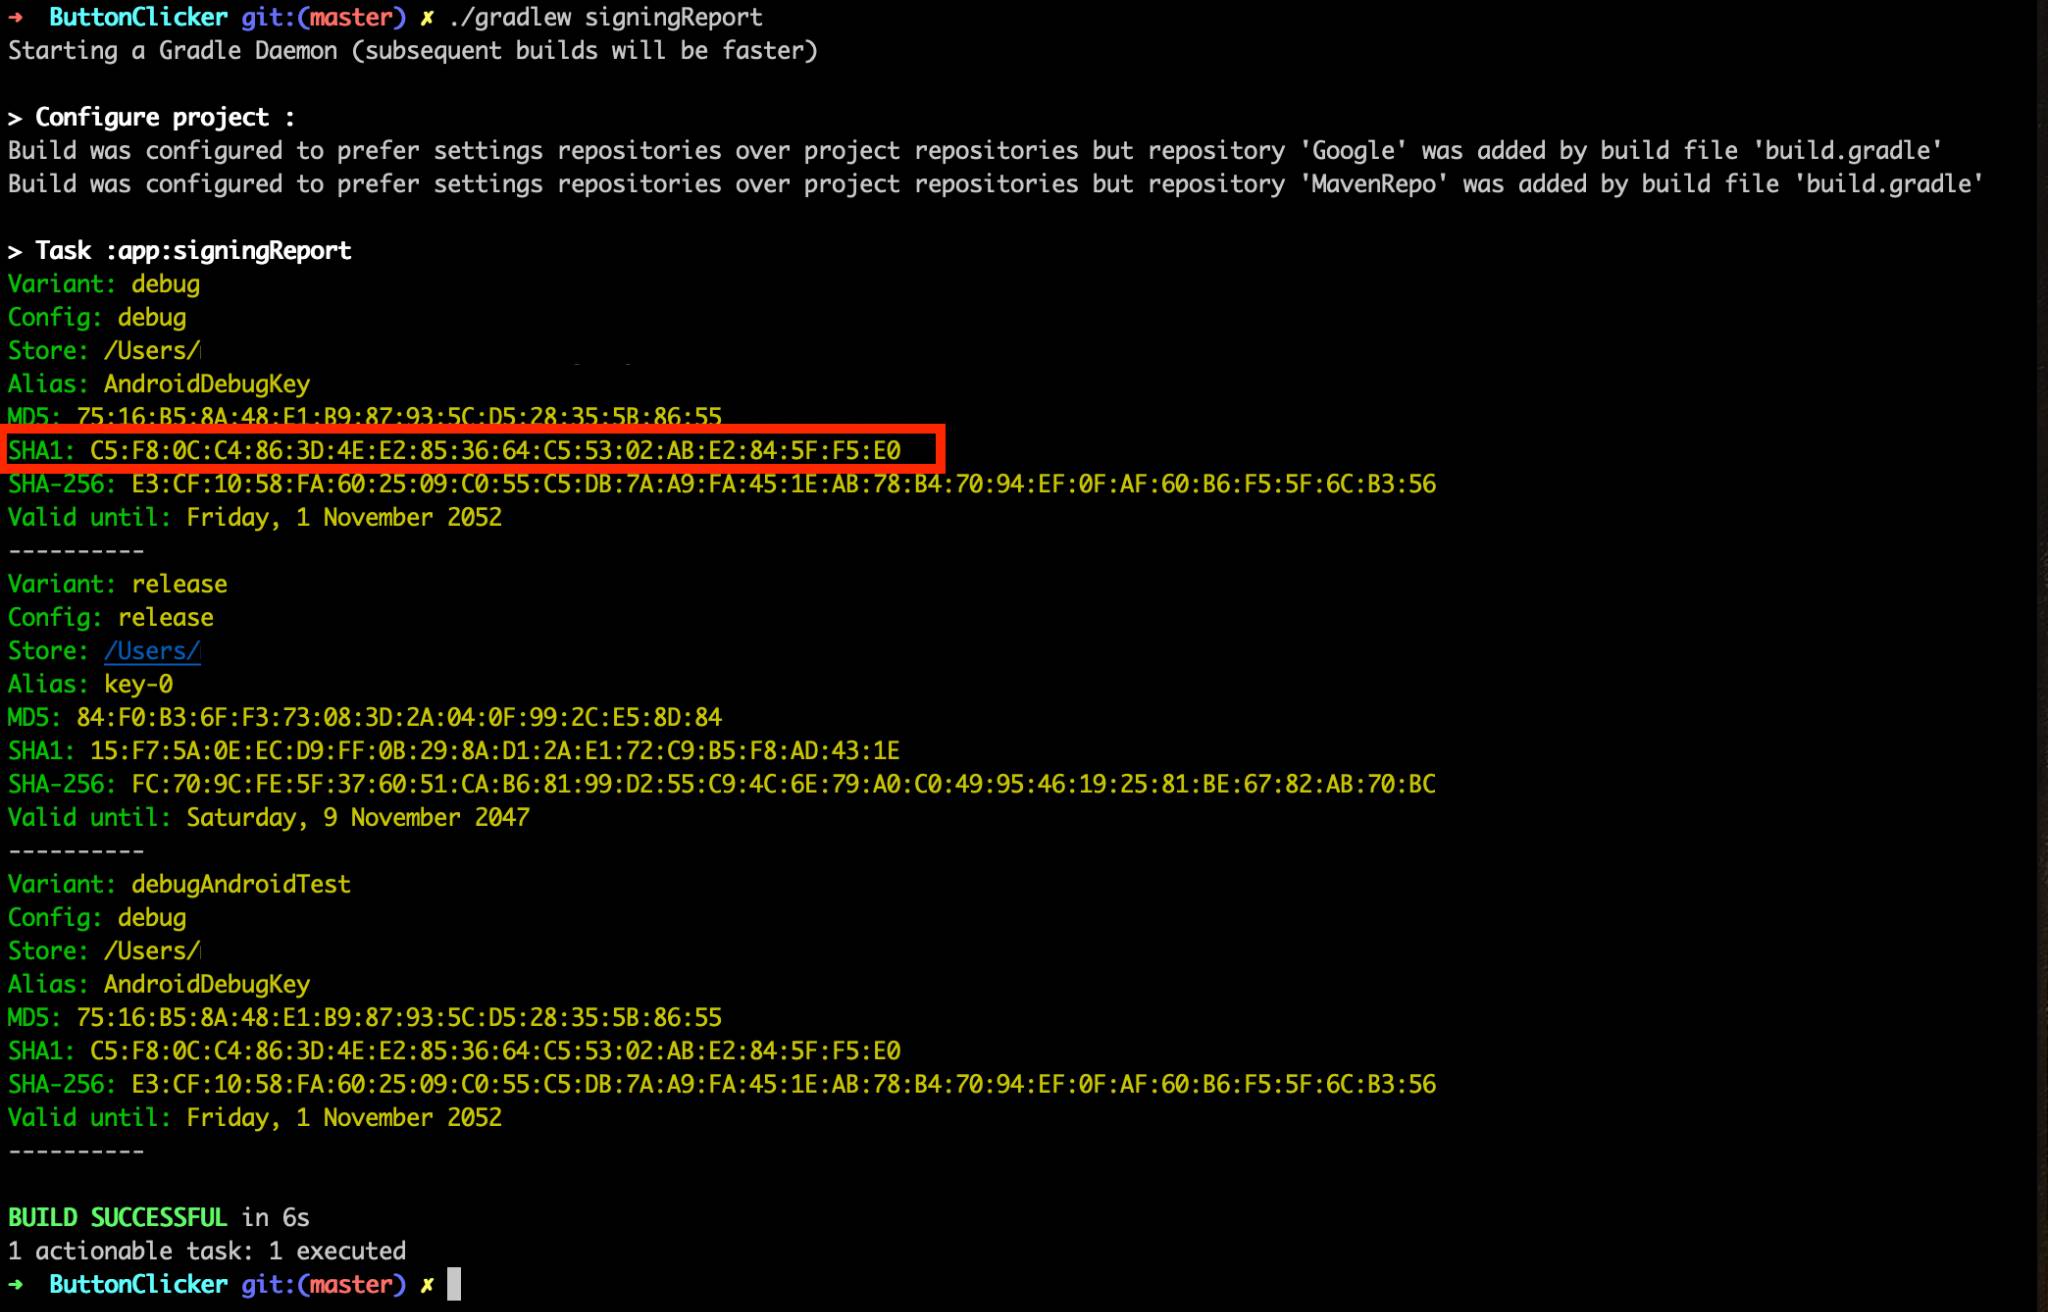
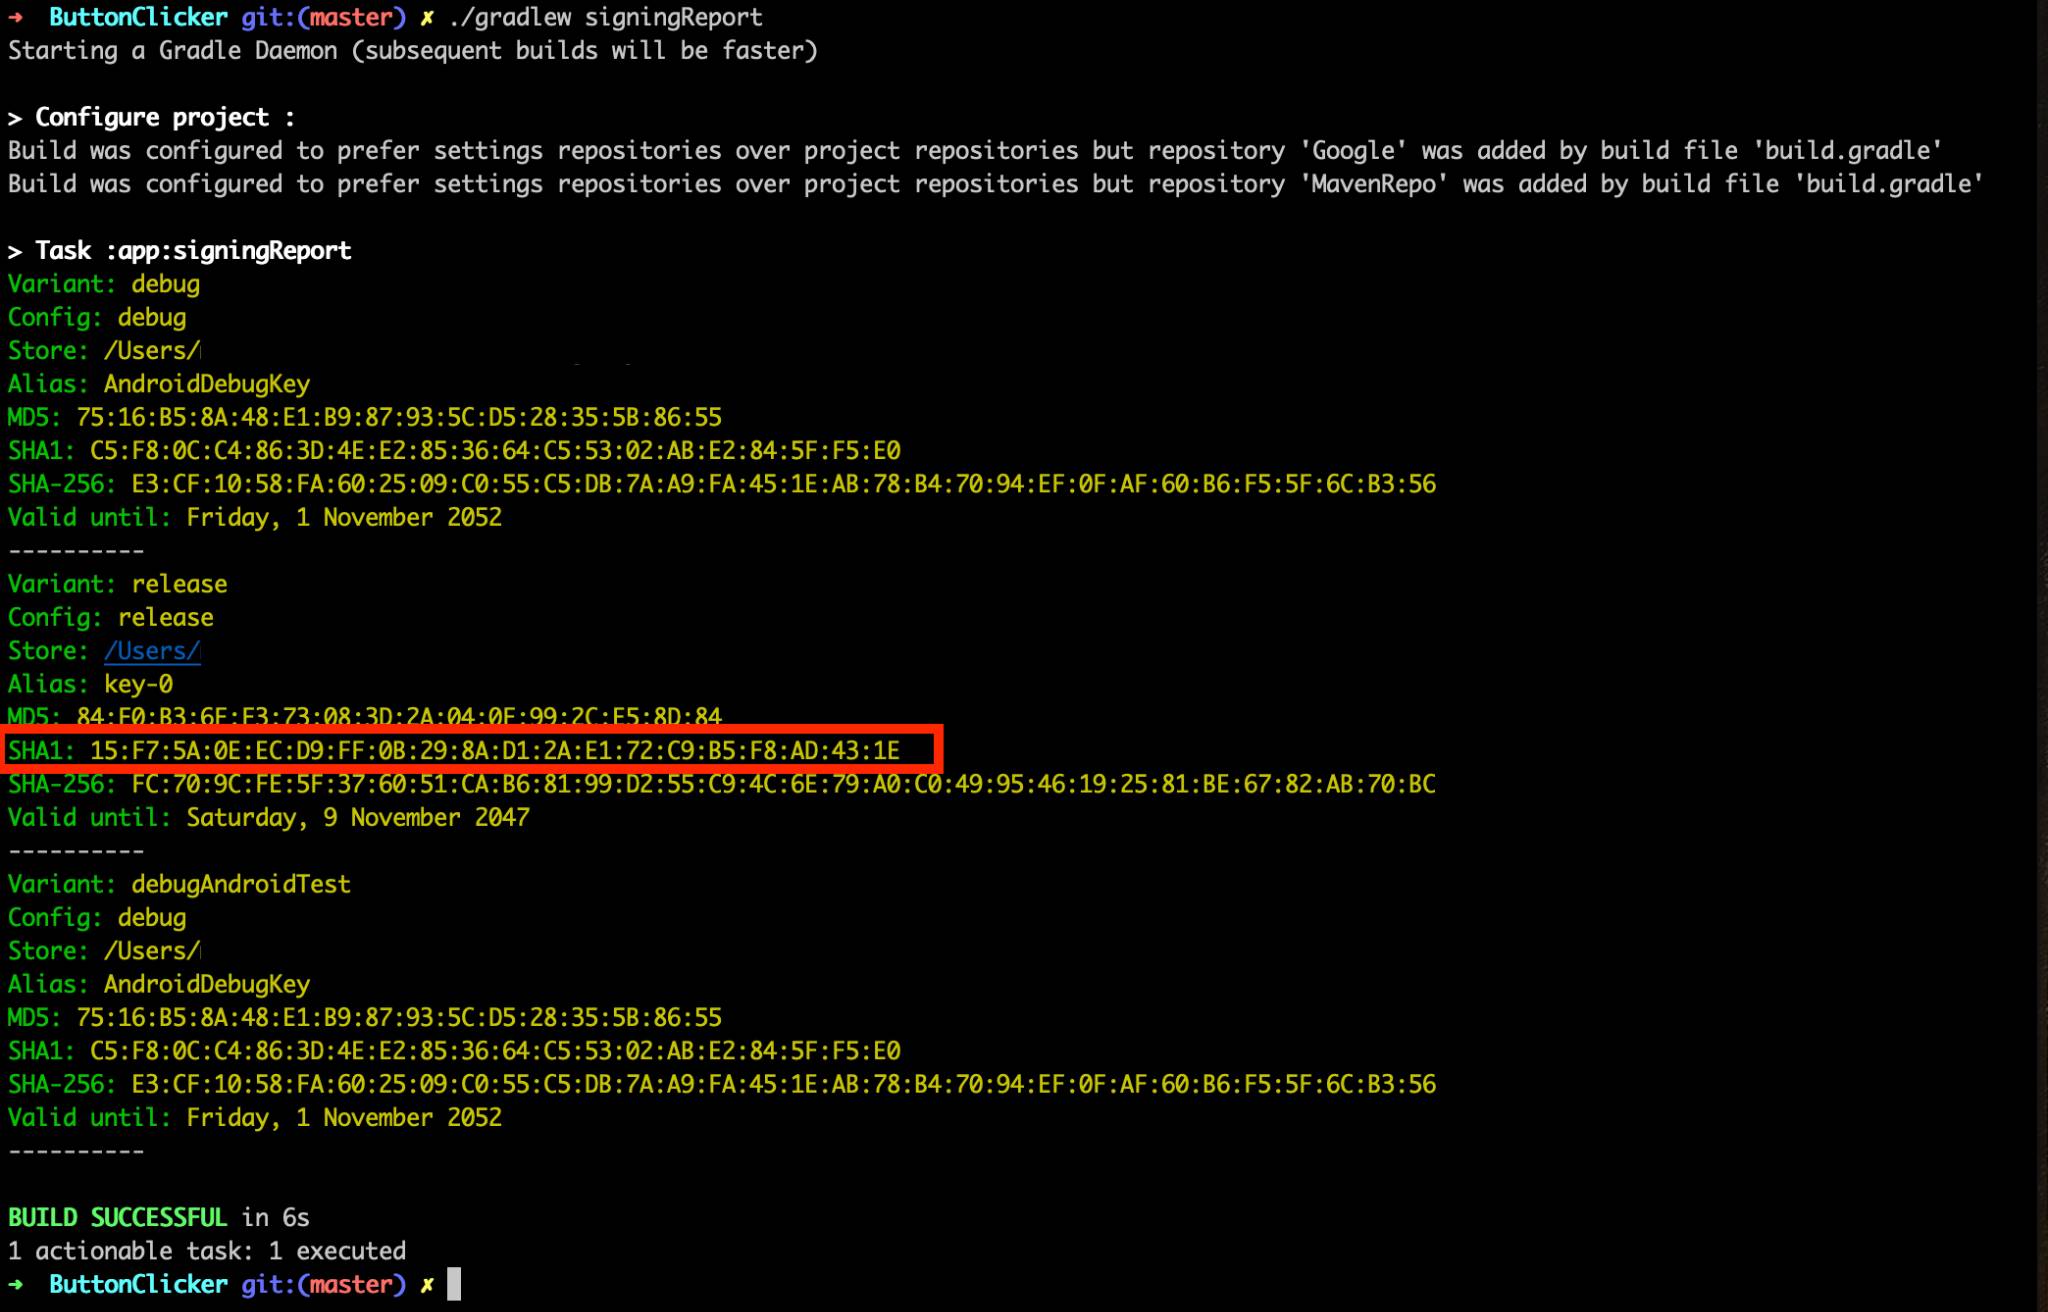
To fetch the Debug signing certificate SHA-1 hash, in your app’s root (project-level) directory, run ./gradlew signingReport then paste the SHA-1 hash into the form.
NOTE: If you are using Flutter, you may need to Configure signing in Gradle prior to this step.
Click Register app.
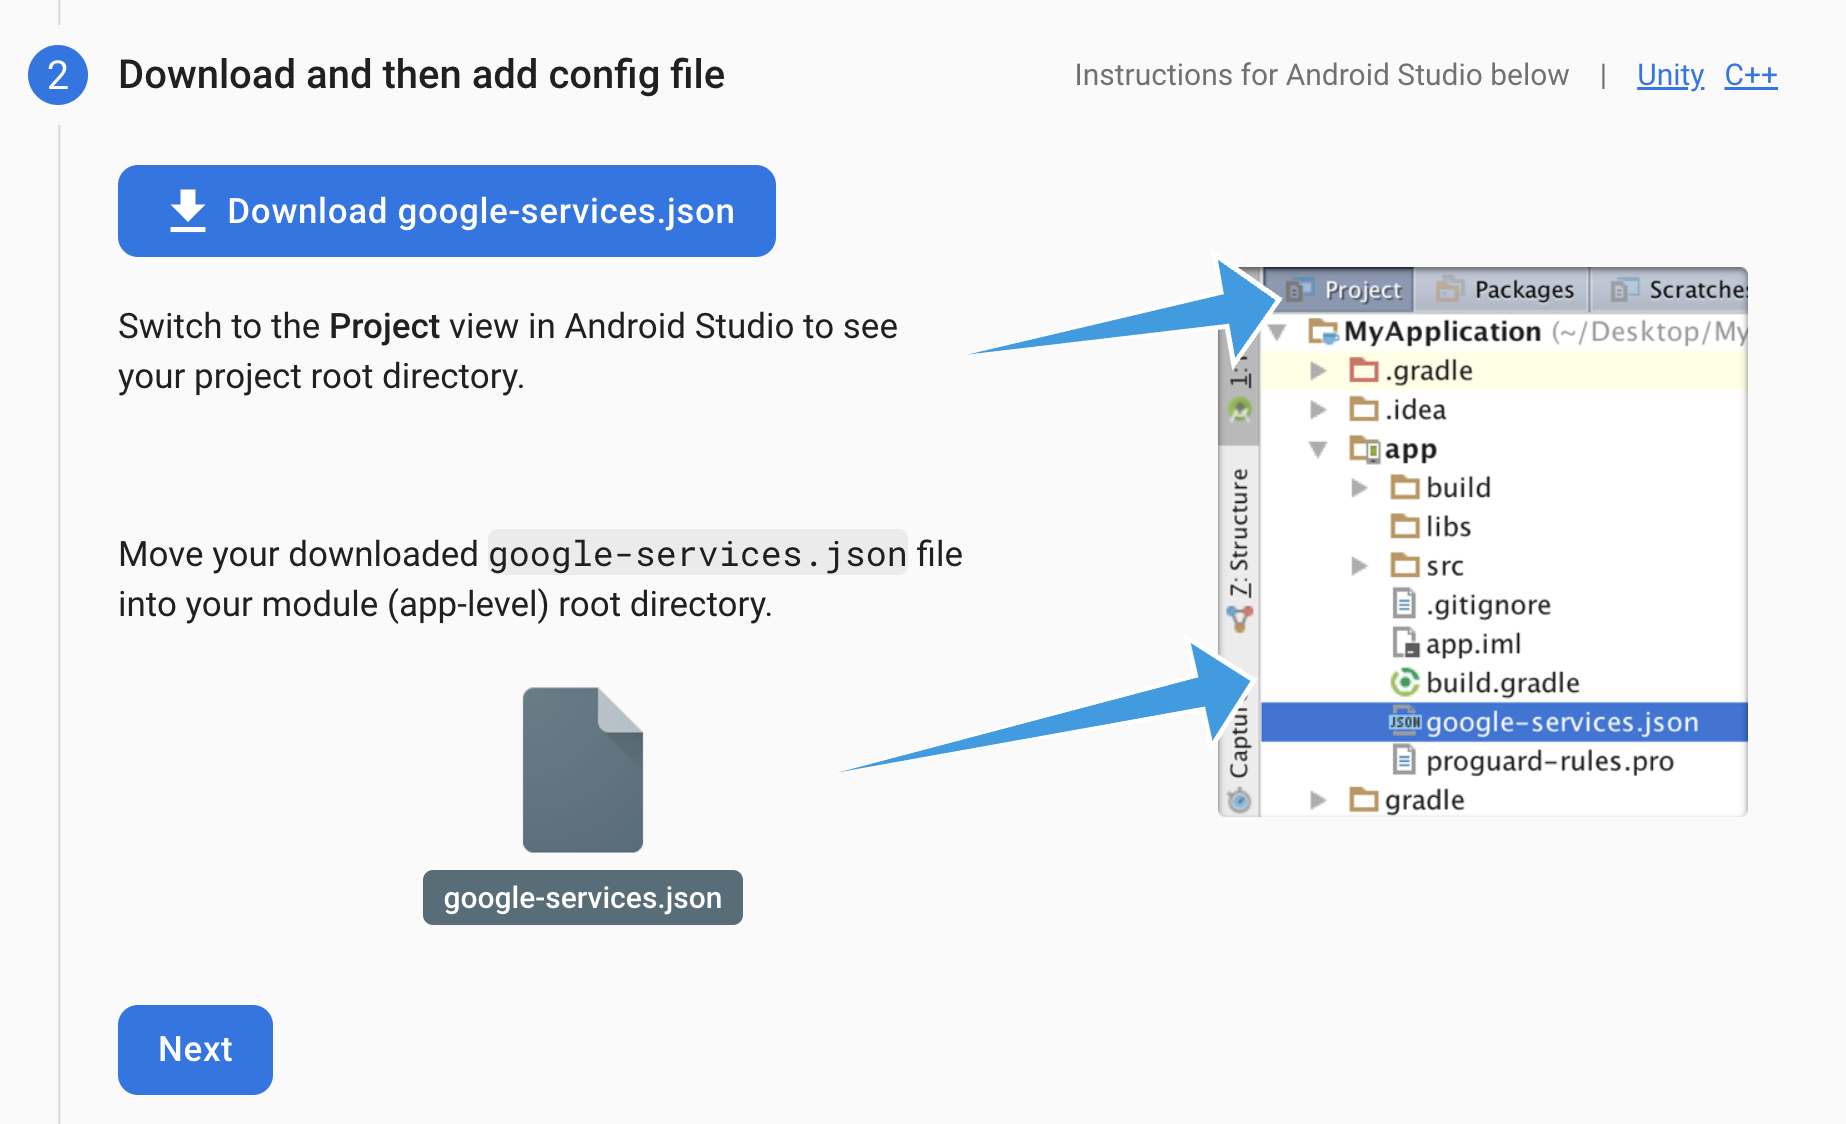
Download the google-services.json file and save it to the Android Studio app project root directory as instructed by Firebase.
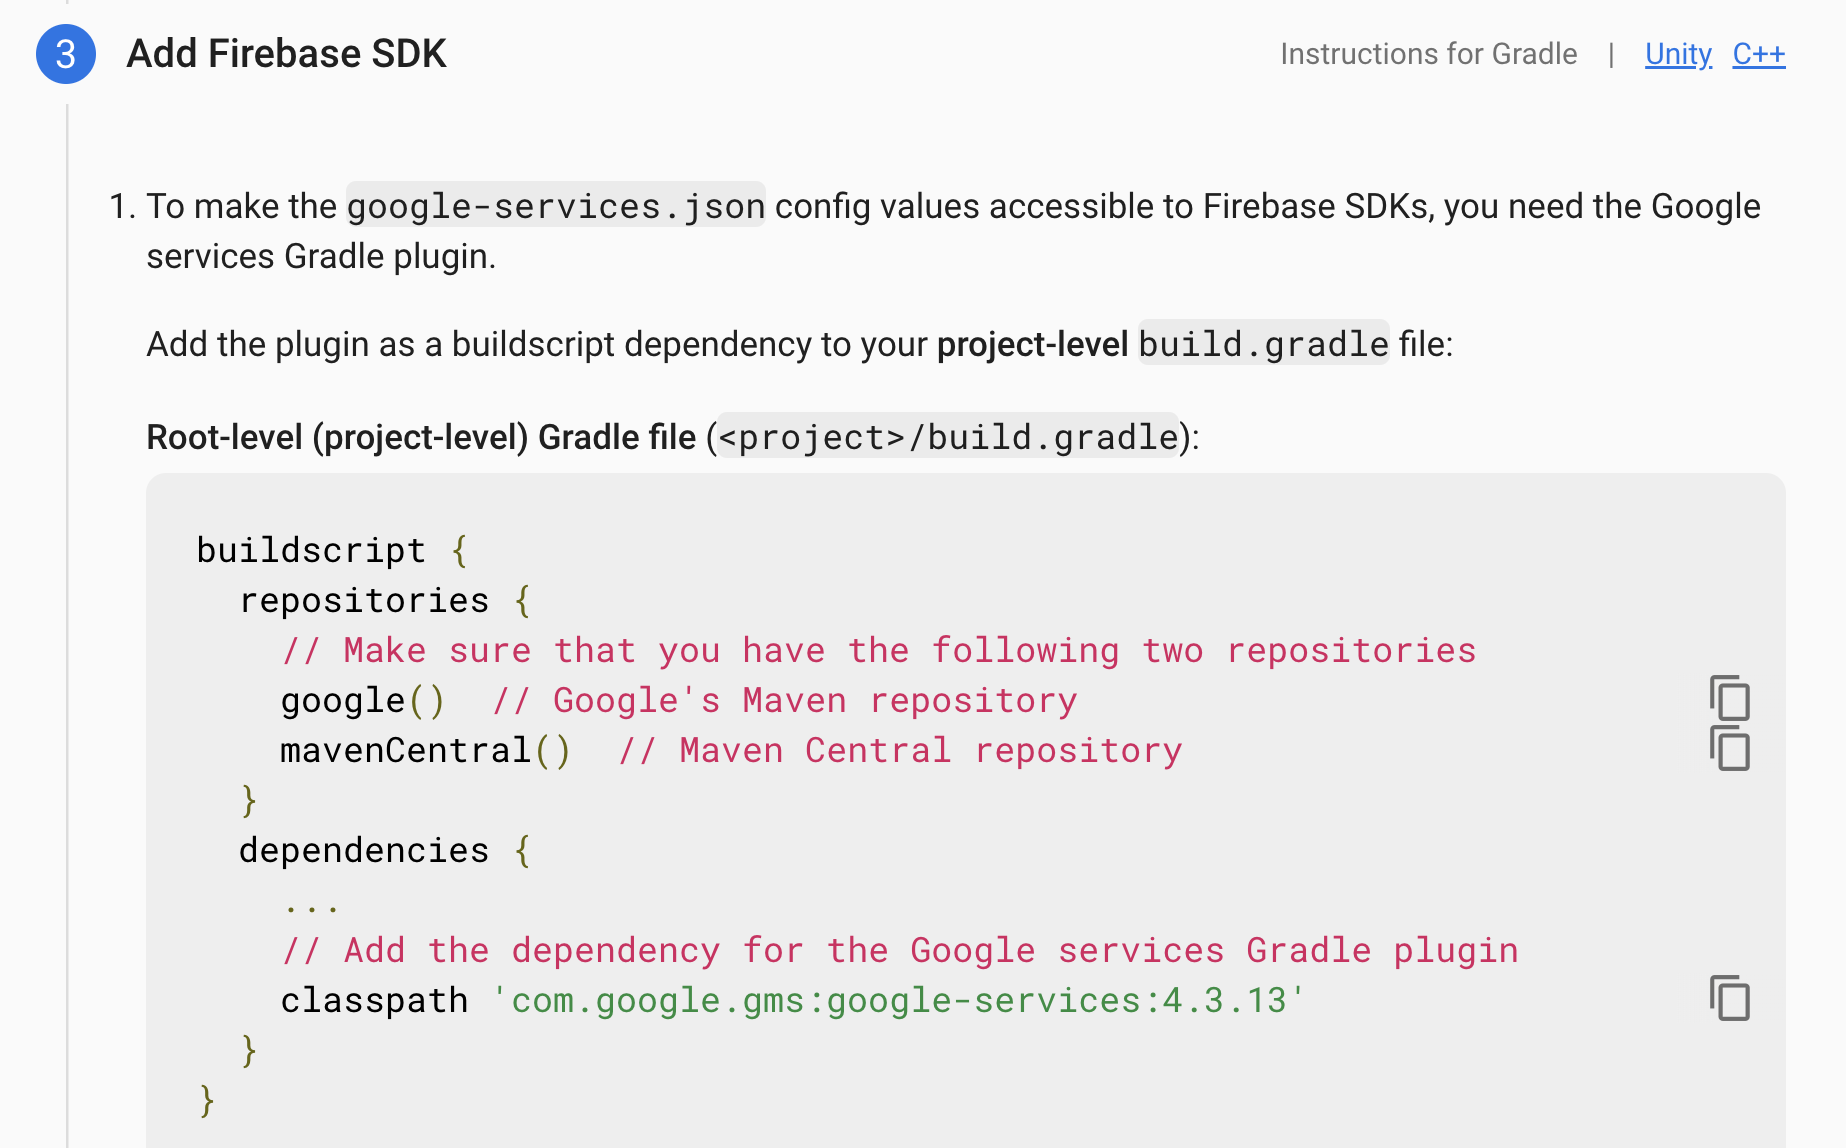
Follow the Firebase instructions to install the Firebase SDK.
Firebase has now been added to your app. Return to the project console to continue the rest of the setup.
Navigate to your Firebase project’s Project settings (if you weren’t already directed there after adding Firebase to your app).
Click the General tab (if not already on it).
At Your apps, click Add fingerprint.
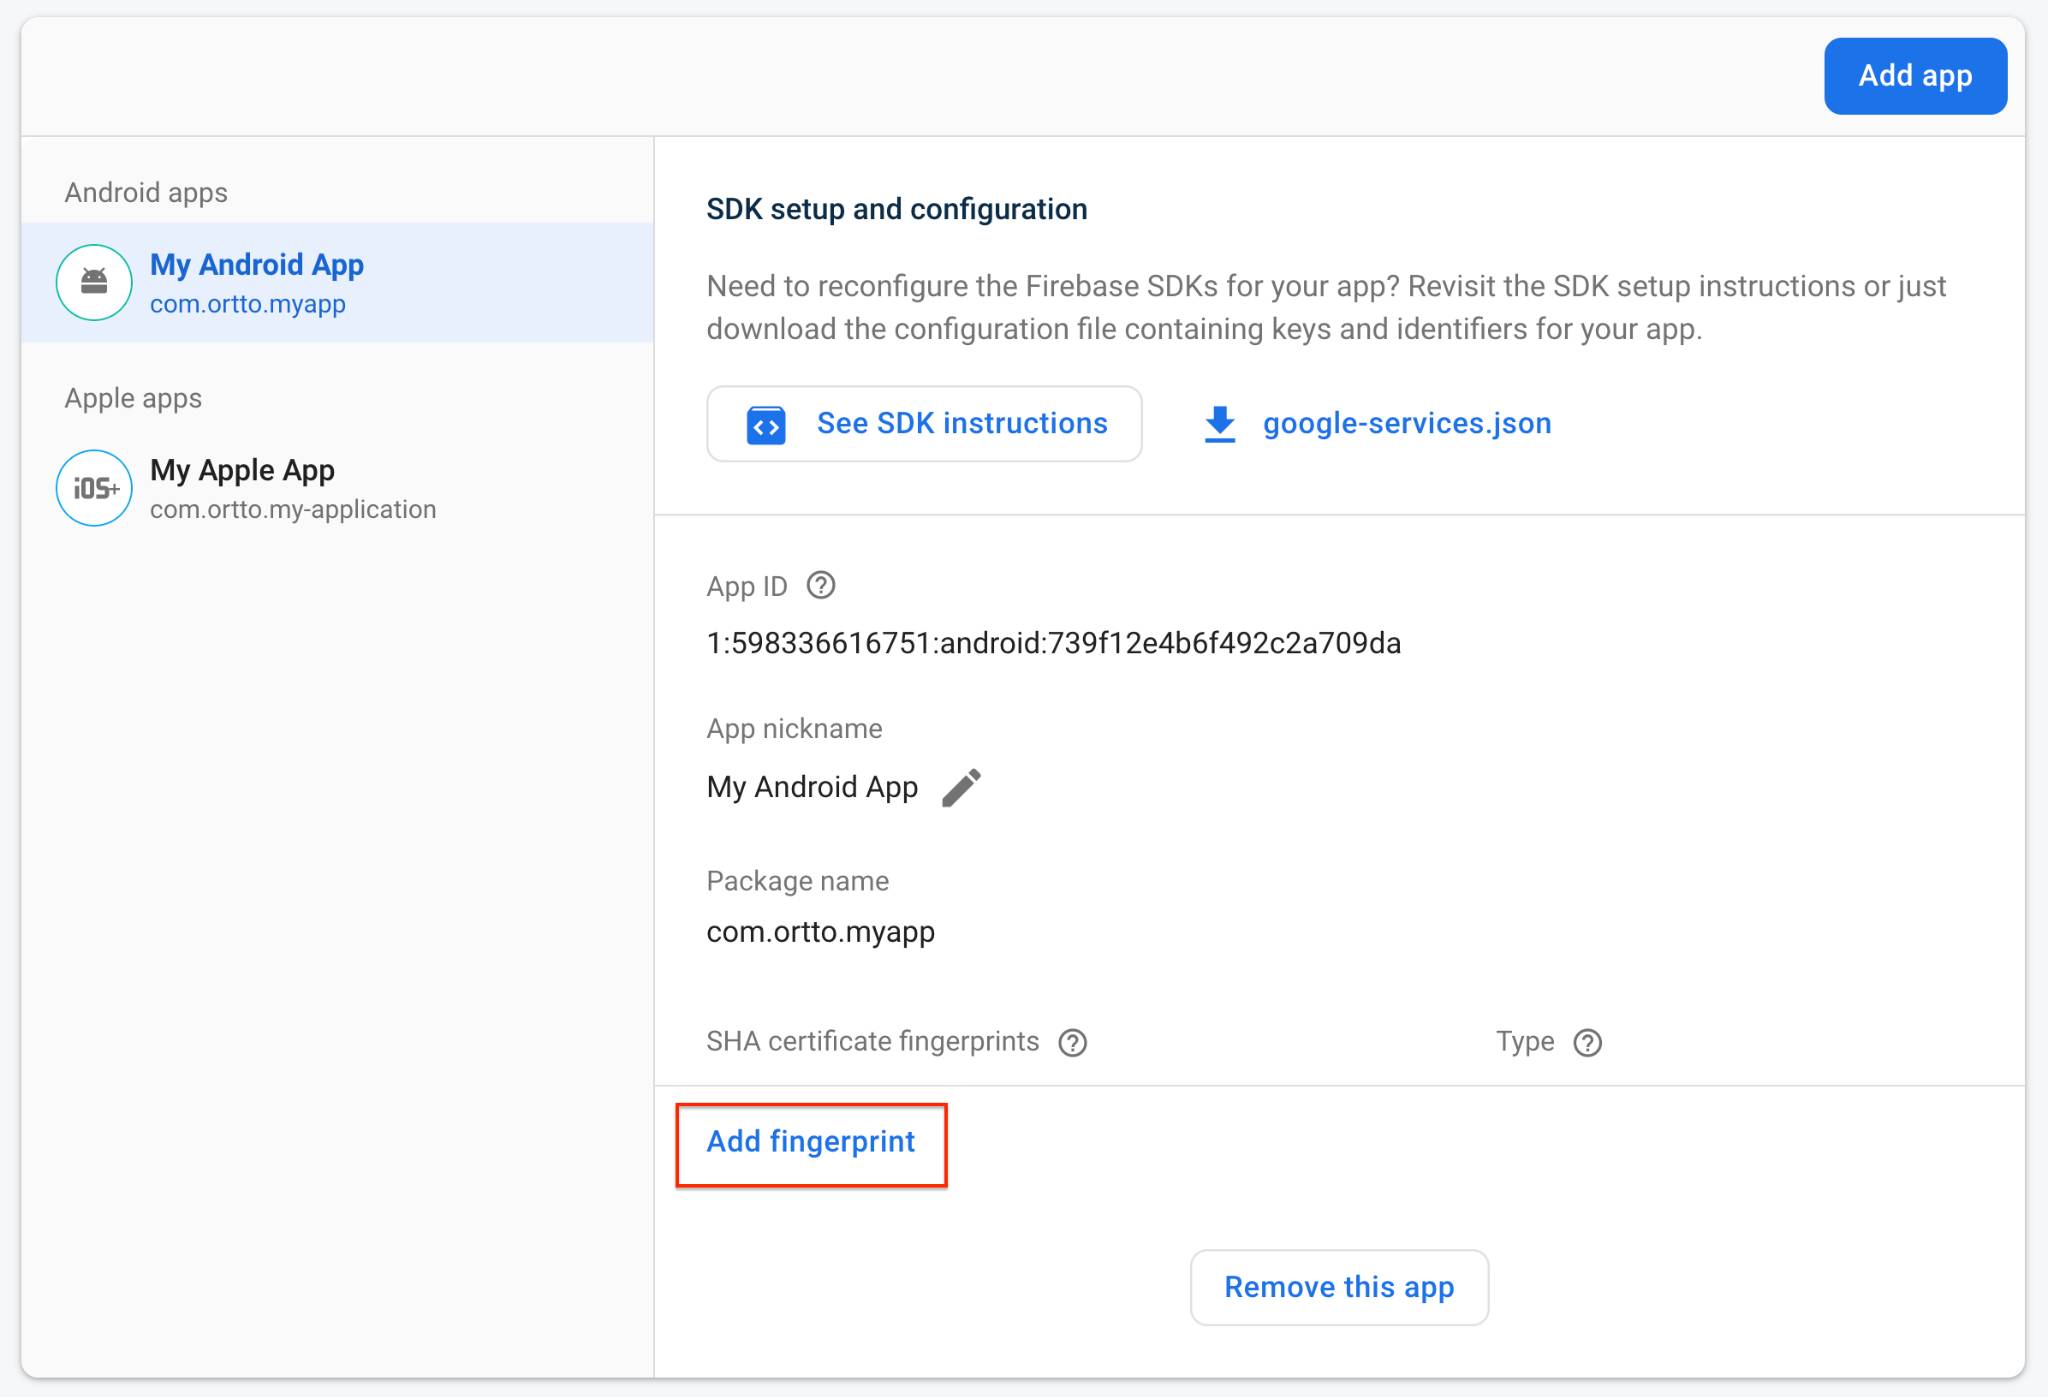
You’ll see 1 SHA-1 fingerprint already present, which is the hash you added during the app registration (at step 3). You need to add 2 more SHA-1 fingerprints (3 in total) so that Firebase can trust that it can send notifications to all versioned builds of your app.
To add fingerprint number 2, in your app’s root (project-level) directory run ./gradlew signingReport (or access the initial output from when you fetched the debug signing certificate) to fetch the release build SHA-1 hash.
Paste it into the Certificate fingerprint field then click Save.
To add fingerprint number 3, click Add fingerprint again. This fingerprint needs to come from the Google Play store console.
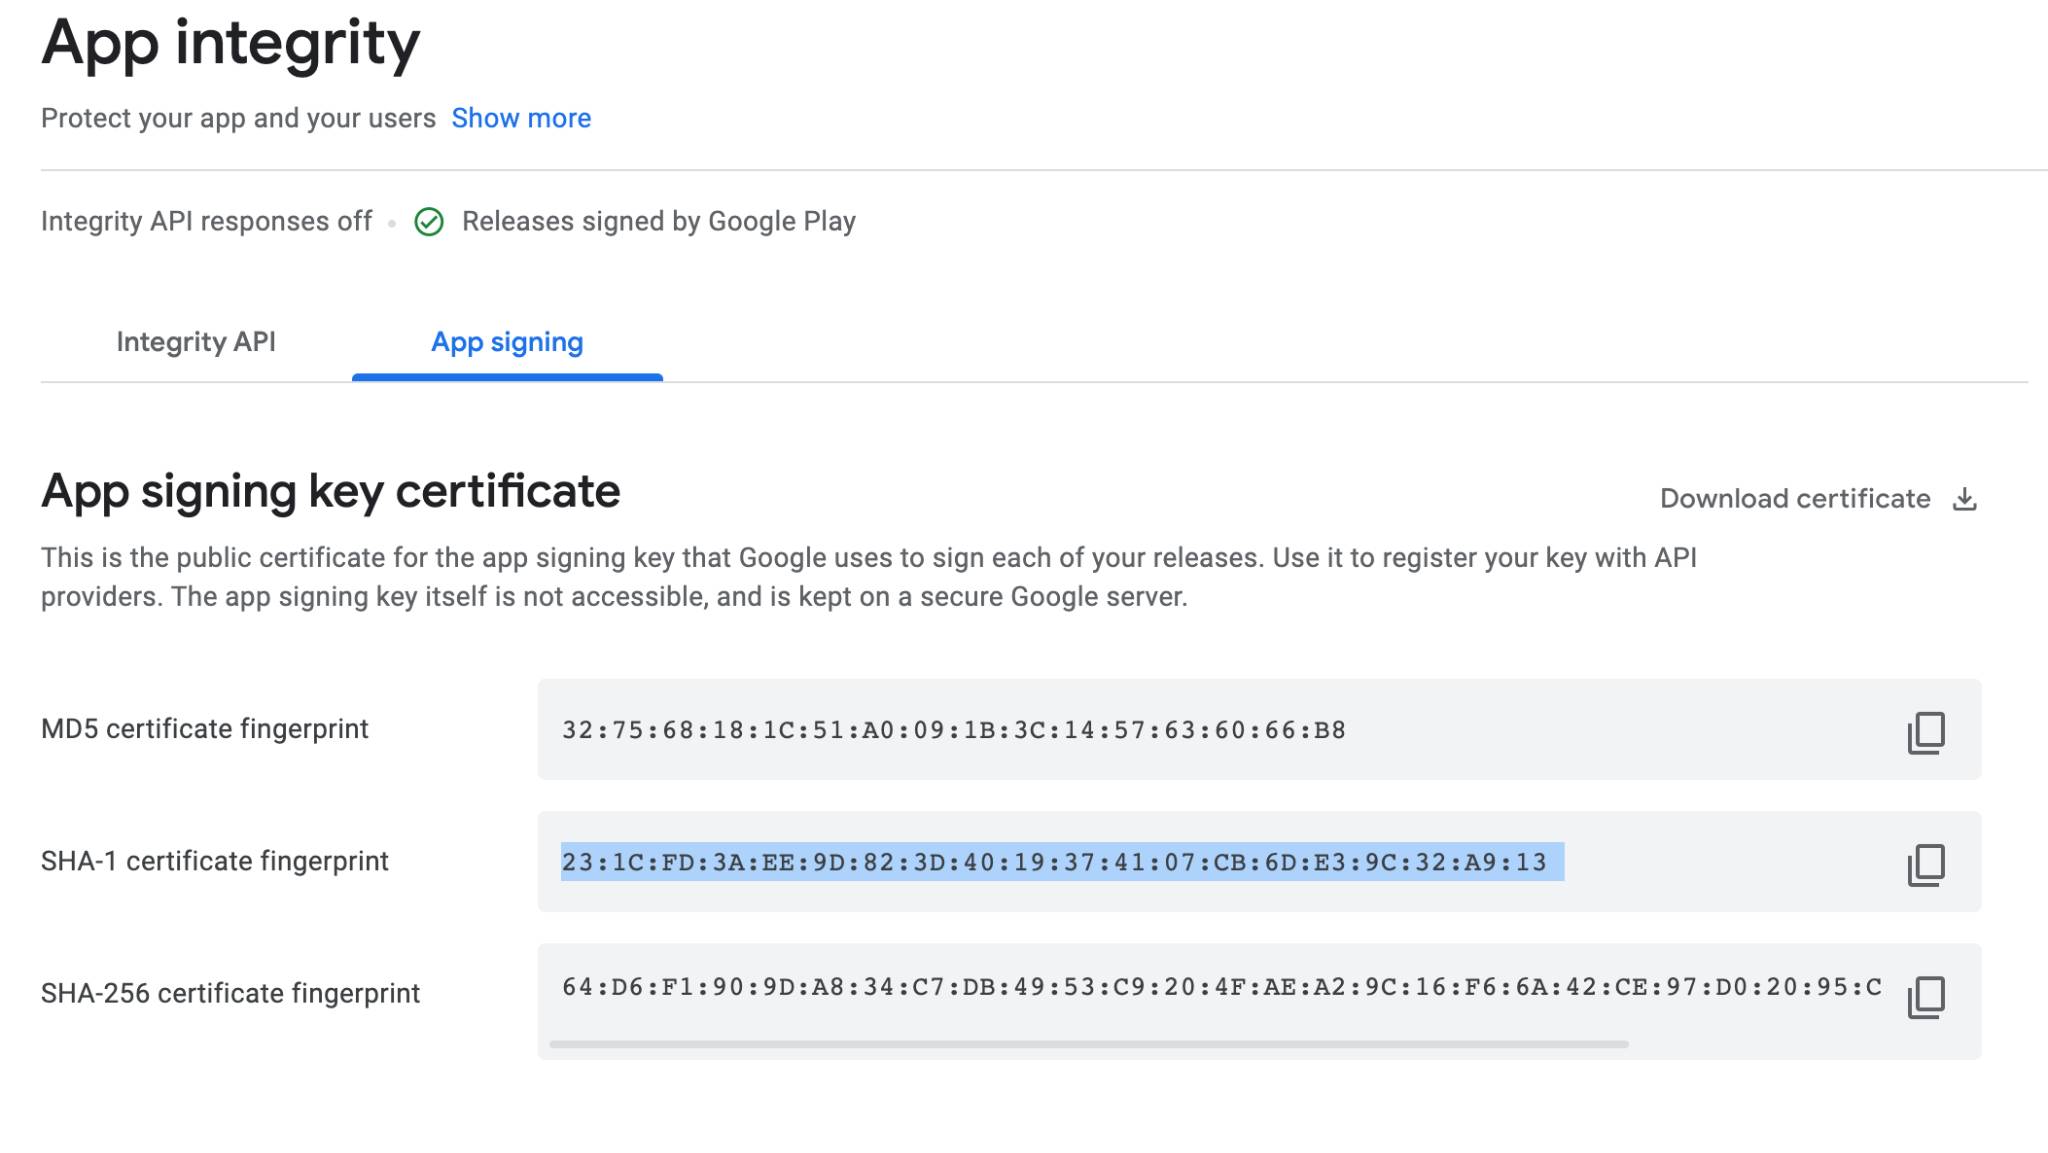
Navigate to https://play.google.com/console/u/0/developers and select your app project then Settings > App integrity from the sidebar.
Under the App signing tab, copy the SHA-1 certificate fingerprint.
Paste it into the Firebase project Certificate fingerprint field then click Save.
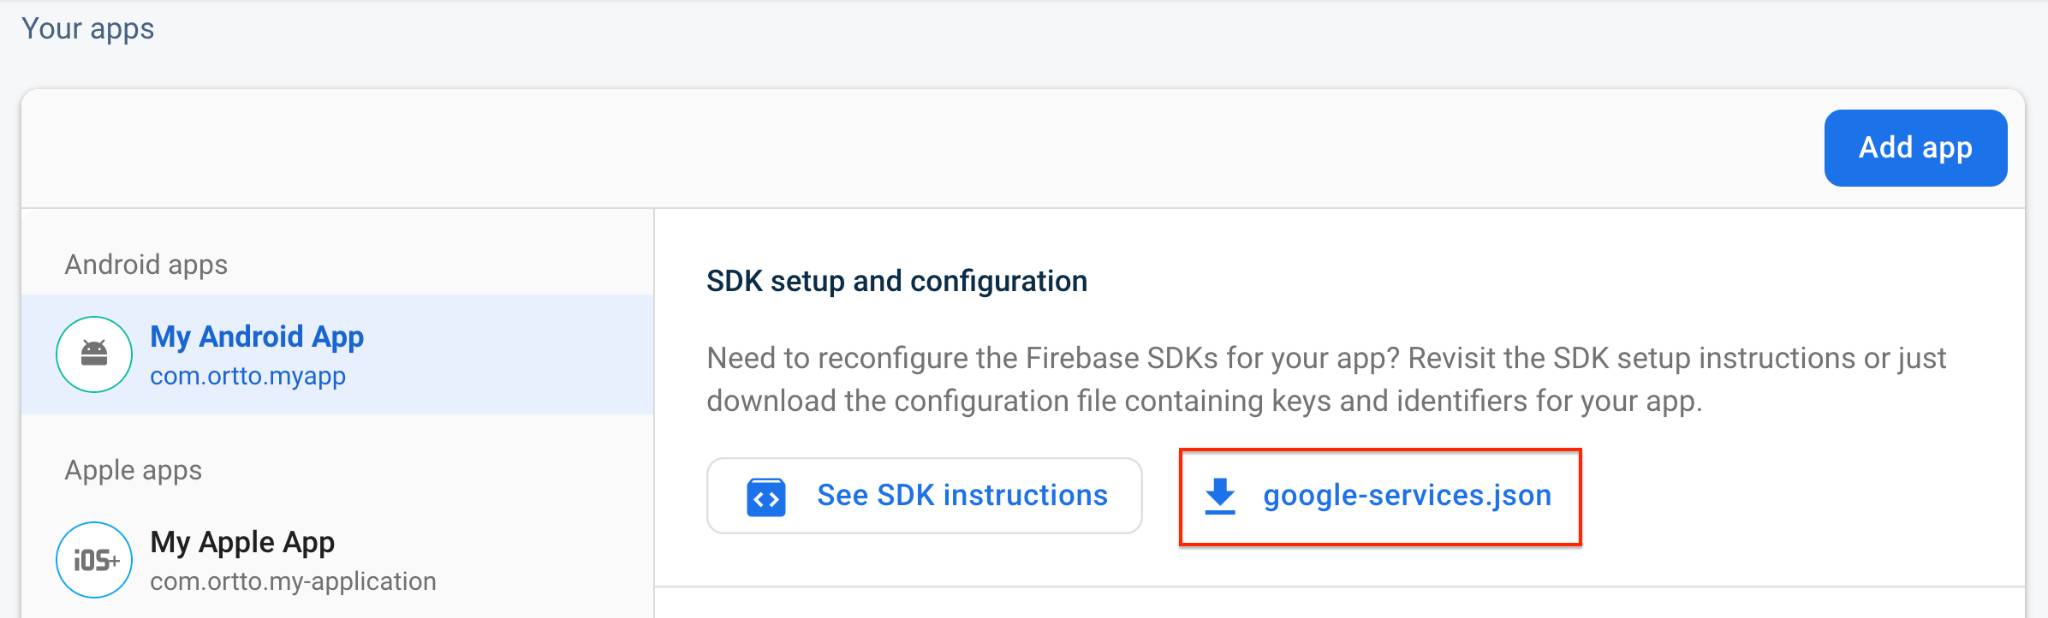
Now your 3 fingerprints are added, you need to re-download the google-services.json file.
While in the Firebase Project settings > General > Your apps > SDK setup and configuration click on google-services.json to download the file.
Import the google-services.json file into your Android Studio app project source directory.
Your project configuration is now complete. The next step is to Enable Ortto access to send push notifications.
Enable Ortto access to Firebase
In Firebase, you need to configure a new service account which grants Ortto access to the Firebase notifications API for your project.
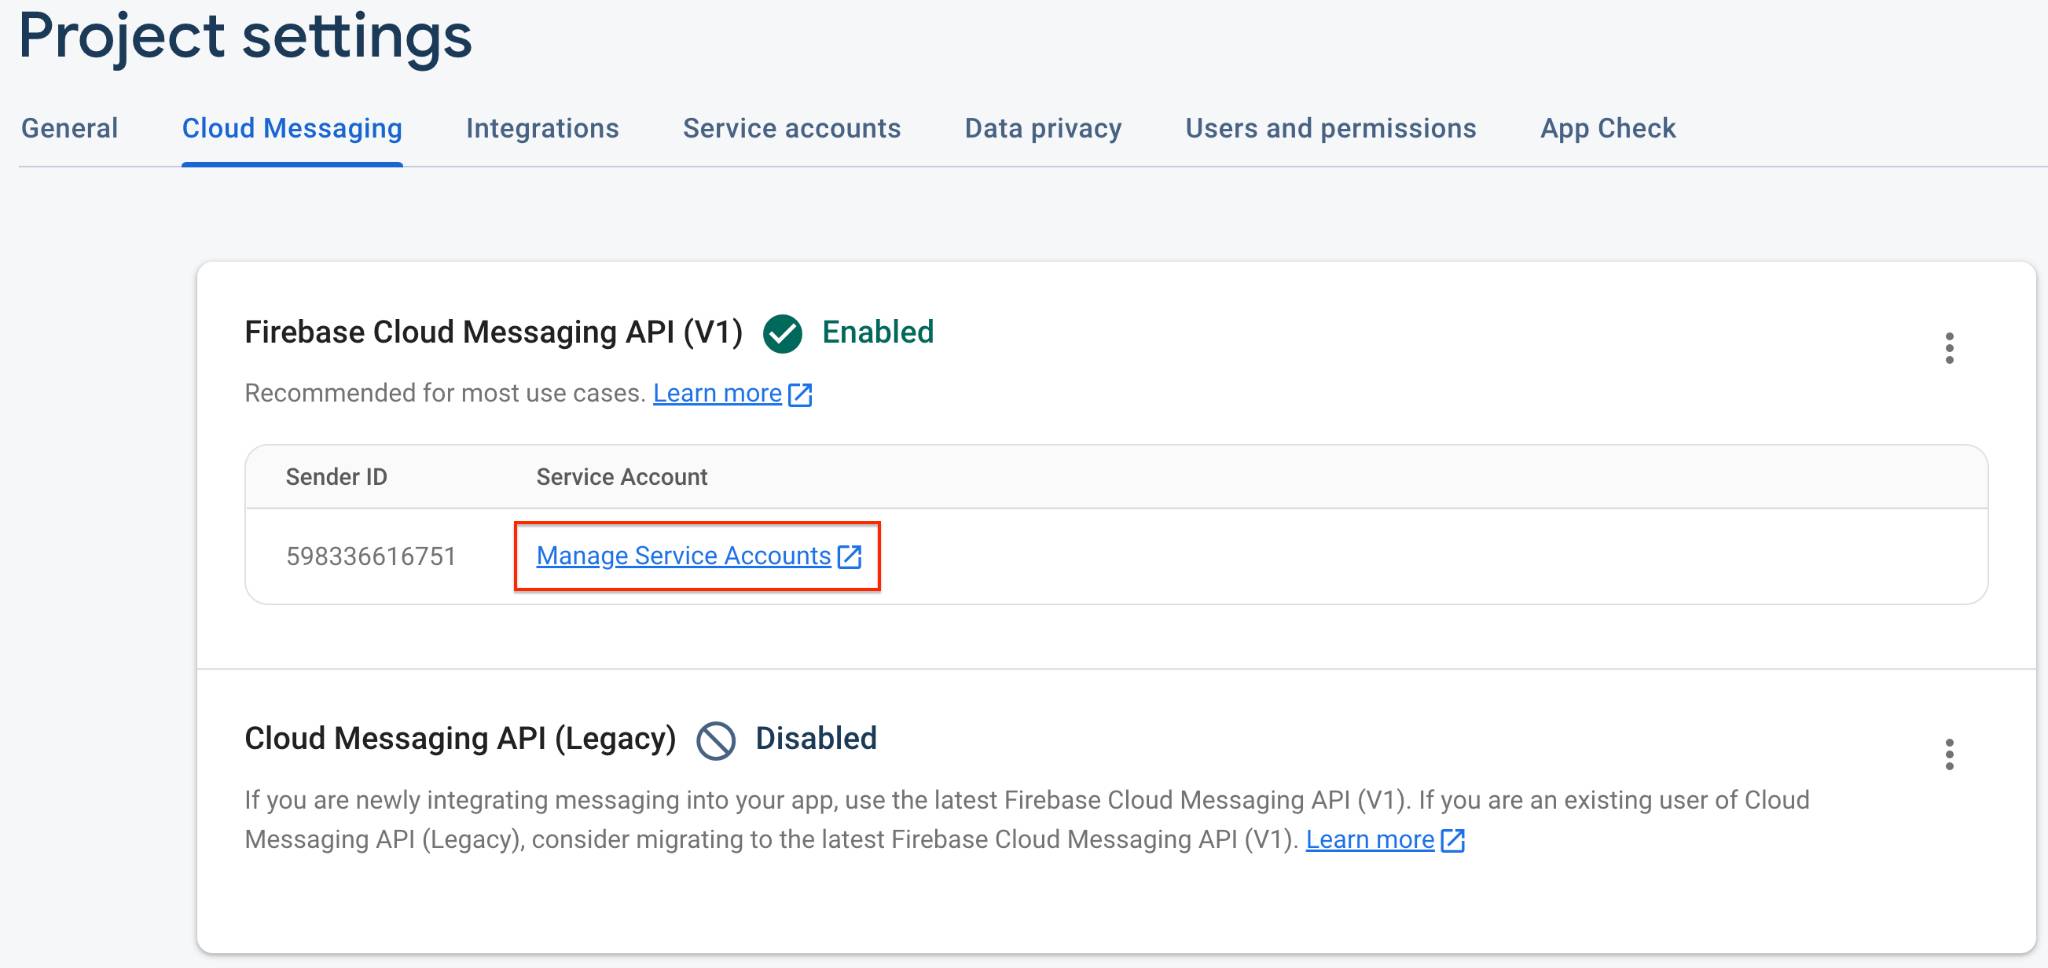
Navigate to your project’s Project settings > Cloud messaging.
At Firebase Cloud Messaging API, click on the link to Manage Service Accounts and the Google Cloud console will open in a new tab.
In the IAM & Admin sidebar, click on Roles.
Click Create role and populate the title, description, ID and role launch stage.
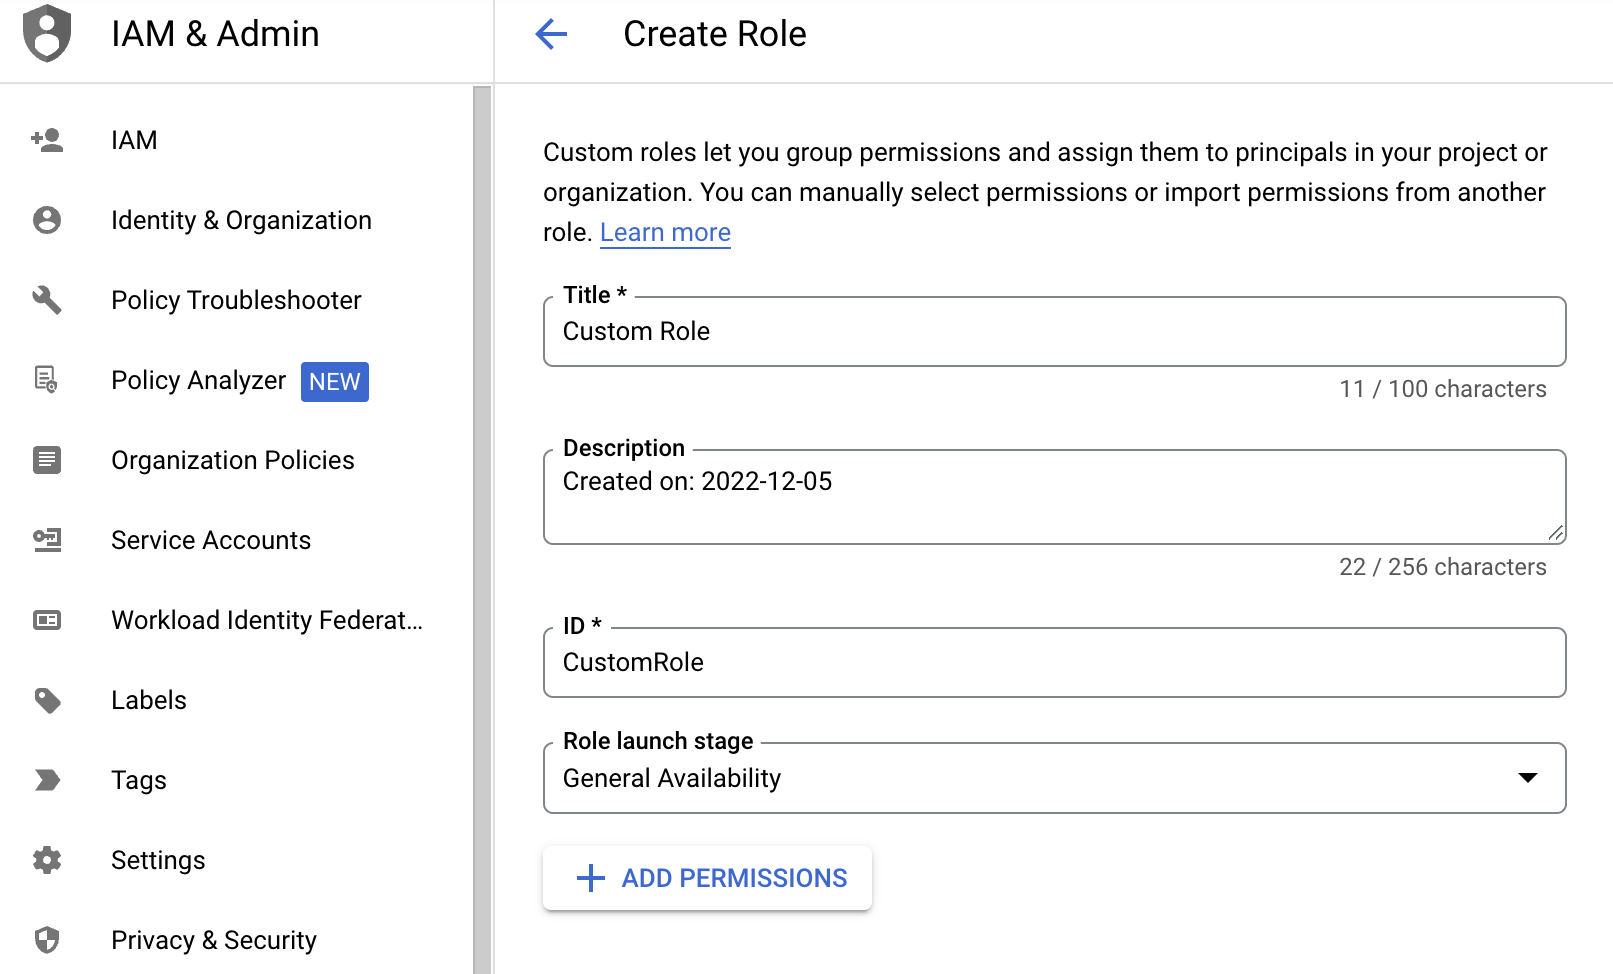
Click Add permissions and add 1 permission: cloudmessaging.messages.create.
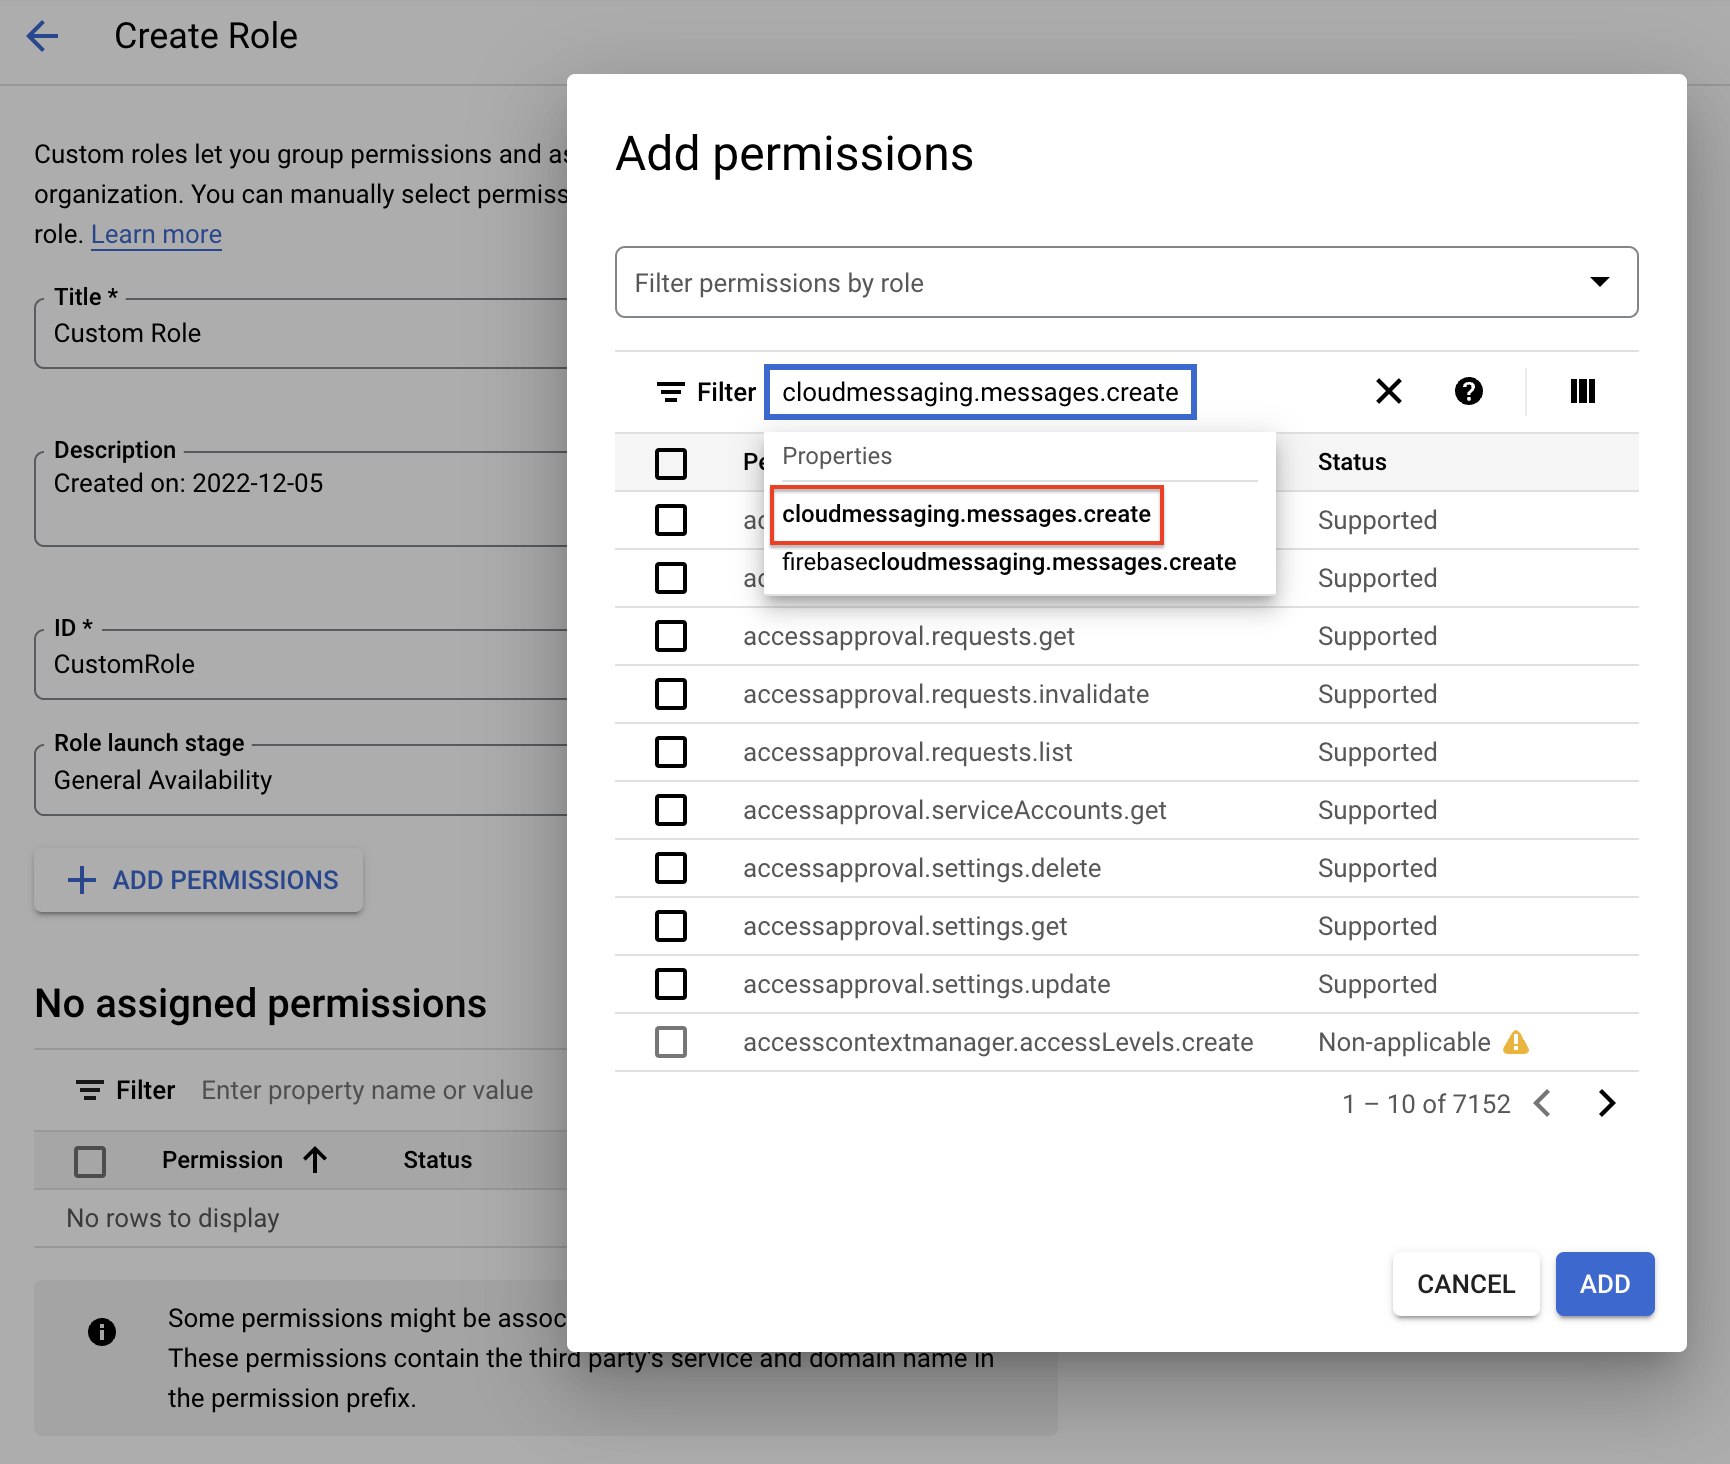
Click Create to finish the role setup.
Still within the Google Cloud console, in the IAM & Admin sidebar, click on Service Accounts to create a new service account specifically for Ortto.
NOTE: If a service account is already present, we recommend that you still create a new, Ortto-specific role to ensure that the role only has the 1 permission (which will be more secure than a role with wider permissions).
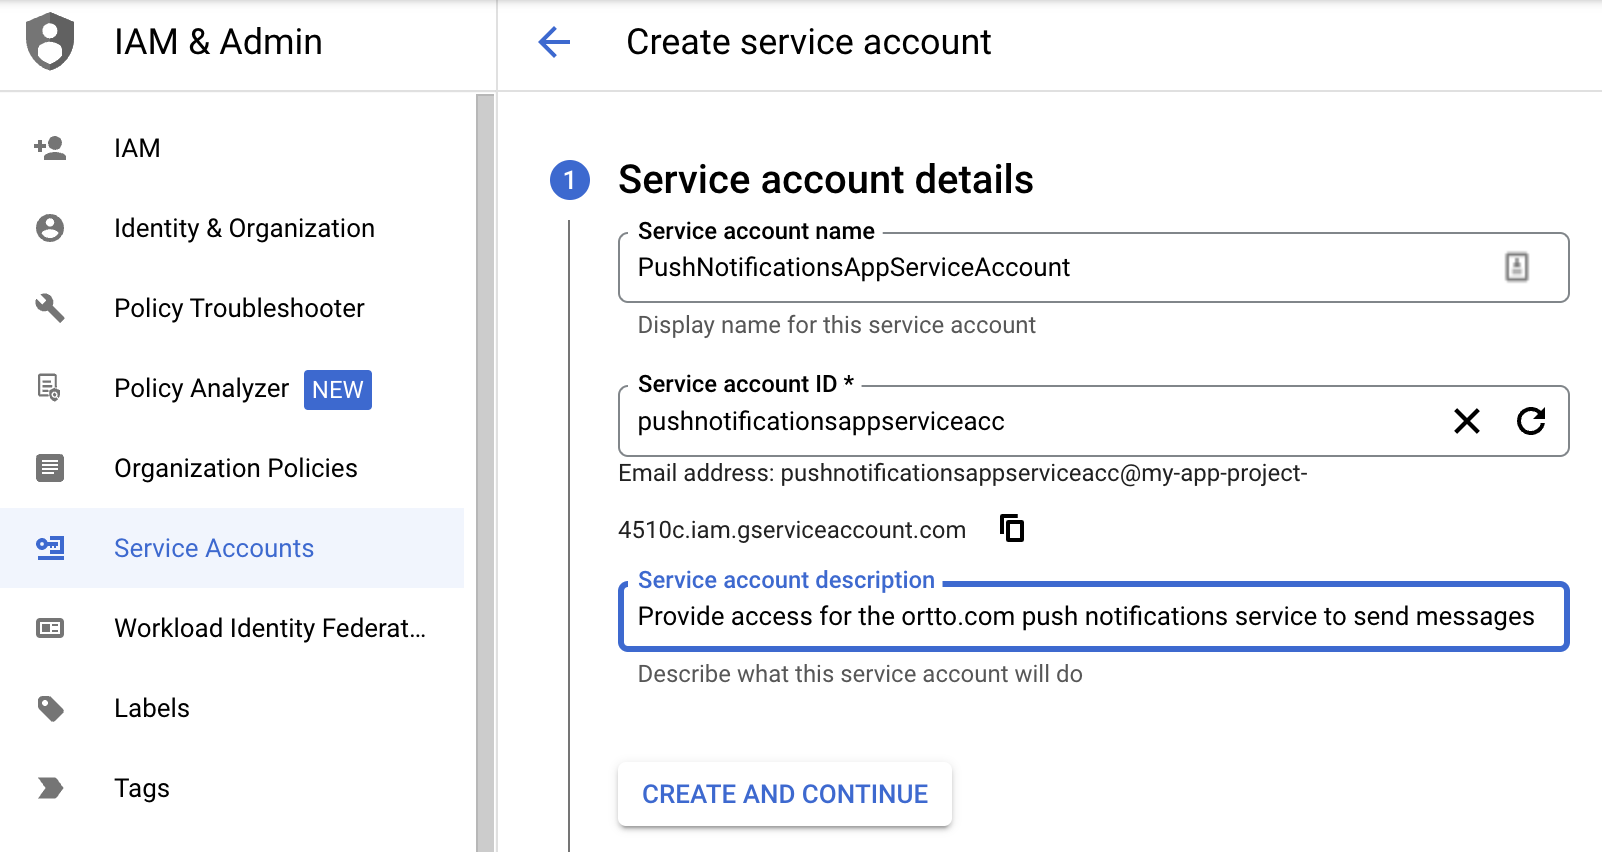
Click Create service account.
Populate the name, ID and description then click Create and continue.
Grant the service account with the new role you created before (at step 4).
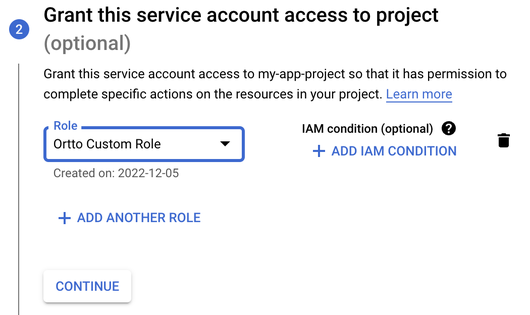
You don’t need to complete the final optional step in the service account creation.
Click Done and you are returned to the Service accounts page.
At the Service accounts page, click on the name of the service account you just added.
At the service account, click the Keys tab then Add key > Create new key.
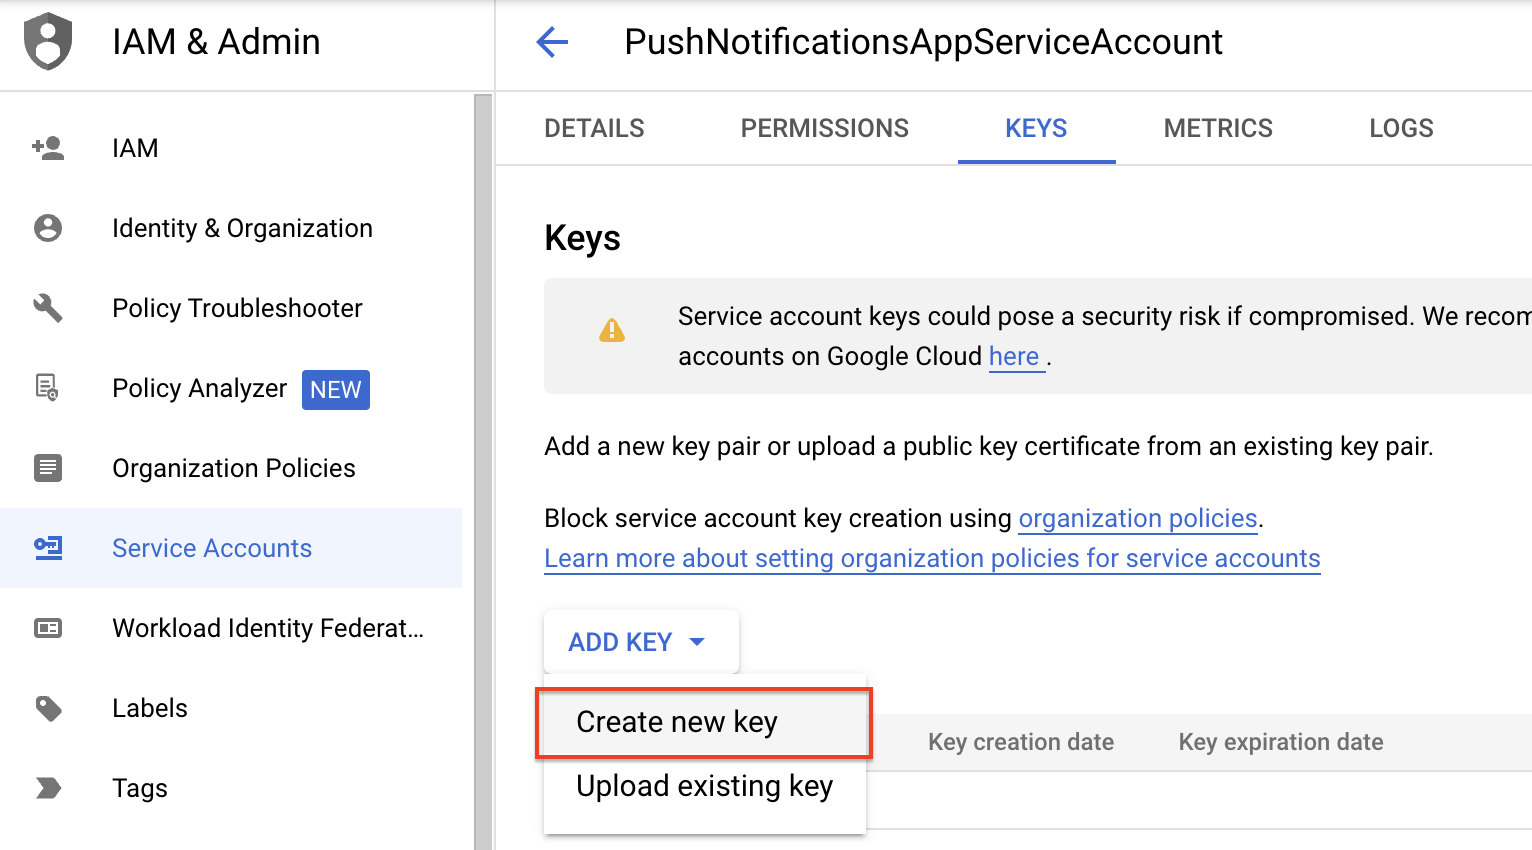
Select JSON then click Create and the .json file will be downloaded.
The resulting JSON file download is required when setting up iOS or Android notifications in your Ortto account Settings > Push notifications:
- For iOS, upload the .json at Settings Push notifications iOS notifications Setup FCM.
- For Android, upload the .json at Settings Push notifications Android notifications Setup.
Now you have completed the Firebase configuration and added the service account .json file to your Ortto account, the next step is to install Ortto’s Android or iOS SDKs so that your app can handle push notification delivery