
Using ledger reports
Overview
Ledger reports provide a detailed, chronological view of individual activity records. These reports list each activity as its own row, allowing you to inspect exactly when an activity occurred and which attributes were recorded.
Ledger reports help you review raw activity details, timestamps, and associated attributes related to campaign interactions and contact behavior.
They are typically used when you need a precise, record-level view of activity data for auditing, troubleshooting, or detailed analysis.
When to use a ledger report
You can use a ledger report when you need to examine individual activities auditing, troubleshooting, or detailed analysis rather than aggregated metrics.
Here are some example cases where a ledger report can be used:
- Itemize a list of SMS or widget responses
- Inspect attribute values recorded at the time an activity occurred
- Export detailed activity records for further analysis
TIP: When troubleshooting campaigns, use ledger reports to investigate contact activity in detail. They provide a timestamped view that helps clarify the timing and order of events.
For example, if you’re reviewing why a contact entered a journey, you can create a ledger report for the entry activity and add columns for relevant conditions. You can then use the Filter by setting to filter on the contact’s email address and isolate their activity for review.
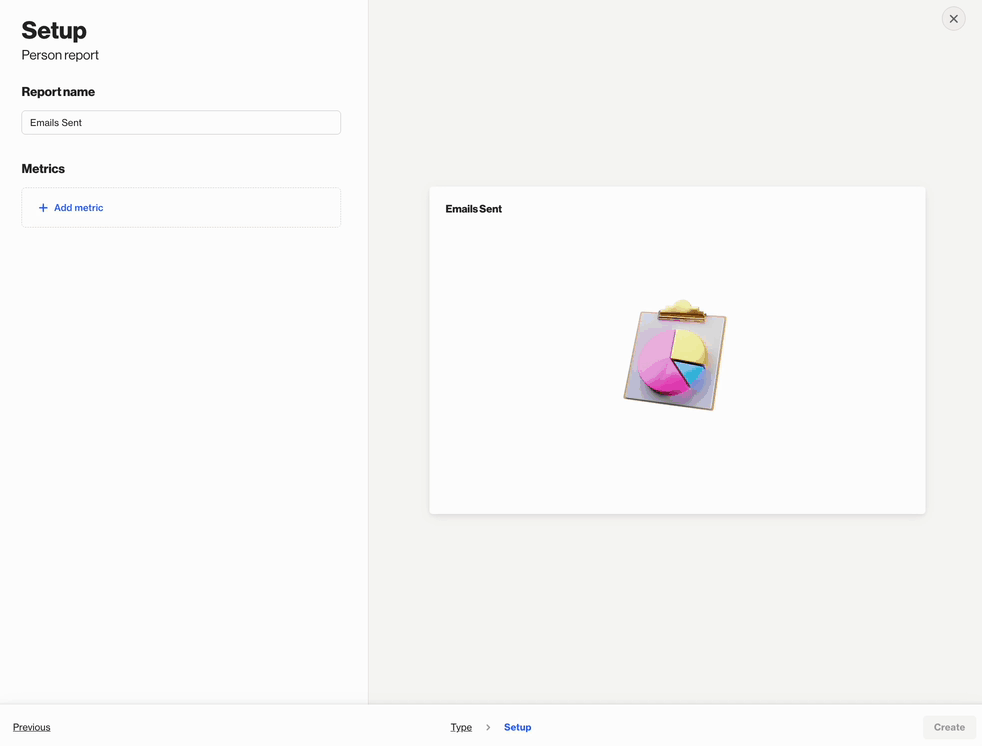
Creating ledger reports
You can create a ledger report by selecting Analytics > Reports > + New Person/Account Report > Start from scratch > Ledger report.
When building the report:
- Click + Add metric to select the activity you want to report on.
- Click + Add column to include additional data in the report.
Column options are organized into the following tabs:
- Attributes: Contains attributes recorded for the selected activity.
- Fields: Contains existing contact field values for the activity’s associated contact profile.
- Accounts: Contains existing account field values for the activity’s associated account profile.
To remove a column, click the trash icon beside that item.
You can rearrange columns in the settings panel by dragging and dropping them into your preferred order.
Once configured, select Create to build the report on the account.
Below is a table of the available setting options for this report:
Setting | Description |
|---|---|
Report Name | Sets the internal name of the ledger report, making it easy to identify in the reports list and dashboards. |
Add metric | Select an activity to use as the metric in the ledger report. |
+ Where | Add conditions to refine which activities or field values are included in the metric. |
+ Add Column | Add an additional attribute, contact field, or account field for the metric. |
Filter results by | Apply additional filters to limit which contacts are included, such as audience membership, field values, or tags. |
Sort by | Choose which column the ledger is sorted by and whether the order is ascending or descending. |
Timeframe | Sets the date range for the report. Only activities within this window are included. |
Uniqueness Window | Determines how often the same contact can be counted for the same activity. This prevents duplicate activity events from inflating results within a defined time period. Learn more about uniqueness windows. |
Exclusions | Allows you remove contacts in your suppression list from your report, such as internal users or test contacts, to keep your results clean and accurate. Learn more about the email suppression list. |
TIP: The Time attribute is added as a date by default. You can click on it for a dropdown option to display as a timestamp for the activity for a more granular review.
The report will show this in the account's selected timezone. Learn more about managing the account timezone.
Configuring uniqueness
When building a ledger report, you can choose to enable the Uniqueness window, which will mean only 1 entry is returned per person, for the combination of columns selected.
This means the results of how many activities are returned per contact depends on each of the following:
- The number of matching activities that have occurred for that contact in the chosen report timeframe
- How close together those activities are
- The combination of activity attributes selected
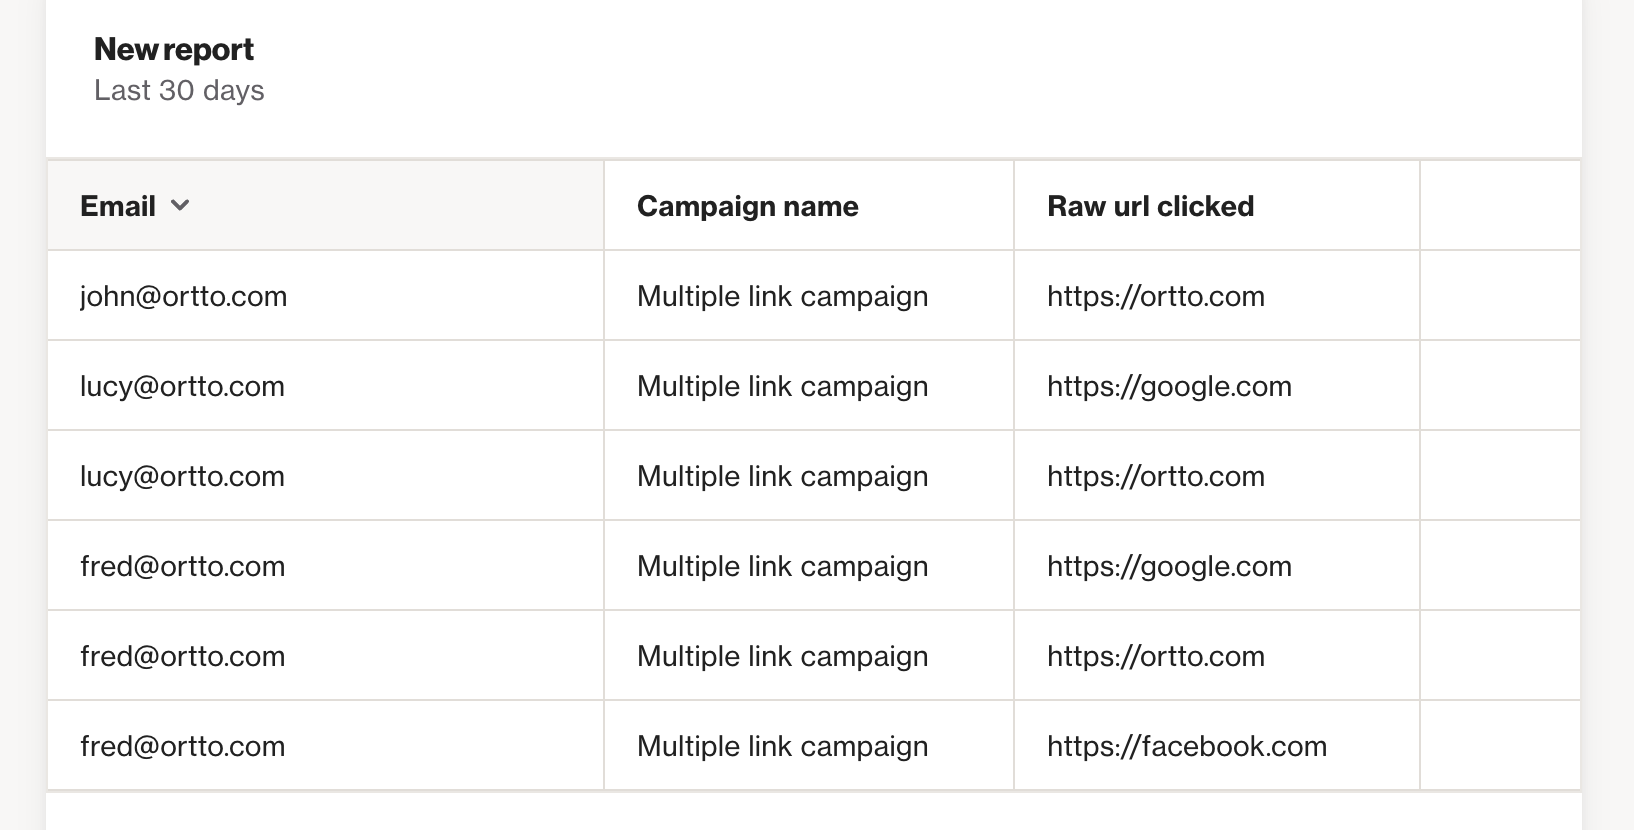
To explain this more clearly, consider the following example:
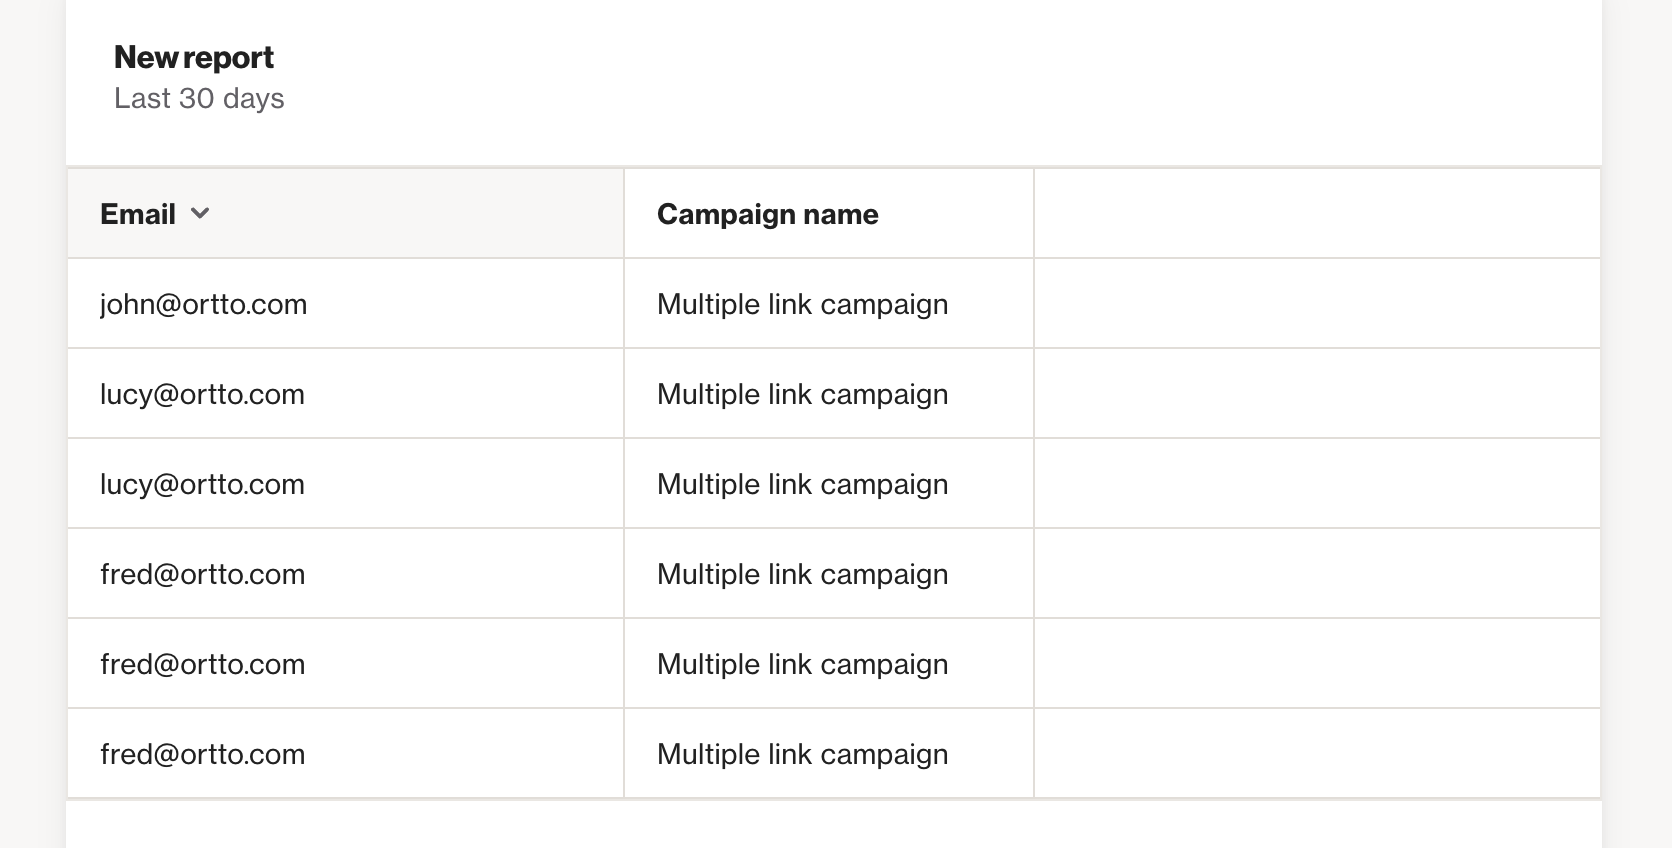
John, Lucy and Fred were each sent an email, and they each clicked at least one link in that email:
- John clicked 1 link
- Lucy clicked 2 links
- Fred clicked 3 links
If we build a ledger report on the "Clicked email" activity, and include "Email" and "Campaign name" as the 2 attributes to display, and do not enable the uniqueness window, you will see all 6 "clicked email" activities for the 3 people as follows:
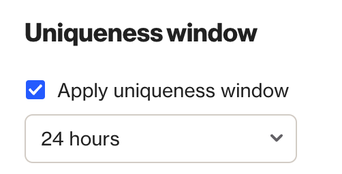
Now, if we enable the Uniqueness window, it's going to ignore any duplicates that would appear in the table, e.g. Lucy's 2nd click, and Fred's 2nd and 3rd click. This is because the entries are identical.

Next, we will add an extra column to track, the raw url clicked on.
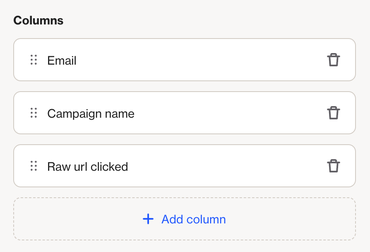
Now, the report will be looking for unique activities, judging uniqueness by all 3 columns. That is, a unique click by a different person, on this campaign, per unique url clicked. In our case, the contacts clicked different urls with each click, so all 6 click activities are now shown again:
Interpreting ledger reports
A ledger report is displayed as a list of individual activity records.
- Each row represents a single activity event.
- Each column displays either activity attributes or contact/account fields selected during report setup.
- Activity attribute columns show the values captured at the time the activity occurred.
- Contact and account field columns show the current values stored in the CDP.
Understanding the rows
Each row in the ledger represents one activity event.
If the same contact performs the same activity multiple times, each occurrence appears as a separate row.
Rows are sorted by time by default, allowing you to review activity in sequence. You can also use the Sort by setting or click a column header to sort the report by a specific column.
Understanding the columns
Each column displays a specific detail about the activity or its associated contact or account.
By default, ledger reports include:
- The activity's date
- Relevant ID fields for the selected activity
You can add additional columns to surface more context, such as:
- Email name from the Attributes tab for email-related activities
- Name and Email from the Fields tab for contact information
- Phone number from the Fields tab for SMS-related activities
Reading down the report allows you to review activity based on the column selected in the Sort By setting, while reading across a row lets you inspect all details for a single event.
NOTE: Reports are built using existing activity data. The data available in a report depends on each activity’s data retention settings. Learn more about data retention.
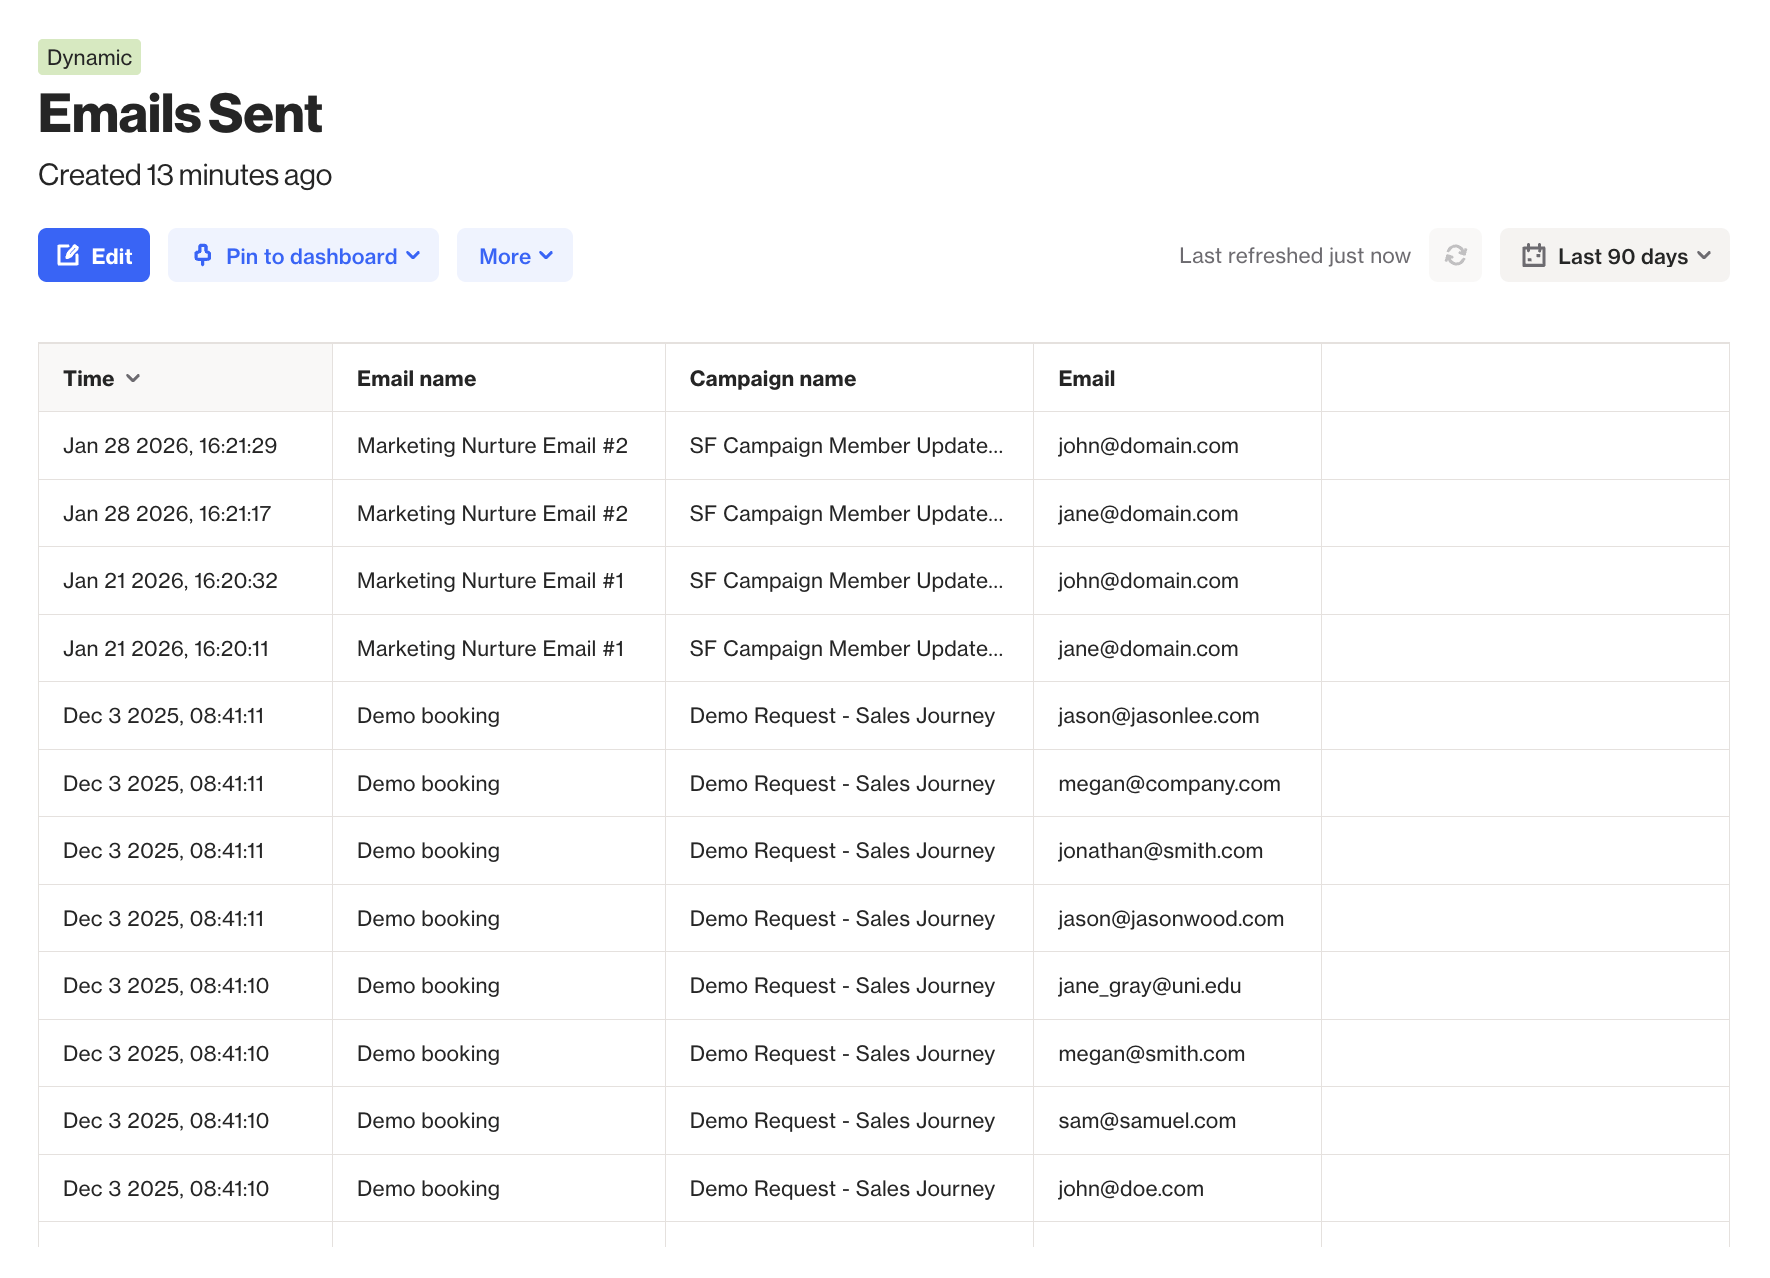
EX: This report contains a ledger of individual Sent Email activities that have occurred on the account in the last 90 days, sorted by Time. It is set to include the Email Name and Campaign Name activity attributes as well as the Email field for the corresponding contact.
Most recently, the Marketing Nurture Email #2 email within the SF Campaign Member Updates campaign was sent to john@domain.com on Jan 28 2026 at 4:21 pm.