
Segment (Actions) integration
Overview
Segment (Actions) is Ortto's integration with Segment's Destination Actions framework. It enables you to send activity and contact data directly from Segment into Ortto using flexible server-side actions. This integration offers more granular control over the data you send and is an alternative to Ortto’s classic Segment integration.
Segment (Actions) vs. Segment classic integration
We recommend using Segment (Actions) over the classic Segment integration. Segment (Actions) offers more flexibility, better data mapping capabilities, and improved performance through batching and server-side processing. With support for granular field and activity mapping directly in the Segment UI, you can control exactly what gets sent to Ortto and how it's structured.
Currently, the integration supports the following actions:
- Upsert Contact Profile: Creates or updates a contact in Ortto based on incoming Segment traits.
- Track Activity: Tracks customer activities by mapping Segment track events to activity records in Ortto. This allows you to capture meaningful behavioural data for use in journeys, campaigns, and reporting.
NOTE: Currently, both Segment integrations only support person-related (contact) events and do not support account (previously organizations)-related events.
Segment prerequisites
To use this integration, you must have an active Segment account and workspace. You need to make sure your Segment source is set up and ready to send data to Ortto.
Configure your Segment destination
- Navigate to Connections > Destinations
- Click Add destination
- Search for and select Ortto (Actions) from the catalog, then click Add destination
- Select the source you want this destination to receive data from
- Enter a name for the destination and click Create destination
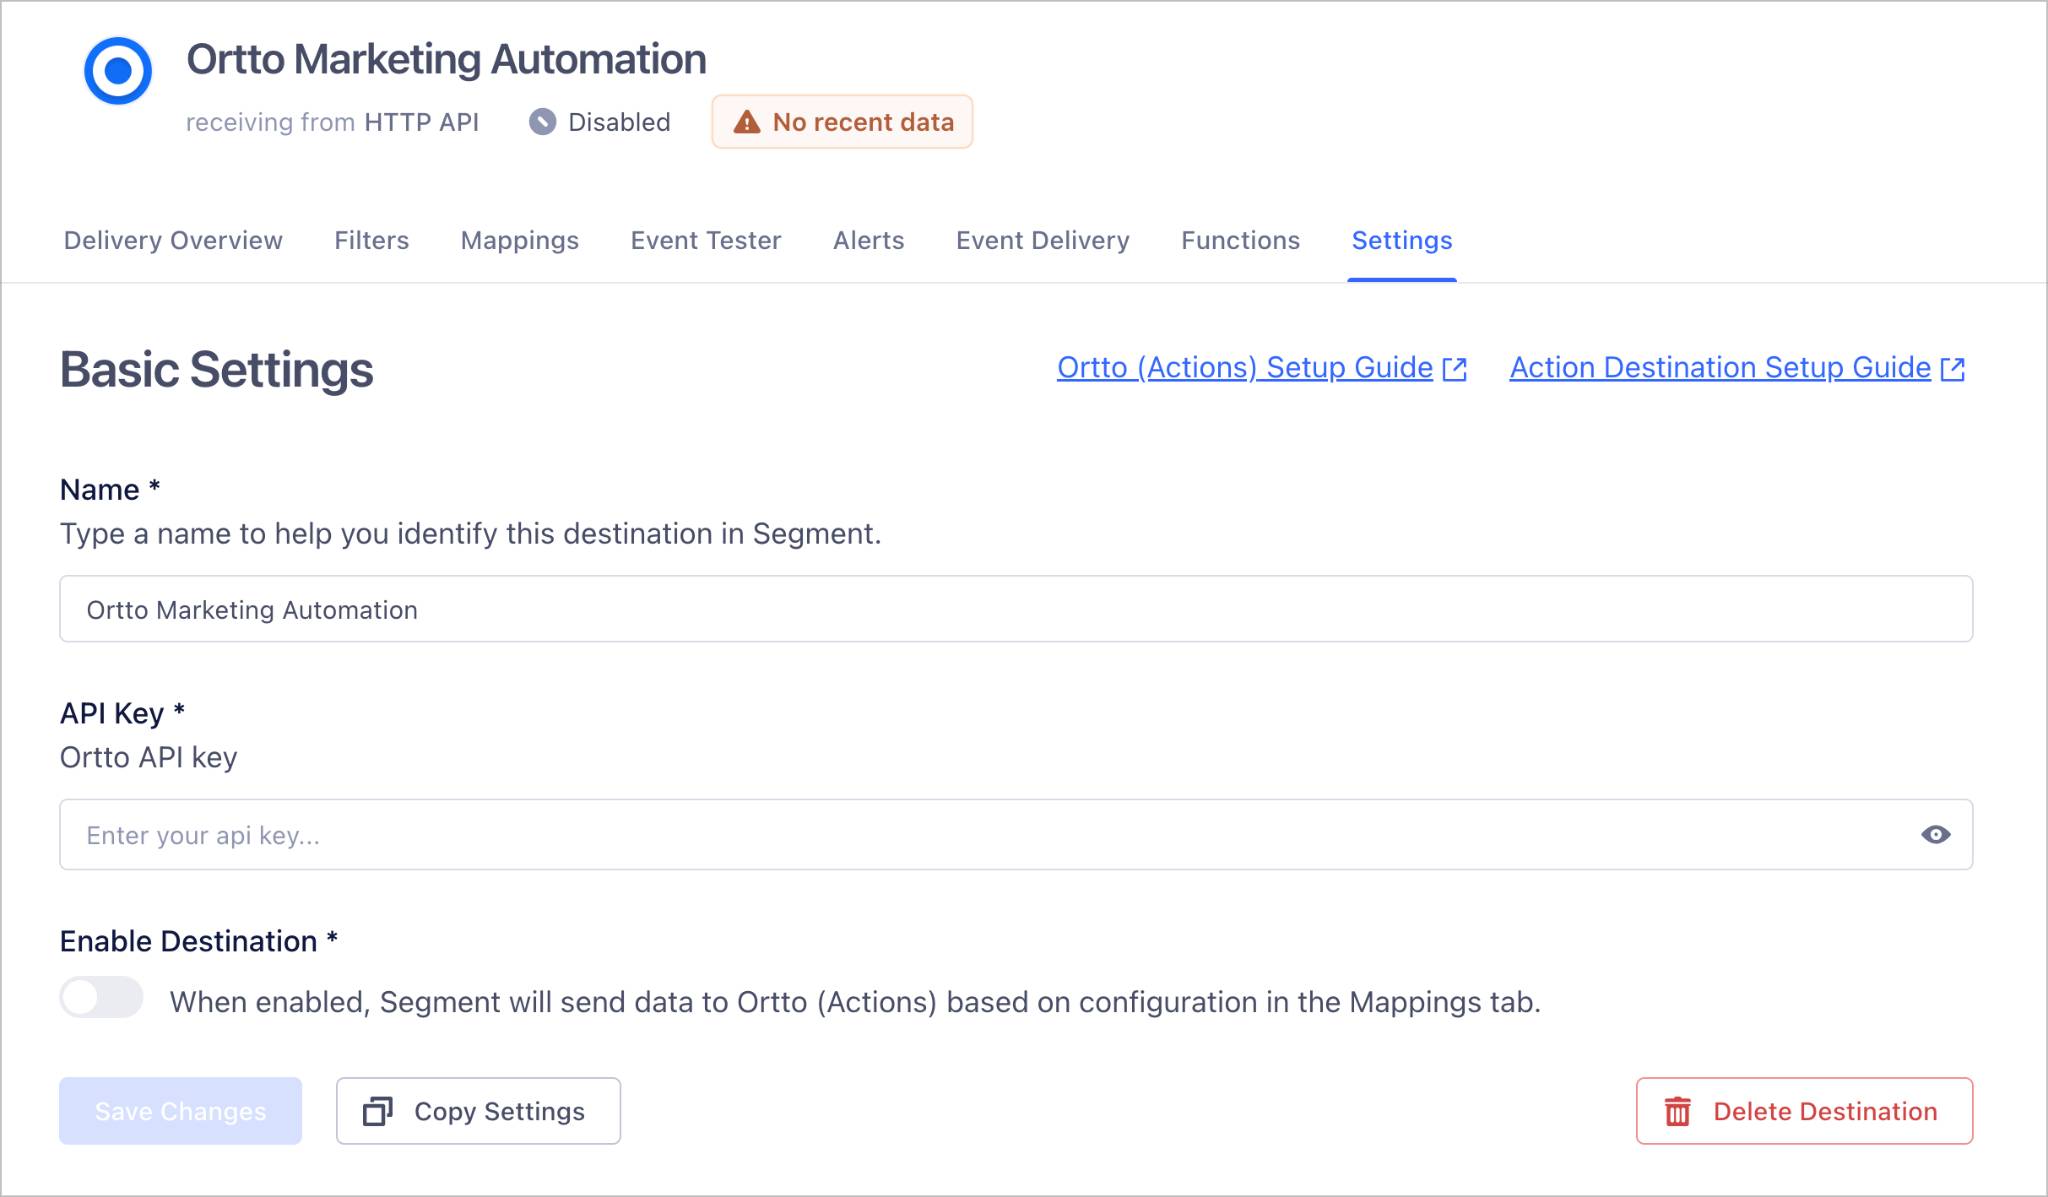
Once created, go to the Settings tab and follow the steps below to retrieve your API key from Ortto.
Create a new data source in Ortto
To complete the integration between Ortto and your Segment workspace, follow these steps in the Ortto interface:
- Go to CDP > Data Sources and click New data source
- Search for and select Segment (Actions)
- Enter a name for the data source and click Connect
- Choose the merge settings that best fit your needs, then click Next
- Copy the API key displayed in Ortto and paste it into the Settings tab of your Segment destination configuration
NOTE: The name you choose for your Ortto data source is for your own reference within Ortto and does not need to match the name of the Segment destination you created in the previous step. These names are independent and used separately in each platform.
Mappings
This step allows you to map contact traits from Segment to CDP fields in Ortto, and optionally map events to activities.
Mapping contact traits
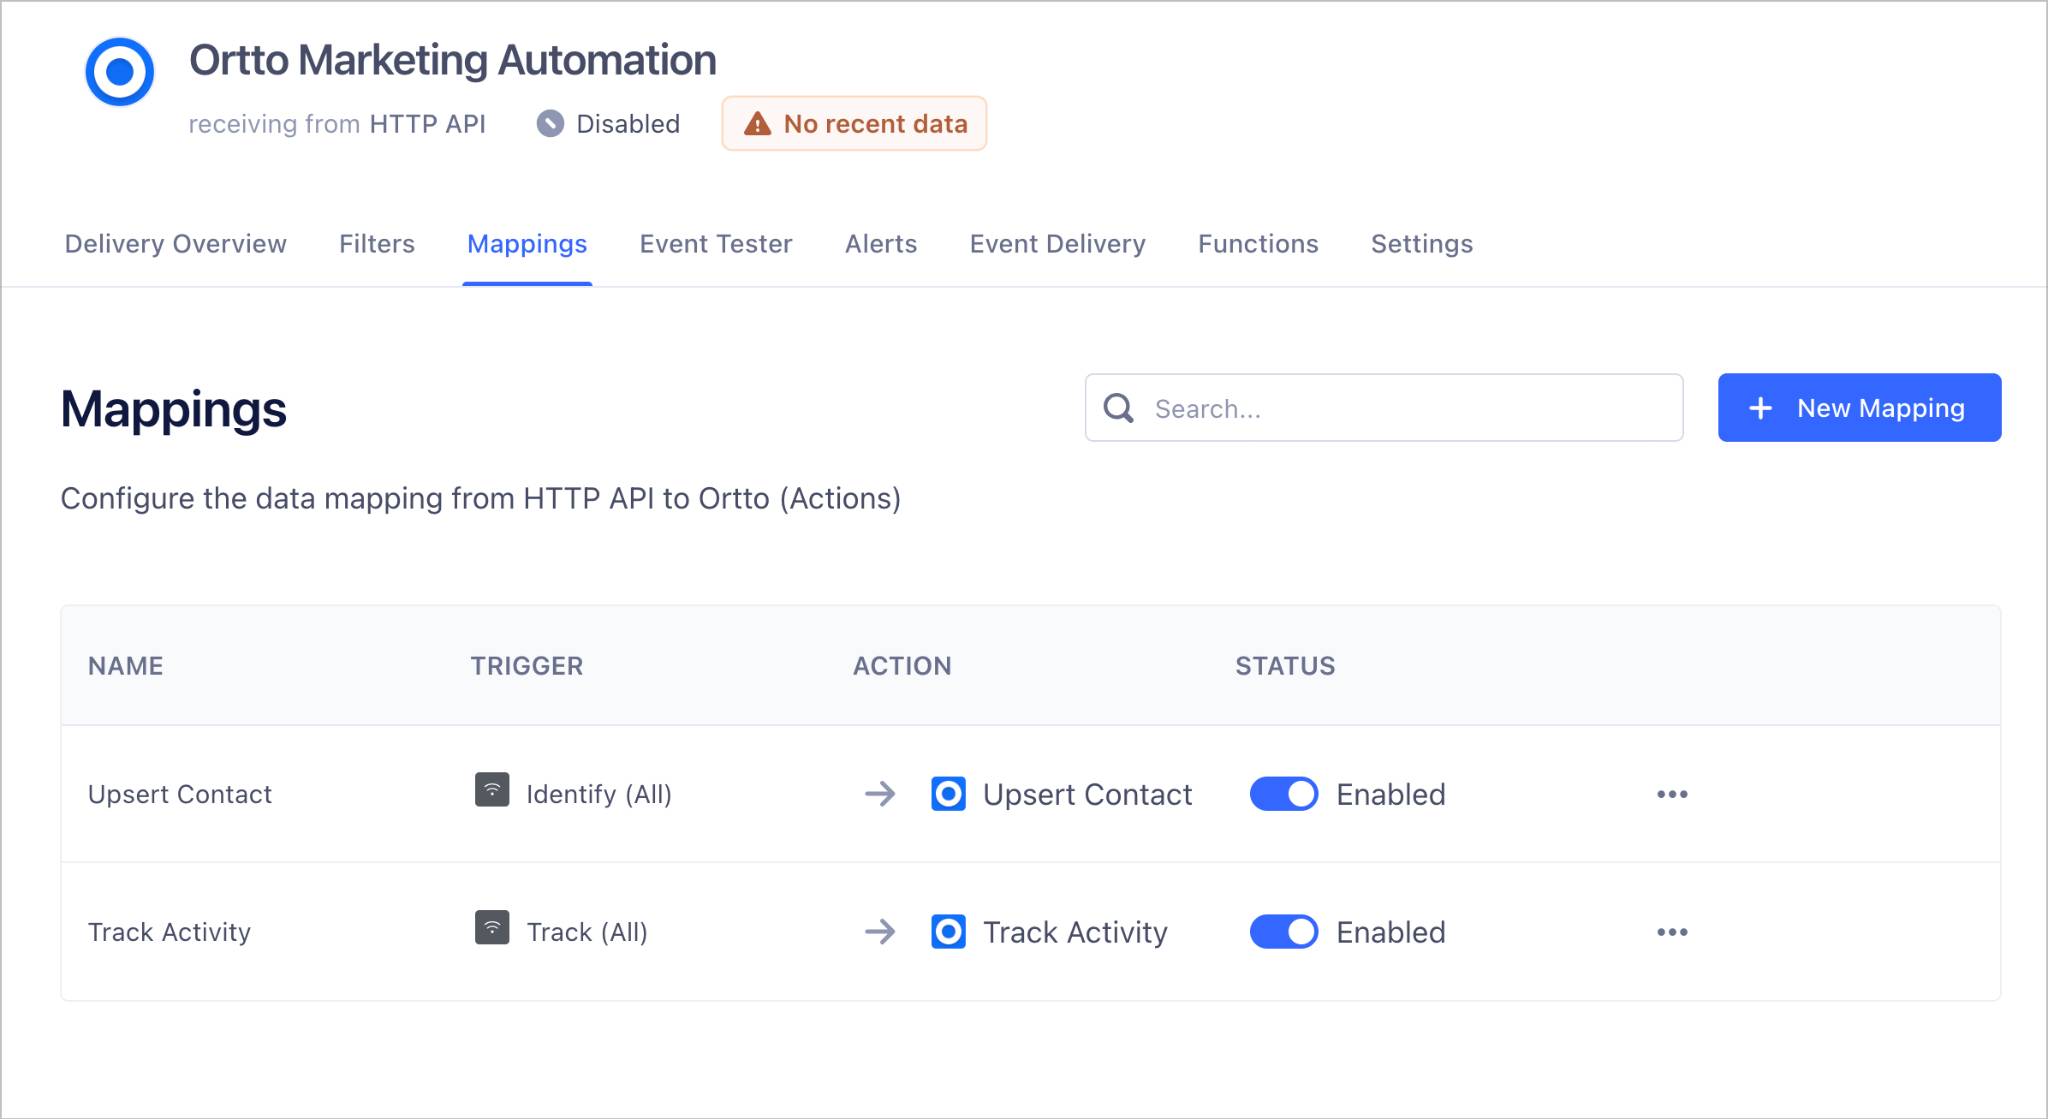
For Ortto to begin accepting data from Segment, you need to define how Segment traits map to CDP fields in Ortto. After copying the API key into Segment, go to the Mappings tab in your Segment destination. From there, either edit a preset or click New Mapping to create one from scratch. We recommend using an Upsert Contact Profile action to configure the CDP field mappings.
IMPORTANT: Mapping contact traits in Ortto is mandatory. Without these mappings in place, Ortto will reject all incoming data from Segment.
Below is an example of a valid identify event that can be used to upsert a contact profile in Ortto:
json {
  "type": "identify",
  "userId": "lana.romeijn.myonlinestore-studio",
  "anonymousId": "507f191e810c19729de860ea",
  "timestamp": "2025-07-10T06:09:00Z",
  "messageId":"3e9a7f45-1f5d-4a52-9c9e-80eb08c2cf7e",
  "traits": {
    "firstName": "Lana",
    "lastName": "Romeijn",
    "email": "lana.romeijn@example.org",
    "birthday": "28-07-1980",
    "active": true
   }
}

NOTE: This is a sample event provided for demonstration purposes only. It is intended to give you a general idea of the expected input structure. The actual event you send should be a modified or extended version of this example, tailored to include the specific and meaningful traits and properties relevant to your system and data model.
Mapping event data to Ortto activity attributes
You can also optionally map track events from Segment to activities in Ortto. To do this, you need to set up a Track Activity mapping in your Ortto (Actions) destination within Segment. This allows you to record meaningful user activities in Ortto based on the events sent from your source.
Once Ortto receives a sample of the activity data, you can create a new mapping to define how incoming properties from Segment should map to activity attributes in Ortto. To do this, click Add activity to open the Select Activity modal in the Ortto interface. Search for the activity name you want to map, select the matching activity from the list, and click Select to continue.
NOTE:
- Our search can display up to 500 recent activities. If you can't find your activity, check if Segment is sending recent data.
- To add an activity manually, click Enter manually in the Add Activity dialog. This lets you include activities and attributes for future support in Segment.
- For more activities, you can purchase the Activities + Add-on, which allows you to track additional Segment events. Each additional activity costs 1 x Activities + Add-on.
Below is an example of a valid track event that can be used to ingest customer activities into Ortto:
json {
  "type": "track",
  "userId": "lana.romeijn.myonlinestore-studio",
  "event": "Sign-in button clicked",
  "timestamp": "2025-07-11T06:09:00Z",
  "messageId": "a5cbd0b6-38e6-4c98-bf95-9f1b3d3949f1",
  "properties": {
     "action": "sign-in-button-clicked",
     "count": 3
   }
}
Each Track Activity action can optionally include contact traits to specify which contact the activity should be assigned to. This is useful when the event includes identifying information, allowing Ortto to correctly associate the activity with an existing contact or create a new one if needed.
Below is an example of a track event with contact traits included:
json {
	"type": "track",
	"userId": "lana.romeijn.myonlinestore-studio",
	"event": "Sign-in button clicked",
	"timestamp": "2025-07-11T06:09:00Z",
	"messageId": "a5cbd0b6-38e6-4c98-bf95-9f1b3d3949f1",
	"properties": {
		"action": "sign-in-button-clicked",
		"count": 3
	},
	"traits": {
      "firstName": "Lana",
      "lastName": "Romeijn",
      "email": "lana.romeijn@example.org",
      "birthday": "28-07-1980",
      "active": true
    }
}
IMPORTANT: Ortto requires all Segment events, whether identify or track, to include either a userId or an anonymousId. These identifiers are essential for matching and merging contacts, as well as associating activities with the correct contact profile.
The actual merge behaviour depends on the unique identifier settings configured in your Ortto account. To ensure your data is delivered and processed correctly, make sure every event, dispatched from your sources includes at least one of these identifiers. Events missing both will be discarded by Segment before they reach Ortto.
NOTE: If you see a Waiting for Segment to send us an Identify event message on the Map page, it means your Segment source hasn’t yet sent the required event data, and the setup is not fully complete. If you don’t plan to finish the configuration right away, you can safely close the page.
Ortto will store a few samples of incoming events from Segment, and you’ll receive an email notification once the data has been received and is ready for mapping. Alternatively, you can manually send an event from Segment to Ortto.
Activity deduplication
Activities are deduplicated using the Timestamp and Message ID. If either of these values is missing or differs between identical activities, duplicates may occur. By default, the Message ID is set to Segment’s internal message ID, but you can provide a custom unique Message ID of up to 128 characters.
When using Reverse ETL to send activities to Ortto via the Track Activity action, Segment does not automatically provide a Message ID. Therefore, duplicates are expected unless you supply a custom unique Message ID along with the Timestamp.
Searching existing Ortto CDP fields
If the list of Ortto CDP fields on the Map page is long, you can filter it by typing letters into the Search box. As you type, fields that don’t match the search will be hidden.
You can then select or deselect the remaining fields. To reset the list, clear the Search box or click the X.
Adding a new Ortto CDP field
If you need to create a new Ortto CDP field to map follow these steps:
- Click Add a new field.
- In the Create field dialog, enter the Field name and Field type for the new field.
- Click OK to save. The new field will appear in the Ortto fields list, sorted alphabetically.
- Drag the new field to the matching Segment identify trait in the Unique identifiers section.
Supported date formats from Segment
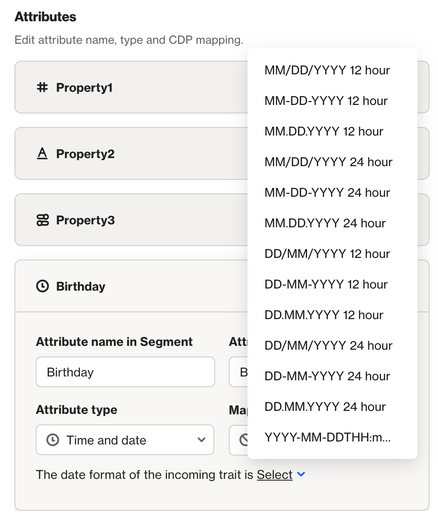
When mapping date or time fields or activity attributes, you need to select your preferred date format from the dropdown below the data type input.
For example, when adding a date or time attribute to an activity:
And another example when mapping a contact field:
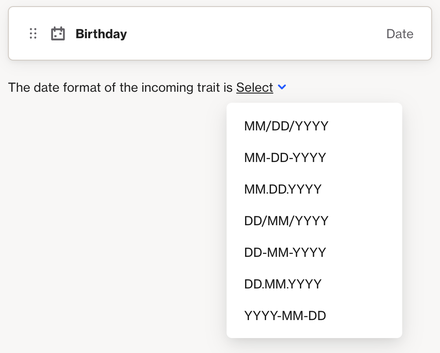
You can specify a different date format for each individual field or attribute based on the structure of the incoming data. This flexibility allows you to handle multiple date formats across various traits or properties, as long as each one is correctly mapped to match the expected format in Ortto. If the incoming value doesn’t match the selected format, it will be considered invalid and ignored.
For example, if you map a Segment trait or property using the format YYYY-MM-DD but send a value in the format DD-MM-YYYY, Ortto will not recognize it as a valid date. As a result, the corresponding CDP field or activity attribute will be skipped during ingestion.
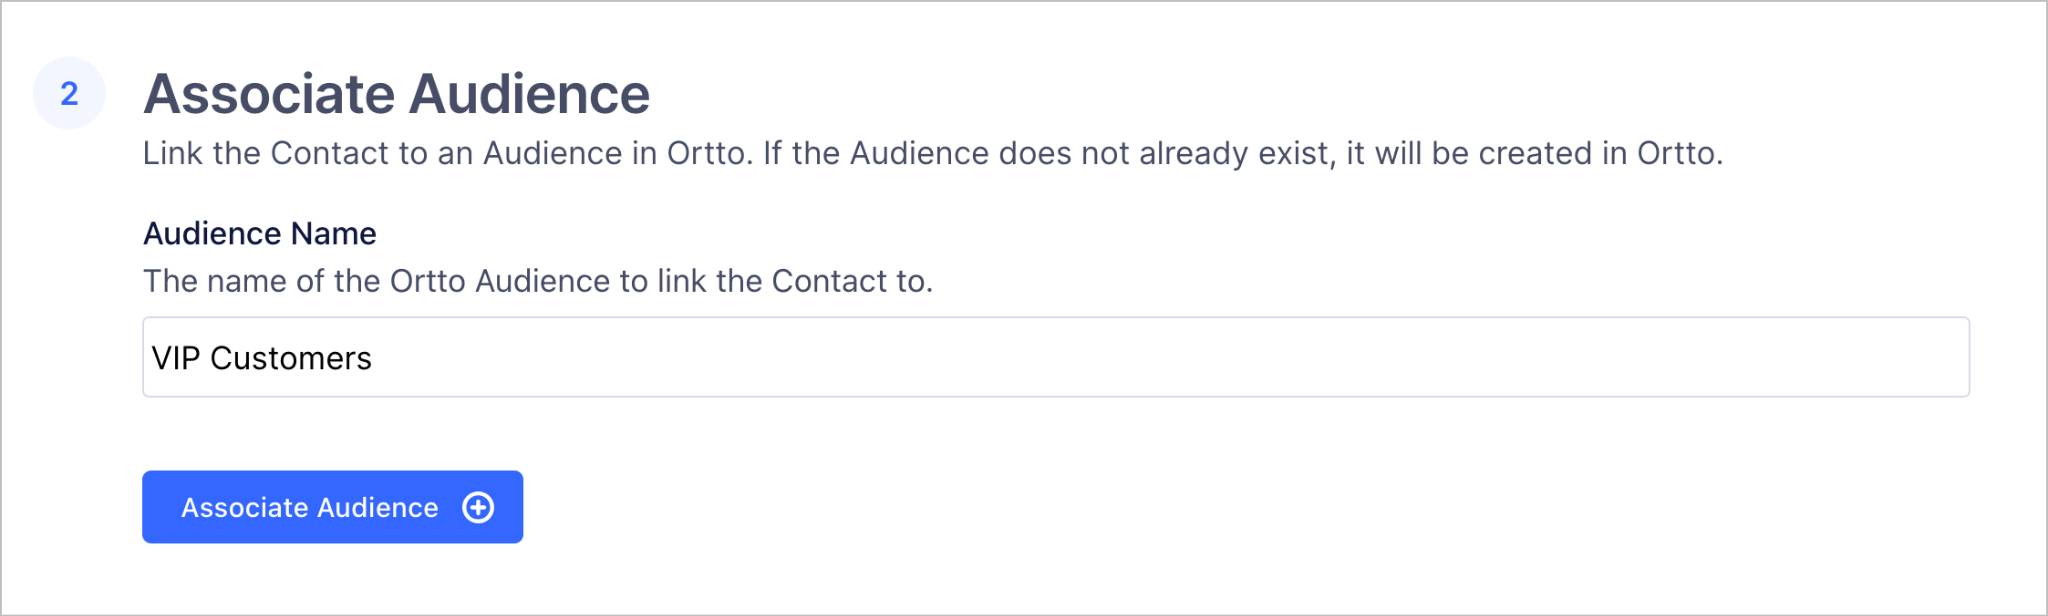
Audience association
You can optionally choose an Ortto Audience for your contacts to be synced to when setting up your mappings. To do this, enter the Audience Name in the Associate Audience section of the mapping page in Segment and click Associate Audience.
To instruct Ortto to remove contacts from the specified audience, set the Audience update mode to Remove in your Segment mapping configuration. This will ensure that any contacts matched by the action are removed from the specified audience in Ortto instead of being added.
Please note that audience names in Ortto are case-sensitive and must be unique. If you enter the name of an existing audience, contacts will be synced to that existing audience in Ortto.
Segment can only sync contacts with audiences that were originally created by Segment (Actions). It cannot interact with or update audiences that were created manually or by other integrations in Ortto.
NOTE: Ortto also includes logic to prevent rapid audience re-entry, which can happen due to asynchronous updates. If a contact exits an audience and re-enters it within 1 minute, Ortto blocks the update that would cause them to rejoin. However, Ortto performs a daily synchronization to ensure the correct final state. Contacts who rejoin more than 1 minute after exiting are processed in real time.
Rate limits
Ortto has rate limits on the number of events it can consume from Segment, based on your plan and the number of contacts.
- Upsert Profile Events: Ortto supports 10 events per included contact (and any additional contacts purchased) every 24 hours. For example:
- With 5,000 contacts: 10 x 5,000 = 50,000 identify events per day.
- With 20,000 contacts: 10 x 20,000 = 200,000 identify events per day.
- Track Activity Events: Ortto supports 5 events per included contact (and any additional contacts purchased) multiplied by the number of activities tracked, every 24 hours. For example:
- With 5,000 contacts and 5 activities: 5 x 5,000 x 5 = 250,000 track events per day.
- With 20,000 contacts and 10 activities: 5 x 20,000 x 10 = 2,000,000 track events per day.
IMPORTANT: Please note that rate limits are shared between the Segment (Actions) and classic Segment direct integrations. Data sent through either method will count toward the same usage limits in your Ortto account.
Additionally, if you choose to include contact details with Track Activity actions by providing traits, or if you update audience membership through activity tracking, both contact profile and activity usage will apply. This means a single event can count toward two separate usage categories in your Ortto plan, one for the contact update and one for the activity itself.
In addition to the limits explained above, Ortto only ingests up to 50 activities per contact per day from the activities backlog. For example, if you send 100 activities with an unknown userId, all with timestamps on the same day, and then send an identify event with the same userId, only the first 50 activities (based on timestamp order) will be associated with the contact. The remaining 50 will be discarded. Ortto processes backlog events in chronological order, starting with the oldest.
Please keep in mind that the daily limit applies only to the activity backlog. Activities associated with already known contacts are not subject to this limit and will be ingested as normal. The 50-per-day cap only affects events stored temporarily for unidentified users until they are matched to a contact.
Server response codes
Segment (Actions) supports the HTTP multi-status response code 207, which indicates that the request contained multiple events and each was processed individually. Since batching is supported, Ortto returns a detailed response payload where each entry corresponds to a specific event in the batch, explaining its processing outcome.
Below is a table that explains the possible response codes for each individual event:
Code | Description |
|---|---|
200 | Processed successfully |
206 | The This response indicates that Ortto successfully queued the activity, but failed to store the associated contact. |
400 | Invalid data received. The error message returned will include details about what went wrong, helping you identify and fix the issue in your payload. |
422 | Occurs when:
|
429 | When you exceed the rate limits explained above, Ortto will begin rejecting incoming data with a |
500 | Internal server error |
NOTE: Receiving a 422: No mappings configured response during the initial mapping process, whether for contact traits or new activities, is expected and completely normal. This simply means that no mappings have been saved yet in Ortto. Despite the response, Ortto will still store the sample data you’ve sent to help you complete the mapping setup. Once mappings are configured, future events will be processed accordingly.
Frequently asked questions
Is it possible to connect the same Segment workspace to multiple Ortto accounts?
Yes. You can connect the same Segment workspace to multiple Ortto accounts by creating separate Ortto (Actions) destinations in Segment. Each destination should be configured with the API key from the relevant Ortto account.
Can I connect more than one Segment workspace to the same Ortto account?
No. At this stage, Ortto allows only one Segment (Actions) connection per Ortto account. This limitation may change in the future, but for now, multiple Segment workspaces cannot be connected to a single Ortto account.
However, you can add multiple sources to a single Ortto (Actions) destination within the same Segment workspace. This allows you to send data from different websites, apps, or environments to the same Ortto account.
Can I use Segment (Actions) data source to send data back to Segment?
No. Segment (Actions) data source is an inbound stream, meaning Ortto receives customer data from Segment.
If you want to send event data from Ortto to Segment, you'll need to set up the Segment webhook.
If I have Segment connected to my Ortto account through a direct destination, do I need to migrate to Segment (Actions)?
No. Migrating to Segment (Actions) is not mandatory at this stage, but it is recommended. Segment (Actions) offers improved flexibility, better data control, and a more modern integration framework. If you would like to migrate now, please reach out to our support team and we’ll assist you through the process.
What happens if the data I send after mapping does not match the stored mapping?
If the data sent after mapping does not match the expected structure or data types defined in the stored mapping, Ortto will ignore any fields it cannot convert. To ensure proper processing, make sure Segment traits and event properties align with the expected data types of the mapped Ortto CDP fields and activity attributes.
You can review invalid data entries in the Logs tab of the Segment (Actions) data source in Ortto. However, keep in mind that Ortto stores only the last 500 errors. If too many invalid events are sent in a short period, relevant logs may be rotated out and no longer visible.