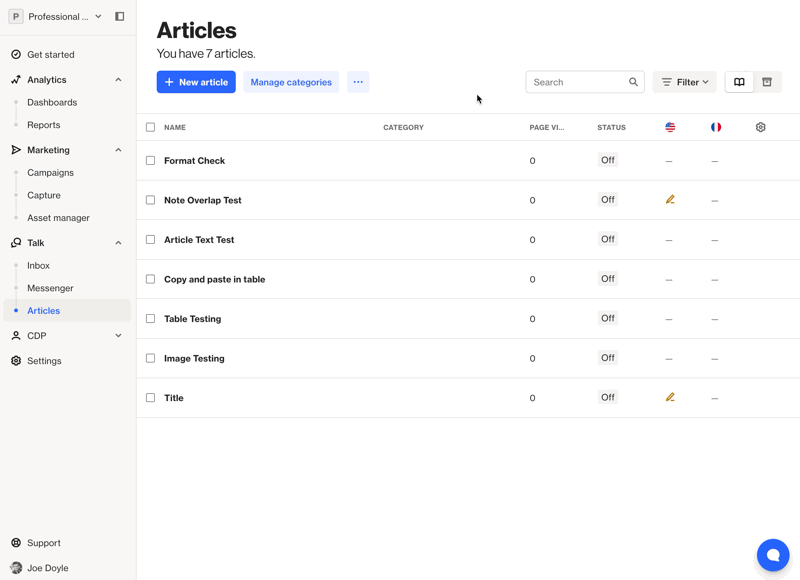
Articles
The Articles page lists all your articles, with an overview of their category, status, and any translations.
On this page you access functions to create a new article, manage categories, and view and edit existing articles.
NOTE:
- Articles not in categories can only be accessed by search or entering the specific article URL. They won’t appear in the knowledge base navigation menu.
- Only articles that are switched ON can be accessed (via navigation, search or entering the article’s URL).
- Translations (articles or categories) that aren’t published won’t be accessible from the knowledge base.
Features by Plan
Plan | Limit |
Professional | 150 Articles 25 Categories |
Business | 300 Articles 50 Categories |
Enterprise | 1000 Articles 100 Categories |
Create an article
To create a new article in your knowledge base, on the Articles page, click New article and you’ll be taken to the article editor.
The article editor is a WYSIWYG (what you see is what you get) type editor so you can easily see how your article will look when it’s published.
Learn more about creating and formatting a knowledge base article, including adding content like images and code blocks in How to create an article.
Publish an article
Once you’ve finished creating your article, click Publish changes.
When you’re ready to show the article in your knowledge base, exit the editor to return to the article view. Then switch the article ON.
Import articles
You can import existing articles hosted by a third-party data source, such as Intercom, Zendesk or Help Scout.
NOTE: To import articles from a data source, you need to have that data source connected to Ortto.
To import articles to your knowledge base:
- On the Articles page, click the … more icon > Import articles.
- You'll be taken to the knowledge base setup wizard. Make any content and style changes required then click Next.
- Select the data source you wish to import from.
- If importing from Intercom or Zendesk, you'll need to connect it as a data source before you can proceed.
- If importing from Help Scout, you don't need to connect it as a data source, but you will need to supply the Docs API Key from your Help Scout account. You can find the key in your Help Scout profile at Authentication > API Keys > Docs API.
- Click Import to proceed.
- The importer will bring your articles and categories into your Ortto knowledge base.
Once your articles and categories are imported, you can edit and manage them as needed within your knowledge base.
NOTE: For Zendesk, you need to have an Admin role to be able to import articles into Ortto.
View an article
From the Articles page, click on an article’s title to access it’s view. In the article’s view, you can see its status, translations (if enabled), key details and SEO, a preview, and a report.
Show or hide the article from your knowledge base using the ON/OFF toggle. Switching an article OFF will make it unavailable to users (it can’t be accessed via the navigation menus, search function or via URL).
To make changes to the article, click Edit to access the article editor and publish your changes.
Preview
In the article’s Preview, if you have translations enabled you can view the different language versions of the article by clicking the language drop-down menu.
Report
Click the Report tab to see the:
- Pageviews — how many times the article has been viewed.
- Conversations — shows you the number of conversations created where the customer gave a "No" response to the article feedback widget and started a conversation with an agent to resolve their issue.
- Feedback — See the Yes (green) and No (red) responses to the article's feedback widget.
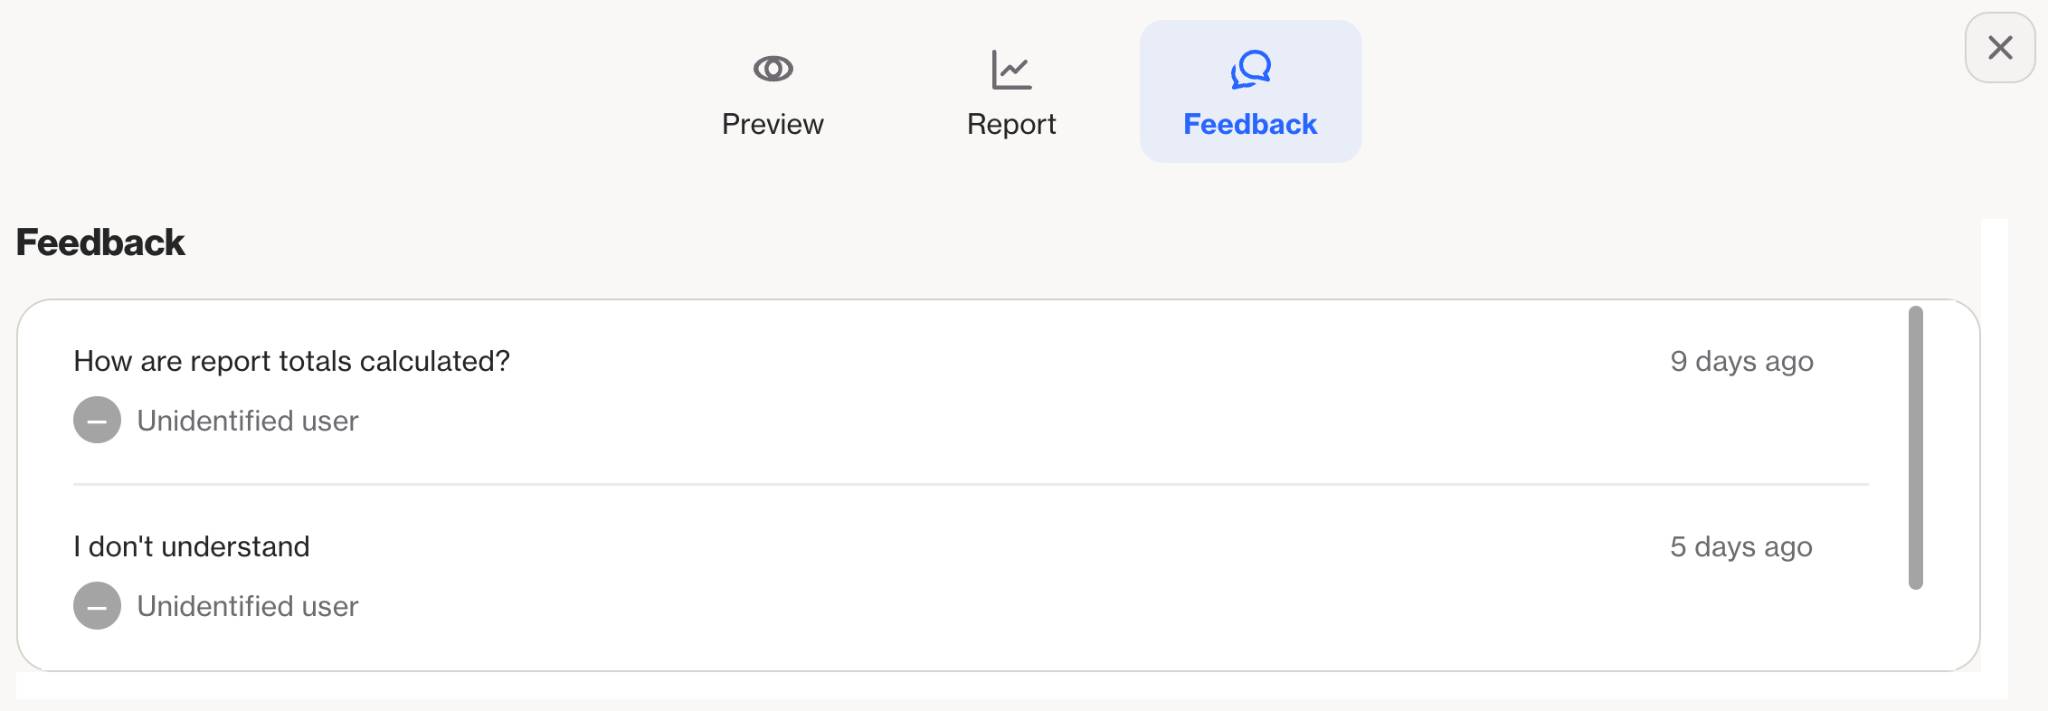
Feedback
This section is available when you have the Feedback settings (at Settings > Knowledge base > Settings) set to: Just submit the feedback.
This section will show the feedback messages that people have submitted.
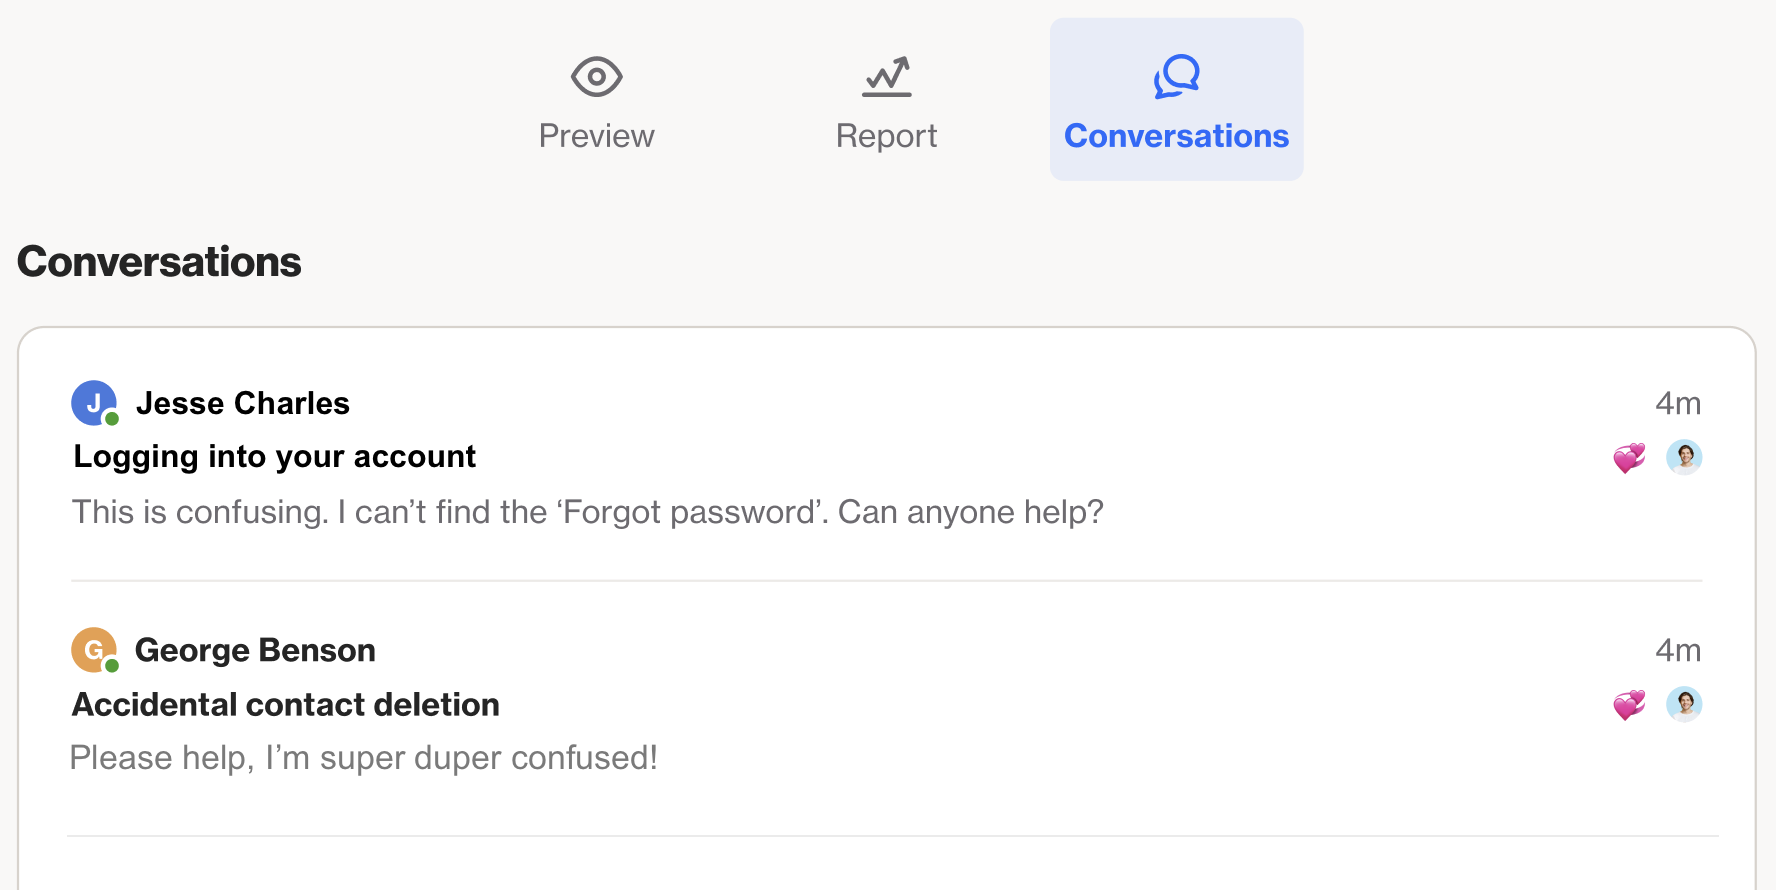
Conversations
This section is available when you have the Feedback settings (at Settings > Knowledge base > Settings) set to: Submit the feedback and create a Talk conversation.
This section will show the conversations created from feedback. You can click on a conversation to view it in the Talk inbox.
Edit an article
When viewing an article, click Edit to access the editor. Make any changes required then click Publish changes to save your edits.
Archive an article
To archive an article, follow these steps:
- While viewing the article, click the … more icon to access the archive option.
- Alternatively, if you're viewing a list of all articles, select the checkbox next to the article name and then click the Archive button.
Delete an article
Please note that you can only delete articles that have been archived. To delete an archived article:
- Navigate to the archived section and select the checkbox next to the article you wish to delete. Click Delete.
- You can also delete the article directly from its opened view.
Article SEO
The title and description you type into an article will become it’s Page title and Page description for SEO purposes.
The article’s URL will become available when the article is switched ON.
When a user reads the article in your knowledge base, the page title will be visible, however the page description will not (as it is designed to be used by search engines).
If a user performs a search via a search engine (like Google) that returns one of your knowledge base articles as a result, the page title will be shown and the page description may also be shown (but not always), so it’s important to write clear and descriptive page titles and page descriptions to help your users easily identify if an article contains the information they need.
Change an article's URL slug
An article's URL slug is the unique identifier for the page. When you publish an article, by default the URL slug has an article ID and contains the article title.
You may wish to modify the article's URL slug for SEO purposes (e.g. to add target keywords). To do so:
- On the article’s page, at SEO > URL, click the edit icon.
- Edit the URL slug as required. It should start with a letter or number, and can include “/” or “-”. However, it cannot begin with the prefixes “a-”, “c-”, or “ai-” (as these may interfere with the permanent page IDs), or end with “/”.
- Click Save changes to finish.
Once your article's URL slug has changed from the default to a custom one, any links to the original (default) article URL will still be valid (as will any links to the new (custom) slug).
IMPORTANT: If you change an article's custom URL slug more than once, any links to previous custom URL slugs will no longer be valid. However, links to the default URL will remain valid.
You have the option to reset a custom URL slug to the default slug, however this will render any links containing the custom URL slug invalid.
NOTE: If you set a custom URL slug, you can still change an article's title as it will not affect the custom slug.
Article translations
Learn more about article translations under Knowledge base translations.
Article feedback and connecting to Talk agents
When your article is published it will automatically have a feedback widget added at the bottom of the page. This lets your customer tell you whether or not the article resolved their issue.
If a customer clicks Yes, this feedback will be recorded against the relevant article. You can view the "Yes" responses when you view the article in Ortto, at the Report tab (under Feedback).
If a customer clicks No on the feedback widget, it will record the response and will give the person the opportunity to describe and submit their issue. When a customer clicks Submit this will, depending on your chosen settings:
- Start a conversation with a support agent to resolve it. The agent will be able to view both the feedback message and a link to the article in question. These conversations and the feedback message can be found when you view the article in Ortto, at the Conversations tab.
- Simply submit the feedback, which will be recorded against the relevant article. You can view them when you view the article in Ortto, at the Feedback tab.
NOTE: To enable starting a conversation when a customer submits feedback, you need to have Talk enabled, which includes having the Talk messenger widget displayed on the page that hosts your knowledge base.