
Email prevention limit
Overview
This setting controls how often subscribers receive emails, helping to prevent overload and reduce the risk of unsubscribing.
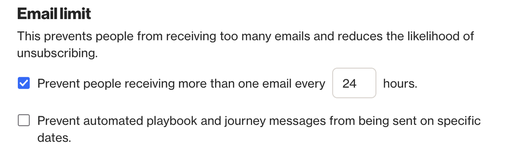
By default, subscribers can receive a maximum of one email every 16 hours.
Identify if an email prevention limit was reached
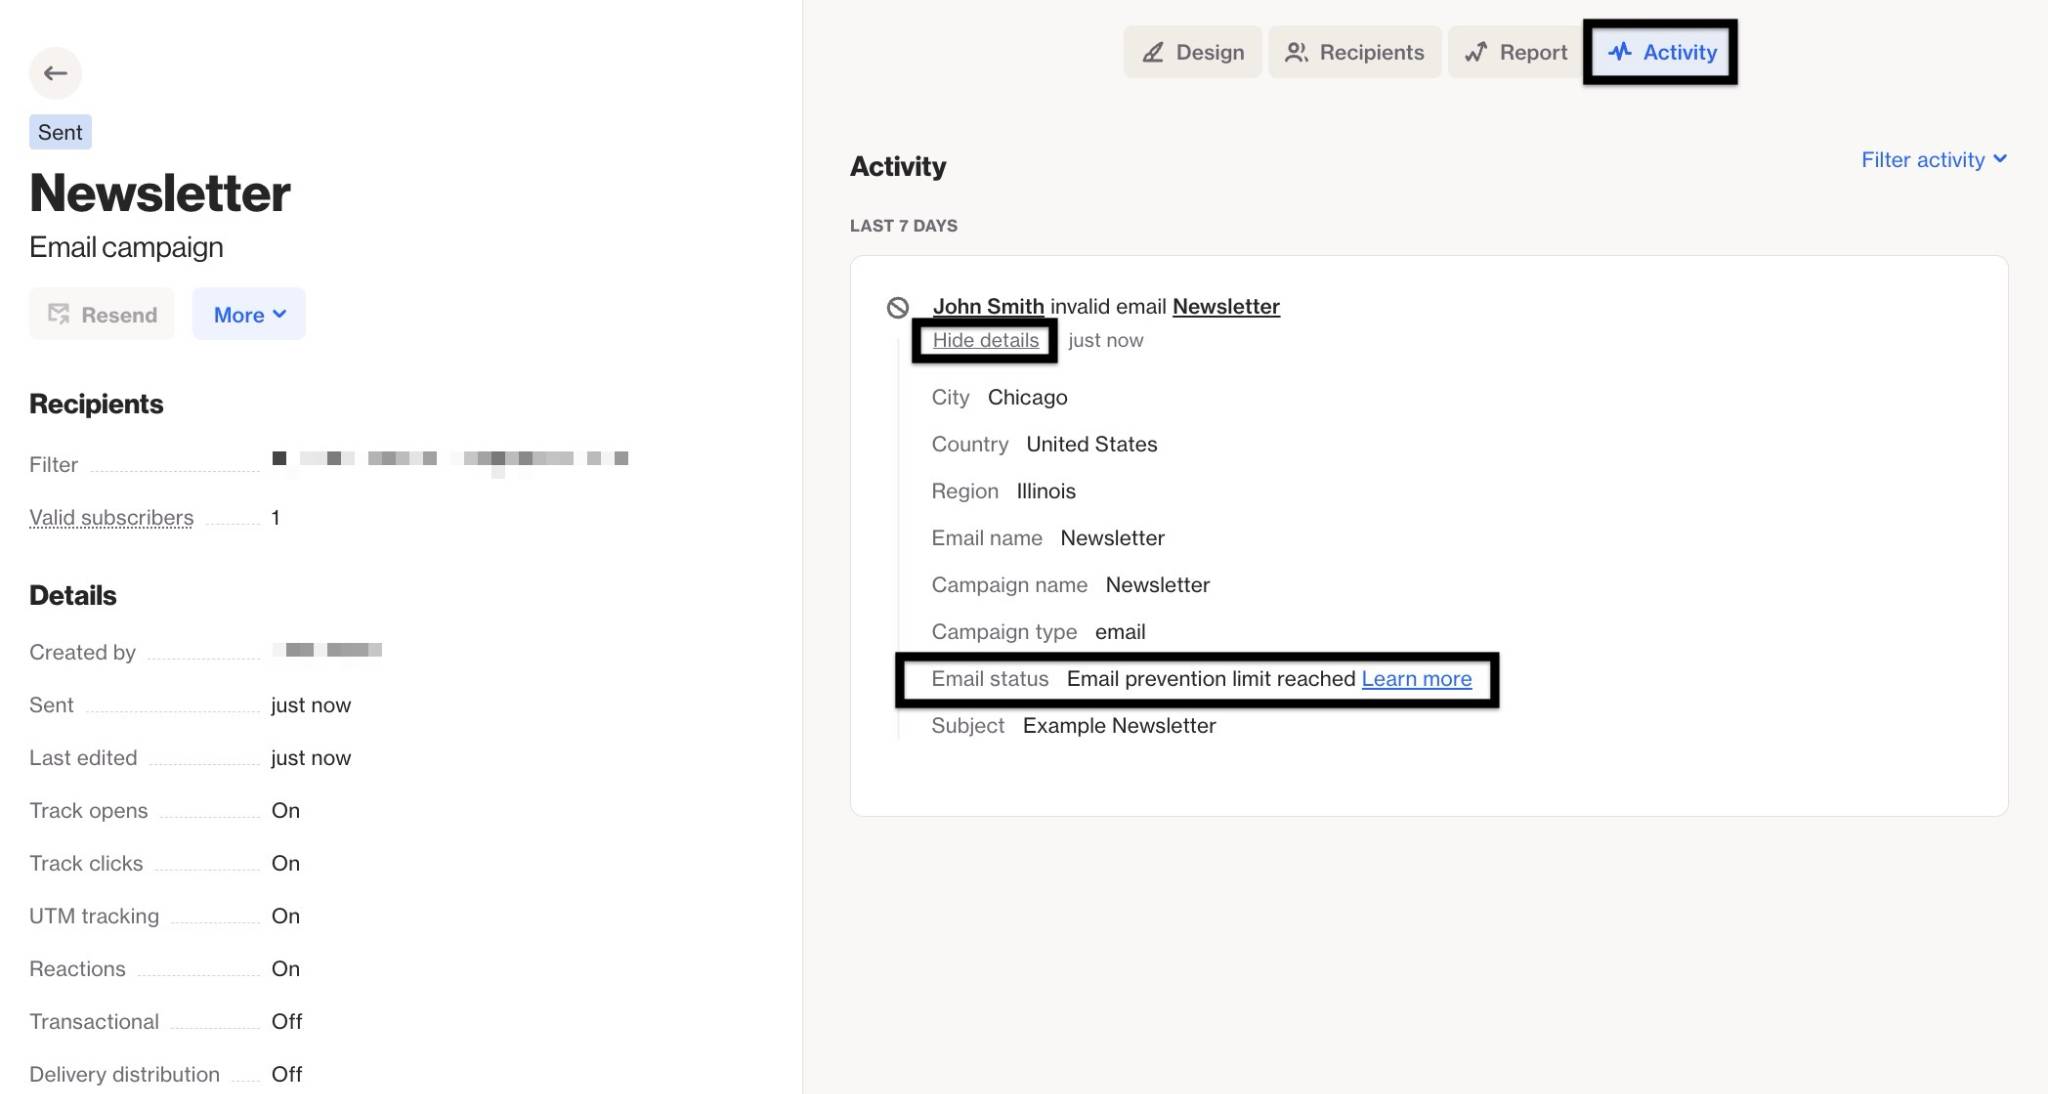
You can identify if the email prevention limit impacted the email sent for a contact by the Invalid Email activity that is shown on the campaign's activity feed as well as the contact's activity feed.
Activity feeds
Clicking the Show Details option for the activity will expand the attribute information for that activity. The Email status attribute will display Email prevention limit reached if this setting impacted the delivery attempt.
Reporting
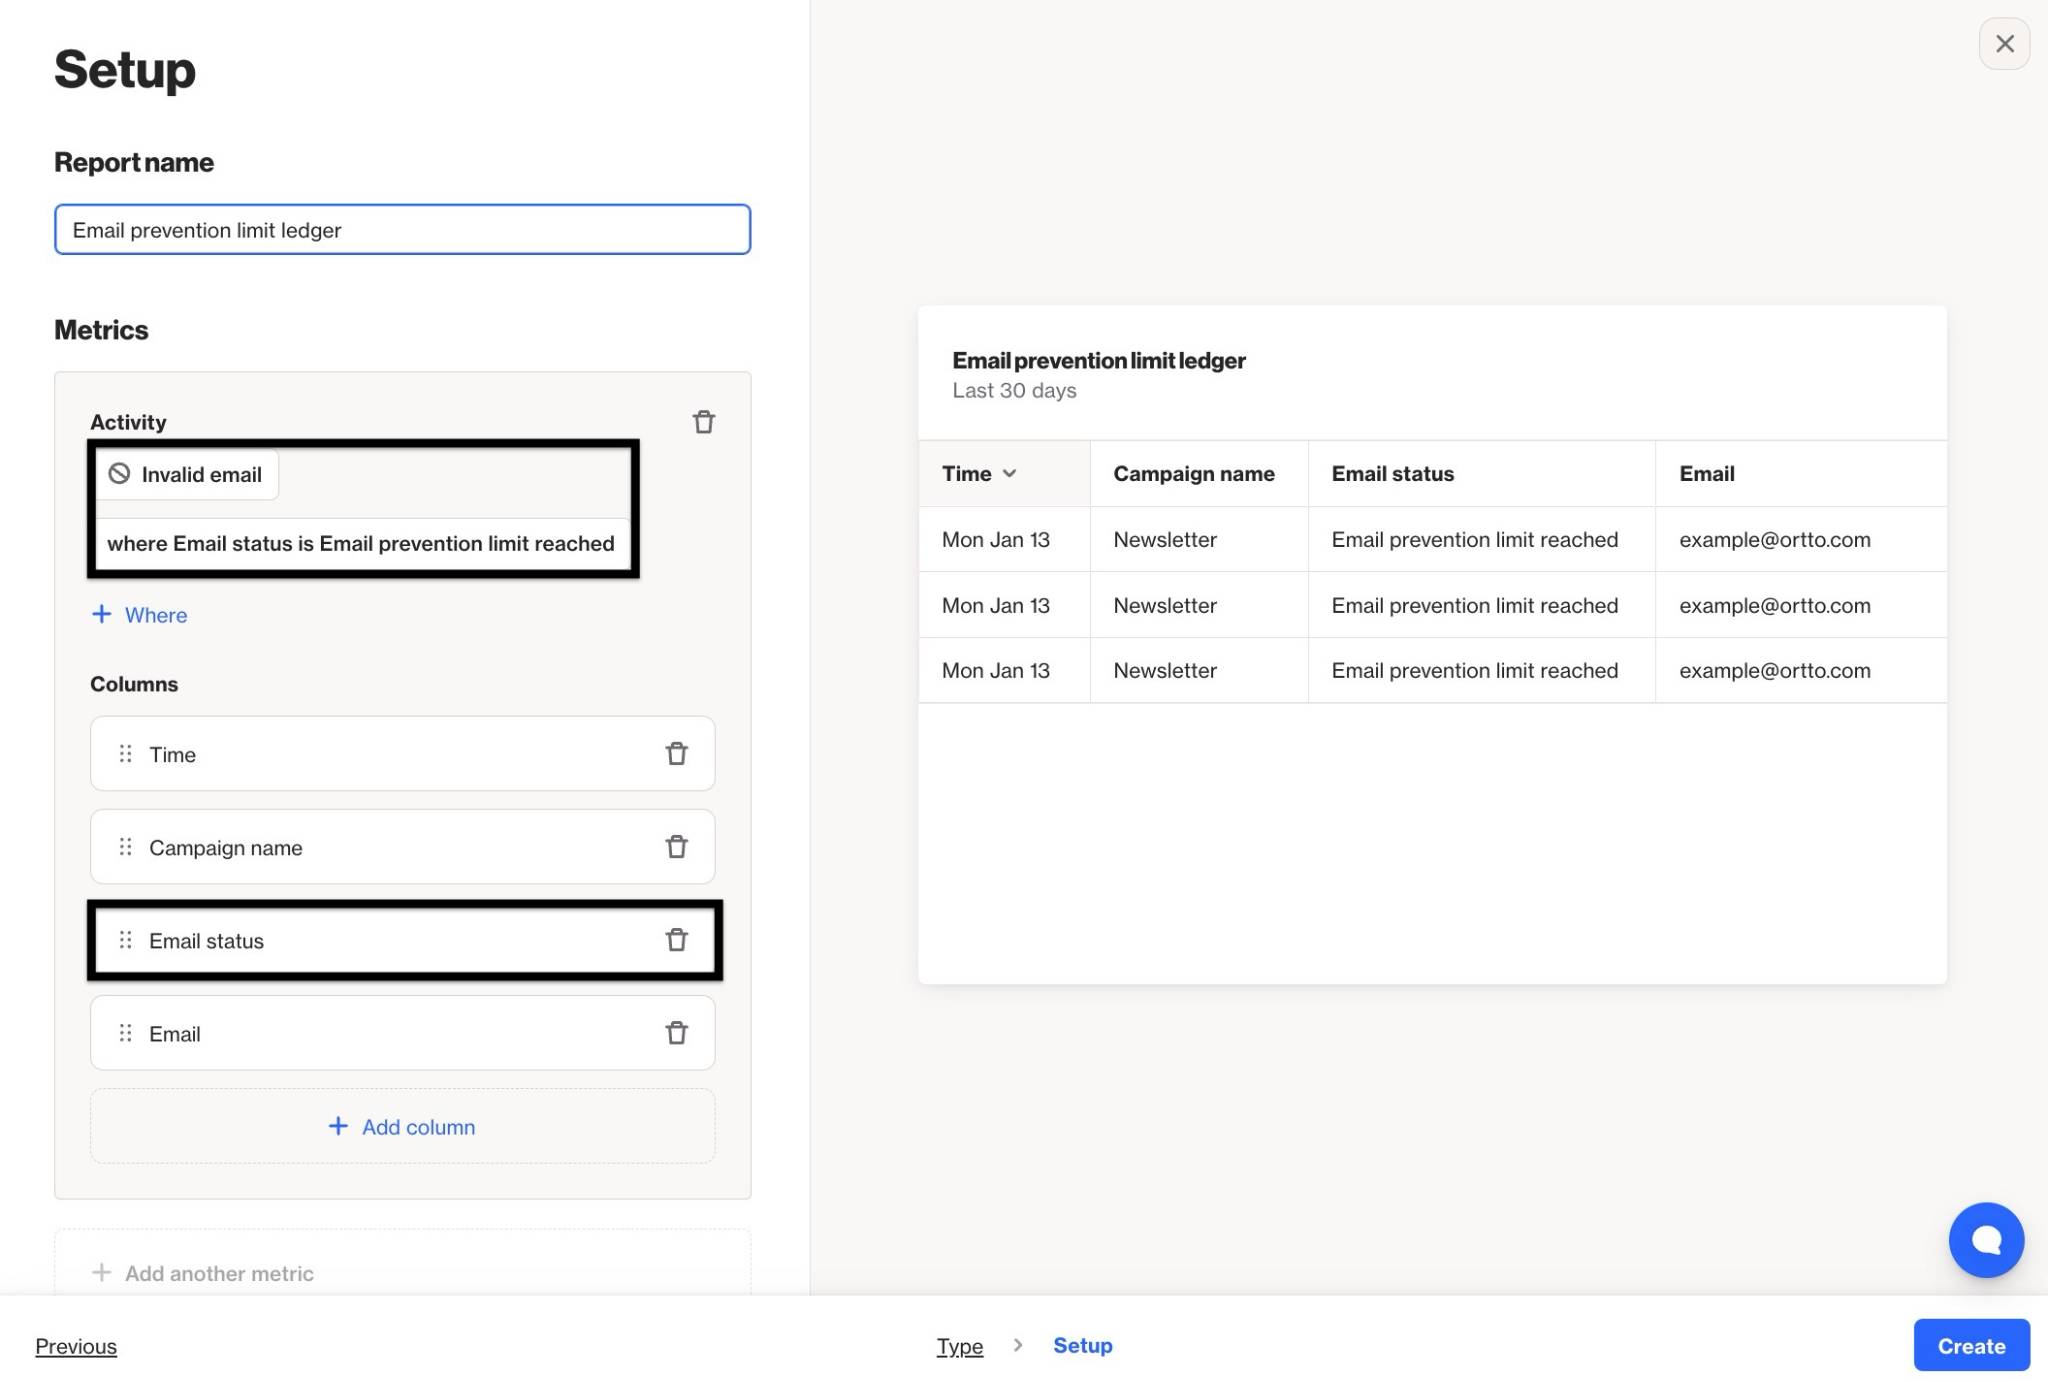
You can also create a ledger report for the Invalid Email activity, and use a condition for the Email Status attribute to isolate the contacts who have the Email Prevention limit reached status. Including the Email Status attribute in the report will display a breakdown of the impacted sends:
Accessing email prevention limit
To access the email prevention limit setting, go to Settings > Channels > Email > Email > Email limit.
What happens when the limit is reached?
When a subscriber reaches their email limit, here's what you can expect based on the campaign type:
Email campaign or Playbook: If a subscriber has already received an email within the limit window, we’ll automatically skip sending them the email. This will be noted in both the subscriber's activity log and the campaign report.
NOTE: For single-send emails and playbooks, if the limit is exceeded, the email will not be sent, even after the time limit has passed.
Journey campaign: If a subscriber hits their email limit while in a journey, they will stay at the email step until the limit resets (e.g., one email every 16 hours). Once the time has passed, the email will be sent as planned.
TIP:
- If you need to send an email immediately, you can turn off the email limit.
- Be cautious: this could lead to spamming contacts, increasing your spam rate and negatively impacting your email deliverability in the future.
NOTE: Some contacts may still wait to receive emails even after the limit is turned off, due to other campaign-specific rules that may apply.
How to resend a single-send email to ineligible contacts
If you want these contacts to receive the email they were previously ineligible for, you have two options. Duplicating the email or resending the original email.
Duplicating the email
- Duplicate the original email.
- Go to the Recipients tab and select Filter.
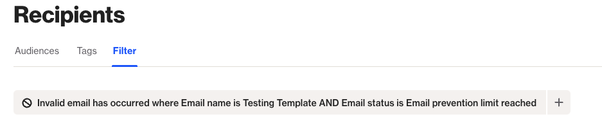
- Create a filter with these settings:
- Invalid email has occurred where Email name is [INSERT EMAIL NAME] AND Email status is Email prevention limit reached.
- Don’t forget to insert the name of the original email.
NOTE:
- You need to wait the designated time (e.g., 16 hours) from the contact/s last sent email activity before you can resend the email.
- Otherwise, they will receive another Invalid activity for email prevention limit reached notification on their contact profile if the email is sent before the designated time has passed.
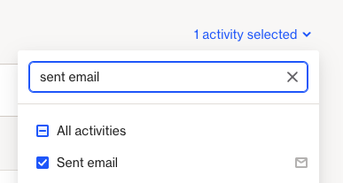
- To view the last email sent to a contact/s, go to their profile and filter for sent email activity.
- Click on X hours ago under the activity to see the exact time of the last email sent.
- We recommend checking the email limit setting first before proceeding to ensure you know the appropriate time to resend the email.
Resending the original email
After 24 hours (for up to 30 days), you can resend the email to contacts who didn’t open it and who received an invalid activity due to hitting the email prevention limit.
NOTE: If you prefer not to send it to those contacts who did not open the email, use the option to duplicate the email instead.
- Open the Original email.
- Hit Resend.
- Resend is only available if you did not select Open rate optimization in the initial email campaign setup.
- An email can only be resent once. Once the resend has been used, the Resend button will disappear.
- If you click Resend, you will be able to schedule the send. If you cancel a scheduled resend, you will still have the option to use the resend feature for as long as it is available.
- If a resend is scheduled because you selected Open rate optimization in the initial campaign setup, you can cancel the resend. If you cancel the resend, you can manually resend using the Resend button 24 hours after the initial send.
- Once the Resend button is clicked, you will have the option to use the original subject line or create a new subject line.
How do I stop sending email on specific dates?
To stop sending emails on specific dates for playbooks and journey messages, any scheduled emails will be sent at the next available time, based on other limits.
EX: If you choose to stop sending on December 25th (Christmas Day), those emails will be sent the next day at 12:00 AM (midnight on December 26th). If a contact received an email on December 24th at 2:00 PM and you have an email limit of 1 per 48 hours, any emails scheduled for December 25th will be sent 48 hours after the last email, meaning the next email would go out on December 26th at 2:00 PM.
To prevent playbooks and journey emails from being sent on specific dates:
- Navigate to Settings > Channels > Email > Email.
- Find Email limit.
- Tick Prevent automated playbook and journey messages from being sent on specific dates.
- Click Add a date and select the relevant date. You can add more dates as needed.
- Click Save to confirm.
Can I override this setting in certain circumstances?
You can override email limits by marking an email message as transactional. This feature is intended for messages directly tied to actions, like sending a customer an order confirmation immediately after a purchase in your store.
NOTE: Transactional emails are only available on certain Ortto plans.
To mark an email as Transactional:
Single-send email
- Navigate to the Email.
- Select the Setup tab.
- Underneath Transactional email > tick This email is transactional.
- Type in the Purpose of the transactional email.
- This disclaimer will be injected in to the email footer as subscribers cannot unsubscribe from transactional emails.
Journeys
- Navigate to the Journey.
- Select Messages.
- Locate the Email you want to mark as transactional.
- Select the (…) then select Edit.
- Underneath Transactional email > tick This email is transactional.
- Type in the Purpose of the transactional email.
- This disclaimer will be injected in to the email footer as subscribers cannot unsubscribe from transactional emails.
Playbooks
- Navigate to the Playbook.
- Select Messages.
- Locate the Email you want to mark as transactional.
- Select the (…) then select Edit.
- Underneath People can receive this message > select Edit.
- Tick This email is transactional.
- Type in the Purpose of the transactional email.
- This disclaimer will be injected in to the email footer as subscribers cannot unsubscribe from transactional emails.
TIP: Alternatively, you can send transactional email via Ortto's API.
NOTE: Sending transactional emails requires approval from Ortto beforehand and should only be used for genuine transactional purposes. These emails will be sent regardless of a person’s subscription status, including if they are unsubscribed.
Learn more about transactional emails.