
Talk Translations
Overview
When additional languages are enabled in General settings, you can configure translations for your Talk widget. This article explains how to set up translations and what to expect when the feature is enabled.
How to enable translations in Talk
To enable translations in Talk, follow these steps:
- Navigate to Settings.
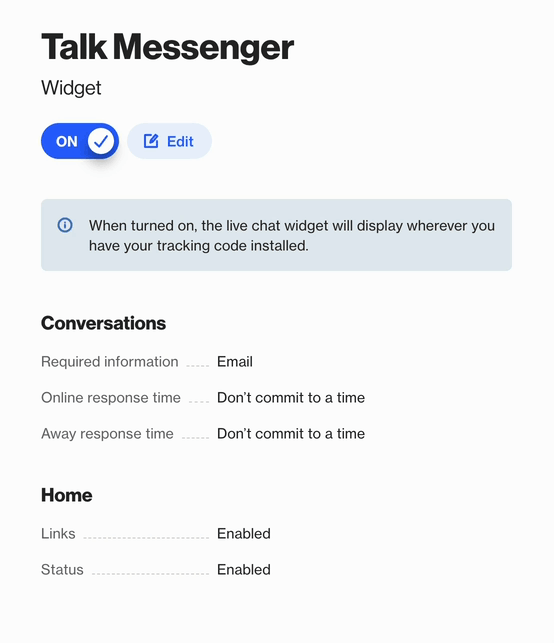
- Select Talk Messenger.
- Click on the Edit button.
- Navigate to the Translations tab.
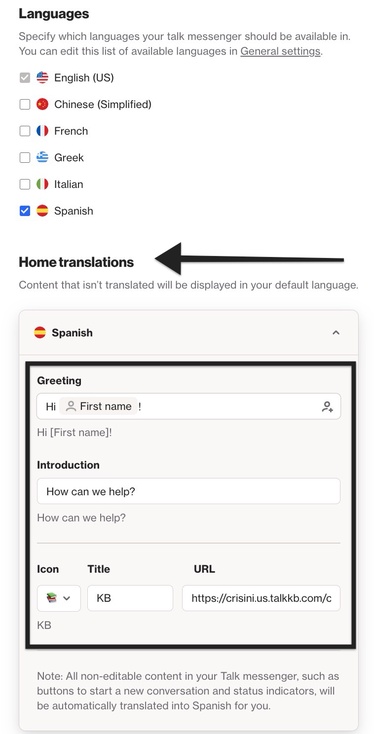
- Select the language(s) you want to enable for your Talk widget.
IMPORTANT: If the language you want is not listed in the Talk Language settings, first enable it on the General settings page. Talk translations only support languages available in Ortto.
Home translations
When translations are enabled for your Talk widget, content that is not translated will be displayed in your default language.
This includes the Greeting, Introduction, and any Quick links enabled of the home page of the widget.
To manually translate these sections select the language under the Home translations section. From here, you can input text to manually translate content that appears under the greeting, introduction and quick links areas.
Automatic language detection
Users have two language detection options:
- Always use latest browser settings for language preferences.
- Don't automatically update language preferences using browser settings.
Learn more about automatic language detection.
How does this improve the customer experience?
Customers will see the Talk widget displayed in their preferred language, as long as the language is supported in Ortto. They can also change the language directly within the Talk widget at any time.
Talk notification emails
Talk Email handoffs will likewise be sent in the customer’s preferred language, as long as the customer is known and their language is supported.
TIP: Only the static content of the email is translated. The conversation itself is not automatically translated and will remain in its original language.