
How to use forms on landing pages
This feature is currently in its beta phase. If you have any feedback, questions, or issues, please contact our support team.
Overview
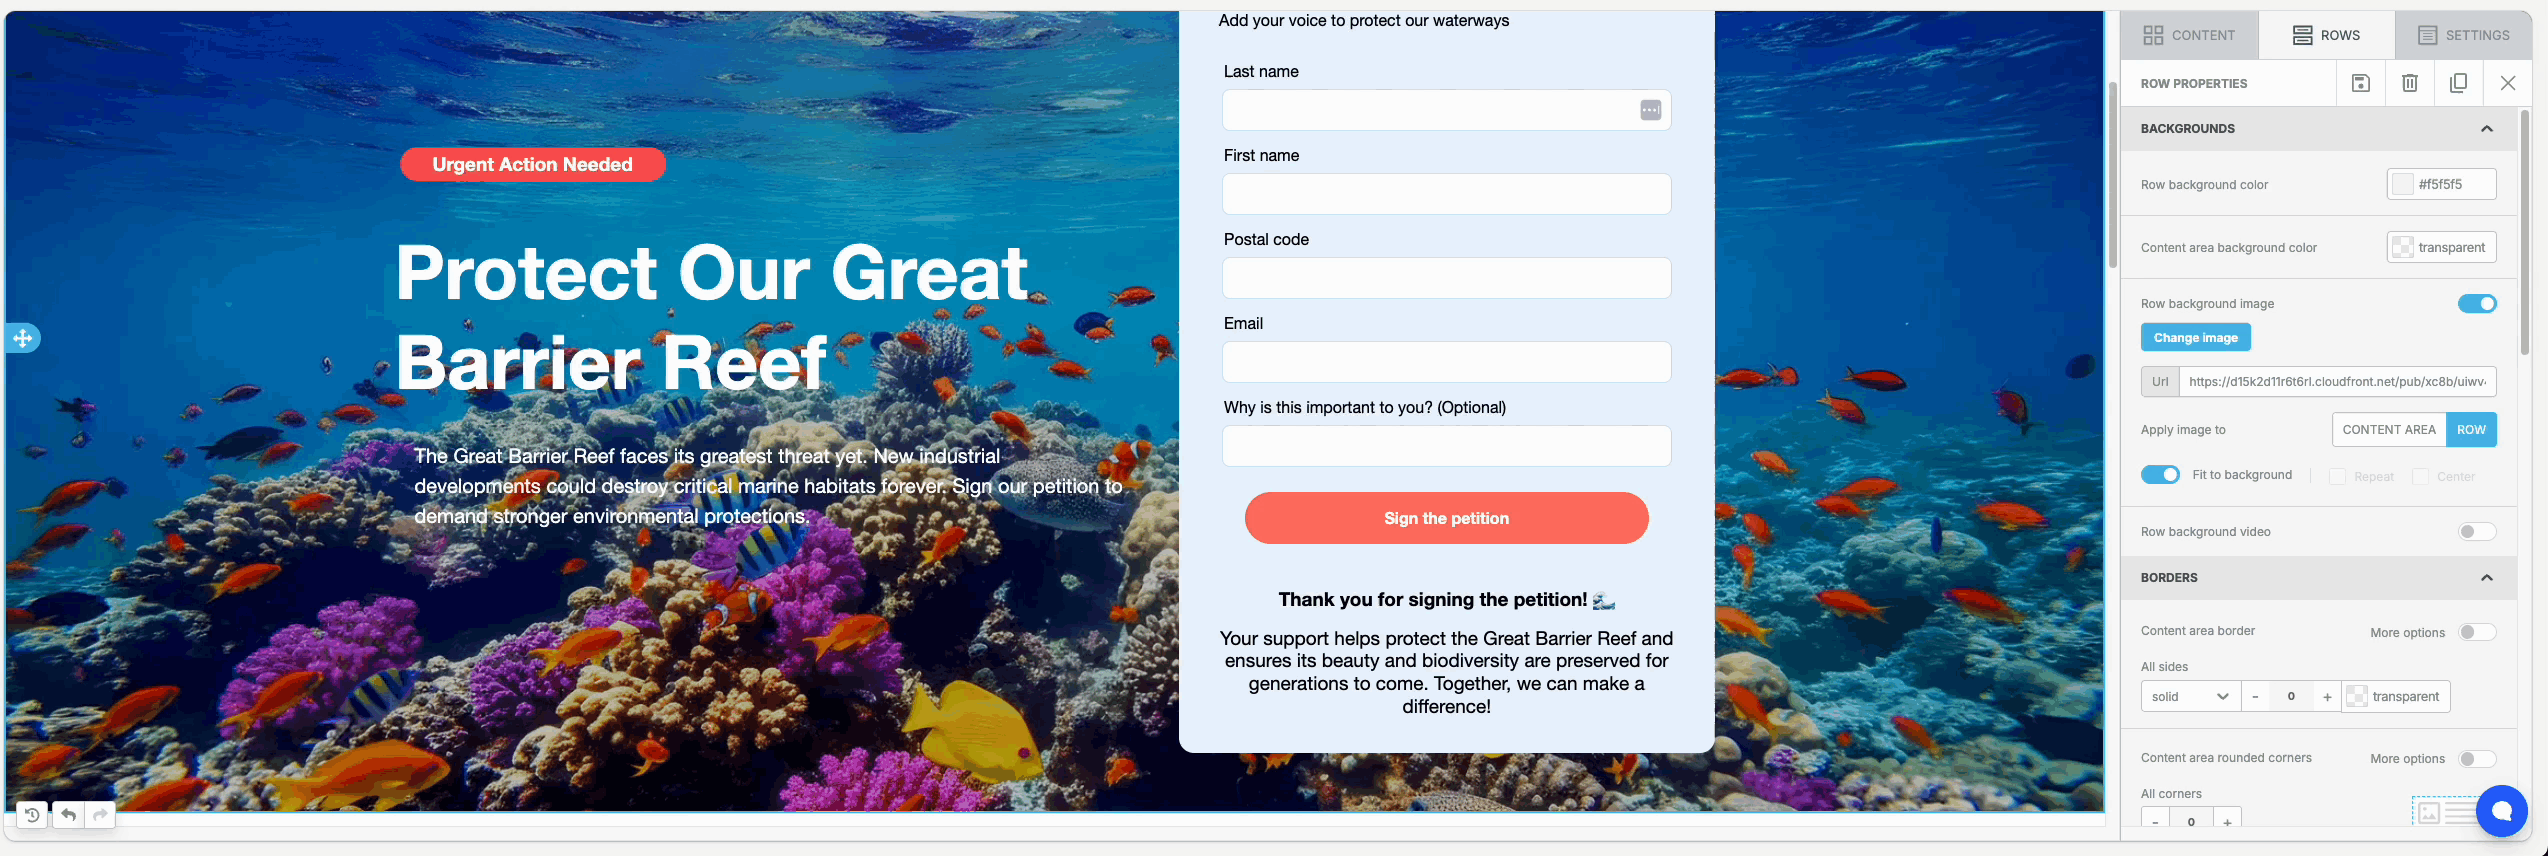
Forms are a great way to collect details from visitors to your landing page, so you can store their information in your Ortto account and communicate with them. Ortto provides its own form component that’s easy to use. Learn more in this article about how to set it up.
Adding and configuring a form
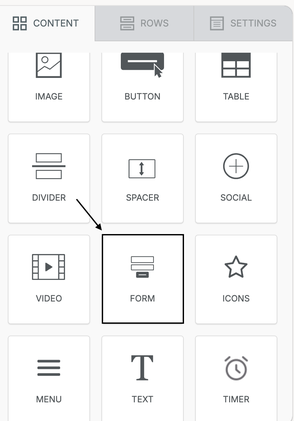
- To add a form to your landing page, drag the Form component to the position where you’d like it to appear. You can find it in the right-side menu among the other components:
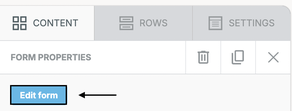
2. Click the Form you just added, then select Edit Form to start adding fields:
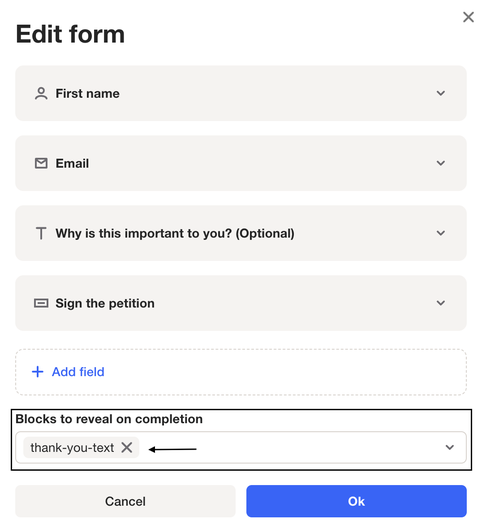
3. On the next screen, you can add fields to your form by clicking the + Add Field button.
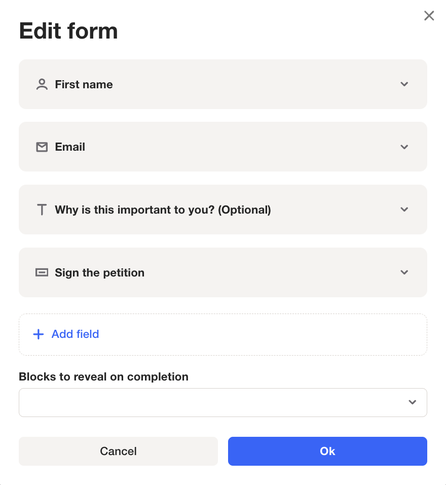
You can select existing fields from your CDP or create new fields directly from this modal.
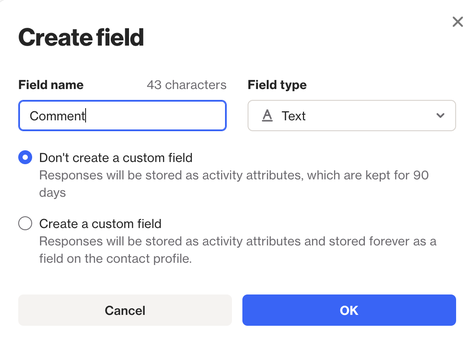
NOTE: If you click + Create new (to create a new field), you can choose not to create a custom field (first option below). In that case, responses will be stored as an attribute within the form submission activity, which is kept for 90 days by default. If you want to store the response indefinitely, create it as a custom field (second option below), so it’s saved directly in the contact profile.
The fields will be displayed in the same order as shown in this modal, but you can reorder them by dragging and dropping them into the desired positions.
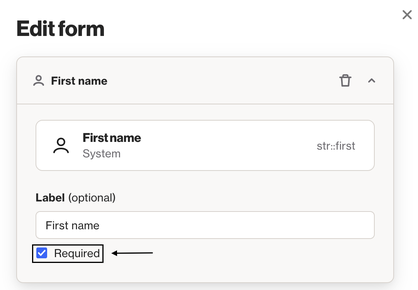
You can also choose whether a field is required by marking the Required checkbox:
Once all fields are added, click Ok to save your changes. Next, you may want to configure what happens when someone submits the form (i.e., the “thank you” flow). See the section below for instructions on how to do this.
NOTE: The form must include at least one unique identifier field (e.g., Email, Phone, or the designated unique identifier from the account settings).
Learn more about unique identifiers.
Configuring the 'thank you' flow
By default, once a form is submitted successfully, we’ll display a toast notification with the message Form submitted successfully!

However, you can choose to display a specific block (e.g. a custom text) after the form is submitted. Follow the steps below to configure this.
- First, create the text or visual element (e.g., image or video) that should appear when the form is submitted. This should be done in the same section where the form is embedded.
- Once that’s done, click the block you just created and enable the Block Identifier option. In this field, enter a unique ID, for example, in this case,
thank-you-text.
Note: The format of your ID must follow the following rules or this feature won't work:
ID tokens must begin with a letter ([A-Za-z]) and may be followed by any number of letters, digits ([0-9]), hyphens ("-"), underscores ("_"), colons (":"), and periods (".").
3. Next, click the form on your landing page and select Edit Form. In the modal, use the Blocks to reveal on completion dropdown to select the unique ID you just created for the section you want to appear. Then click Ok to save.
All set! Once the form is submitted, the block you associated with it will appear automatically.
TIP: Enabling the block identifier hides the block on the live page automatically, making it appear only after the form is submitted.