
Creating a landing page
This feature is currently in its beta phase. If you have any feedback, questions, or issues, please contact our support team.
Overview
Landing pages are a simple and effective way to capture your audience’s attention, promote offers, or drive specific actions. With Ortto, you can easily create and customize landing pages using built-in components like text, images, and forms. Learn more in this article about how to set up and publish your landing pages.
Creating a new landing page
To create a new landing page, navigate to Marketing > Landing pages > New landing page.
Landing pages setup
This section describes each successive page of the landing page creation process.
Template
On the Template page, choose a template that suits your needs. If none fit, select Start from scratch.
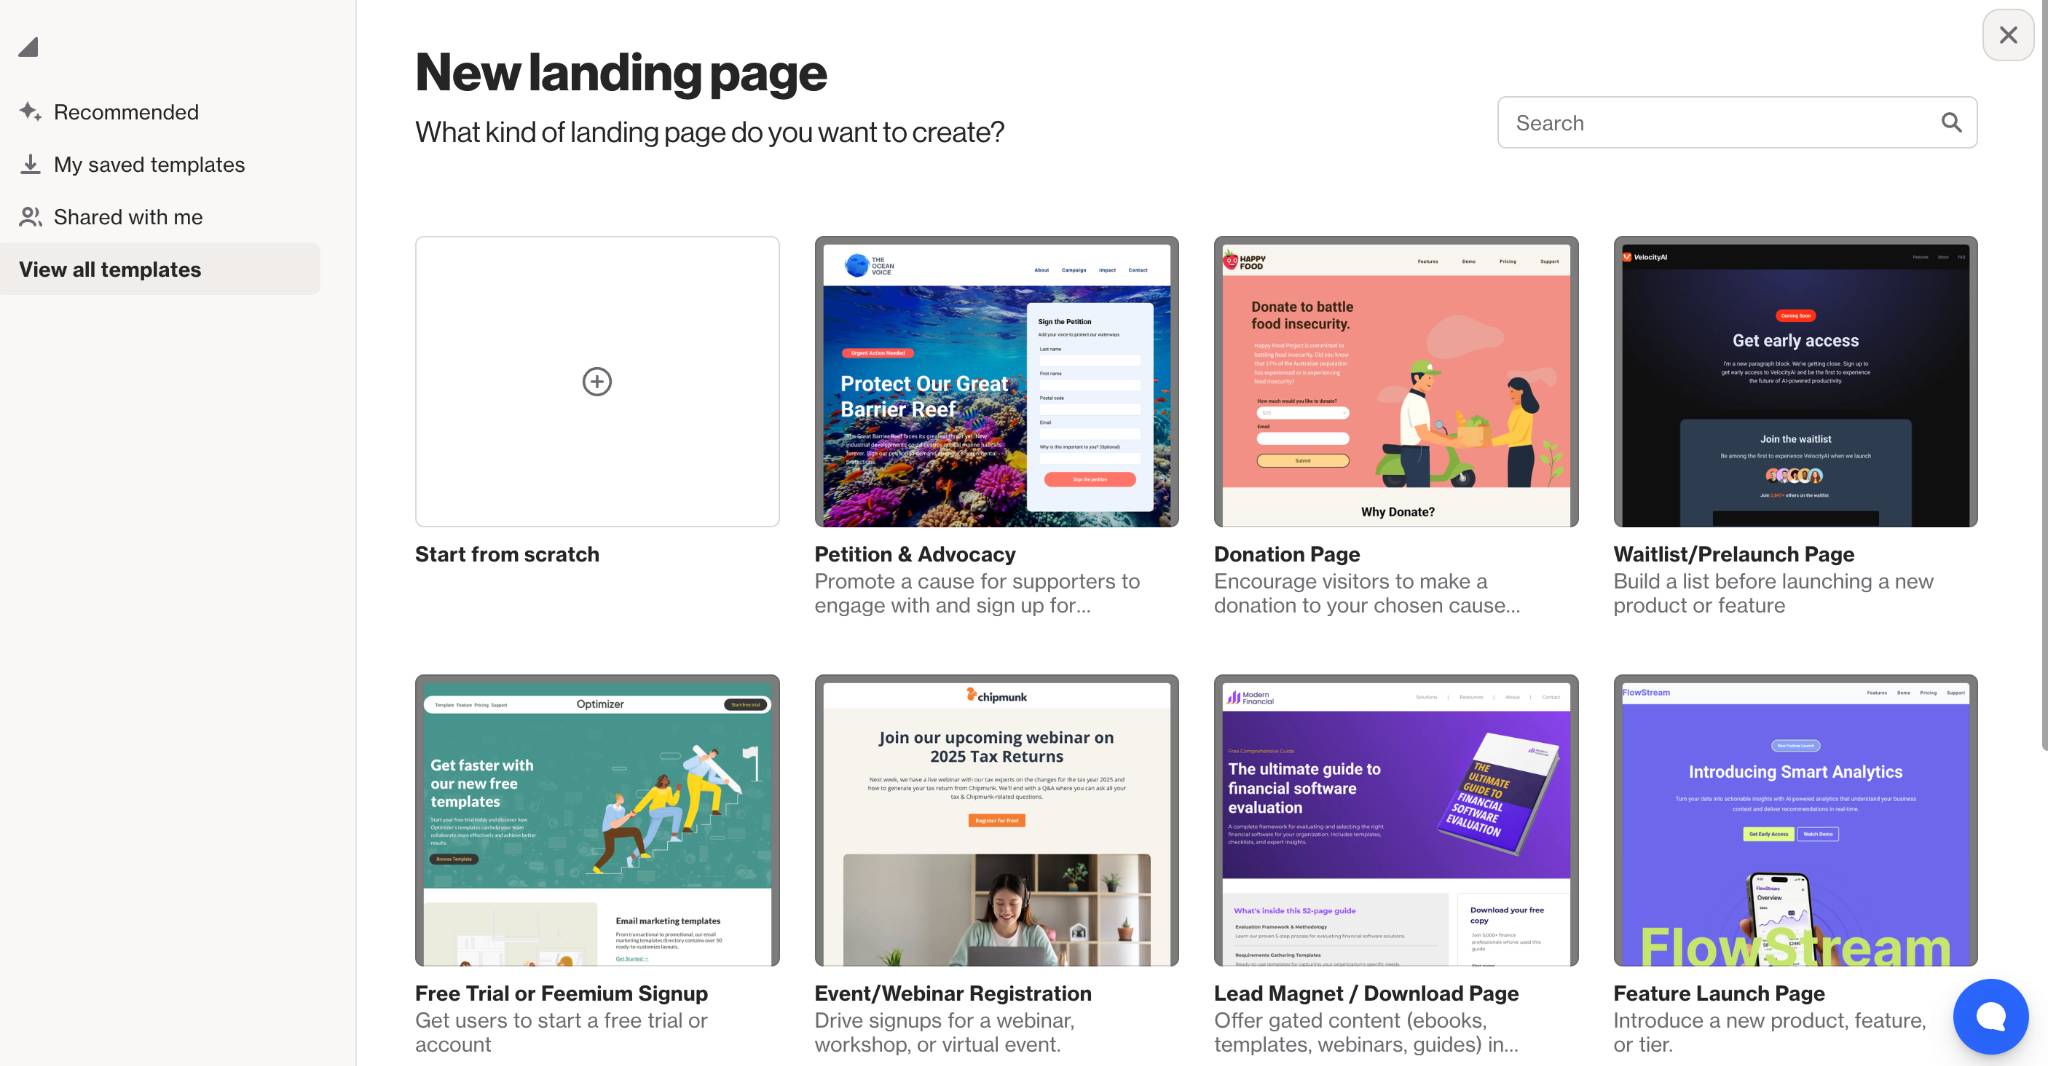
You can also access:
- My saved templates.
- Shared with me (templates shared from other Ortto accounts).
Brandbook settings:
You can apply your brand book settings by checking Apply brand book styling and click Use template to get started.

Learn more about the brand book feature.
SEO
The SEO fields help search engines understand and rank your landing page. By providing a descriptive page title and summary, you make it easier for potential visitors to find your page in search results and understand what it’s about before they click.
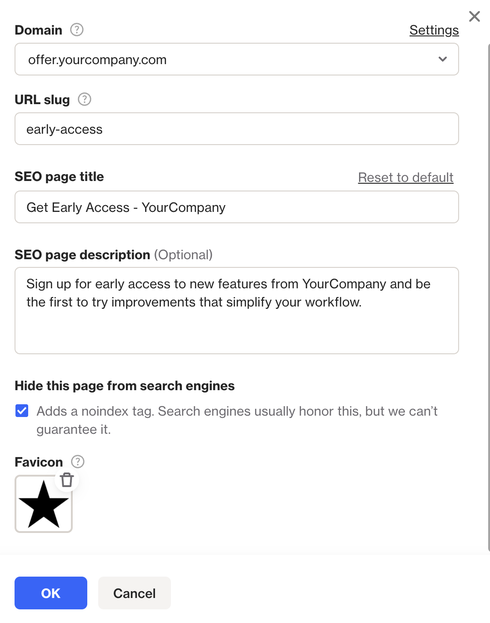
- Domain: The web address where your landing page is hosted (e.g.,
yourcompany.com). - URL slug: The customizable part of the URL that comes after the domain (e.g.,
yourcompany.com/early-access). - SEO Page title: Add a descriptive title. This appears on the browser tab and helps search engines understand your page.
- SEO Page description: Add a summary of your page for search engines. It won’t appear on the page itself but helps users know what your page is about in search results.
- Hide this page from search engines: When this option is ticked, it instructs search engines (e.g., Google) not to index your page.
- Favicon: Upload a small icon that appears in the browser tab and bookmarks. The file size must be 1 MB or smaller, with minimum dimensions of 16×16 pixels.
NOTE: To use your own domain, first connect it to your Ortto account. Once your custom domain is set up, you’ll be able to create a subdomain to host your landing pages.
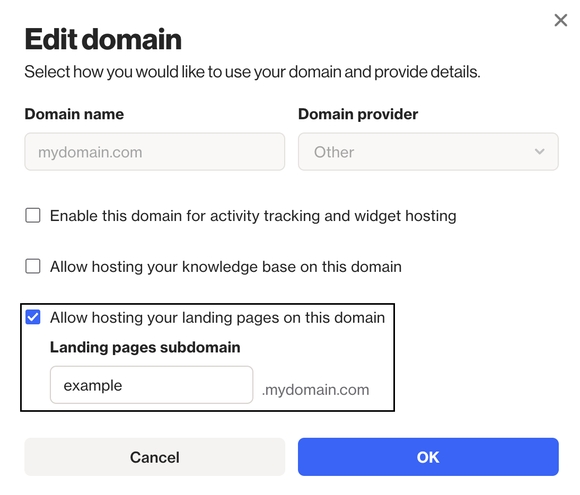
Learn more about how to set up a custom domain.
While we highly recommend using a custom domain, you can still host your landing pages on our default domain if you don’t set one up.
Tracking
Decide if you want to enable tracking of link clicks within your landing page, whether UTM parameters should automatically be added to all links, and whether you want to automatically add any UTM fields that exist in the URL when a customer arrives on the landing page to your links.

Link tracking
By enabling link tracking, Ortto will register an activity for every time a link on your page is clicked. This enables you to report on the impact of your page and attribute conversions against it.
Enabling link tracking does not change the domain of your urls, and instead uses Javascript to detect a link click.
Automatic UTM parameters
Enable this setting to automatically have standard UTM parameters added to all links. You may choose to override these values for specific links if desired. The automatic parameters added are:
- utm_source = ortto
- utm_medium = landing_page
- utm_campaign = (Your Landing page title, converted to lowercase, with spaces replaced by underscores
_)
Pass through UTM parameters
Choose this setting if you want the UTM parameters added to your links to be populated with the UTM parameters available in the URL (if any) when the landing page is loaded. This enables the initial UTM values that led to the customer arriving at your landing page to be passed through by the landing page to your final destination.
Attribution
Attribution helps you track which landing pages drive conversions. In this section, you can set the activity that will count as a conversion for the landing page.
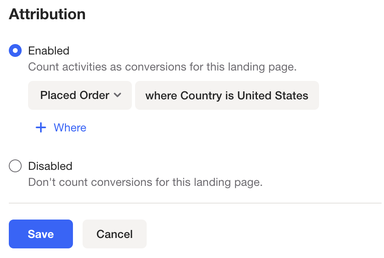
To set the touch trigger for landing pages, go to Settings > Attribution. By default, it’s set to Shown, but you can change it to Engaged.
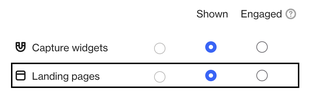
- Shown: Counts a touch when a contact visits the landing page and then completes the attribution activity within the attribution window.
- Engaged: Counts a touch when a contact interacts with the landing page (e.g., clicks a button or submits a form) and then completes the attribution activity within the attribution window.
Learn more about attribution and touch triggers.
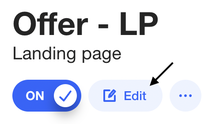
Content
Click the Edit button to start customizing your landing page. You can design it easily using our drag-and-drop builder, which works very similarly to our email editor.
Forms
Use forms on your landing pages to collect contact details, such as email and any additional fields you want. You can also control what happens after the form is submitted and configure a Thank you flow using customisable block identifiers.
Learn more about how to use forms on landing pages.
Rate limits
Landing pages have rate limits to prevent excessive activity. These limits apply separately for clicks, page views, and form submissions:
Clicks
Limits:
- 1 click per landing page, per contact, per link every 15 minutes.
Page Views
Limits:
- 1 view per landing page, per contact every 15 minutes.
- Up to 15 views per landing page, per contact in 24 hours.
Form Submissions
Limits:
- Up to 5 submissions per landing page, per form ID every 10 minutes.
- Up to 30 submissions per landing page, per form ID in 24 hours.
These limits help maintain system stability and prevent abuse of landing page features.