
Roles
Overview
Discover how custom roles can be tailored to meet your organization's specific needs. Define precise permissions that align with various user roles and responsibilities.
NOTE: The ability to create custom roles is dependent on your Ortto plan.
Accessing roles
To access the roles page, go to Settings > User management > Roles.
Managing roles
The roles page allows users to:
Role features
To re-order custom roles, click the re-order icon and drag the role to the position you want.
Create roles
Admin users have the ability to create custom roles in addition to the default ones. Follow these steps to create a new role:
- Navigate to Roles.
- Select New role.
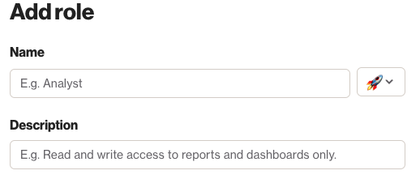
- Here you can set a Name, role description and choose an icon.
4. Under Permissions, select the checkboxes for each Ortto feature to set the permissions.
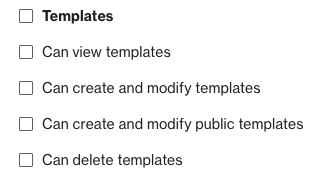
5. Click Add role to finish.
NOTE: When creating a custom user role, you have the option to enable permissions for an entire Ortto feature or select specific elements within it.
View and manage roles
- Navigate to Roles.
- Select the more "…" option next to the role.
- Select Edit.
- Make the required Changes.
- Select Update role.
NOTE:
- For all roles, including system roles, you can click on the role name to view a list of permissions assigned to that role.
- Invited users who have not yet accepted will not be shown on the Roles page.
TIP: In the roles list, the Members column shows which users are assigned to each role. Hover over a member’s avatar or initials to view their full name. Click the avatar or initials to access the user’s profile.
Delete a role
- Navigate to Roles.
- Select the more "…" option next to the role.
- Select Delete.
- Select OK to proceed.
NOTE: Default roles created by Ortto are not deletable.
Add users to a custom role
- Navigate to Users.
- Follow the steps for Changing a users role.