
Adding dynamic content to emails using display conditions
Overview
Dynamic email content lets users personalize their emails by showing recipients the information and visuals that are relevant to them. Users can set display conditions to show or hide content based on a recipient's activity, attributes, or field values.
Accessing dynamic content
To access the dynamic content builder, go to Marketing > Campaigns > Select your Campaign > Navigate to the Content tab of the Email.
Creating dynamic content
Create display conditions using the condition builder
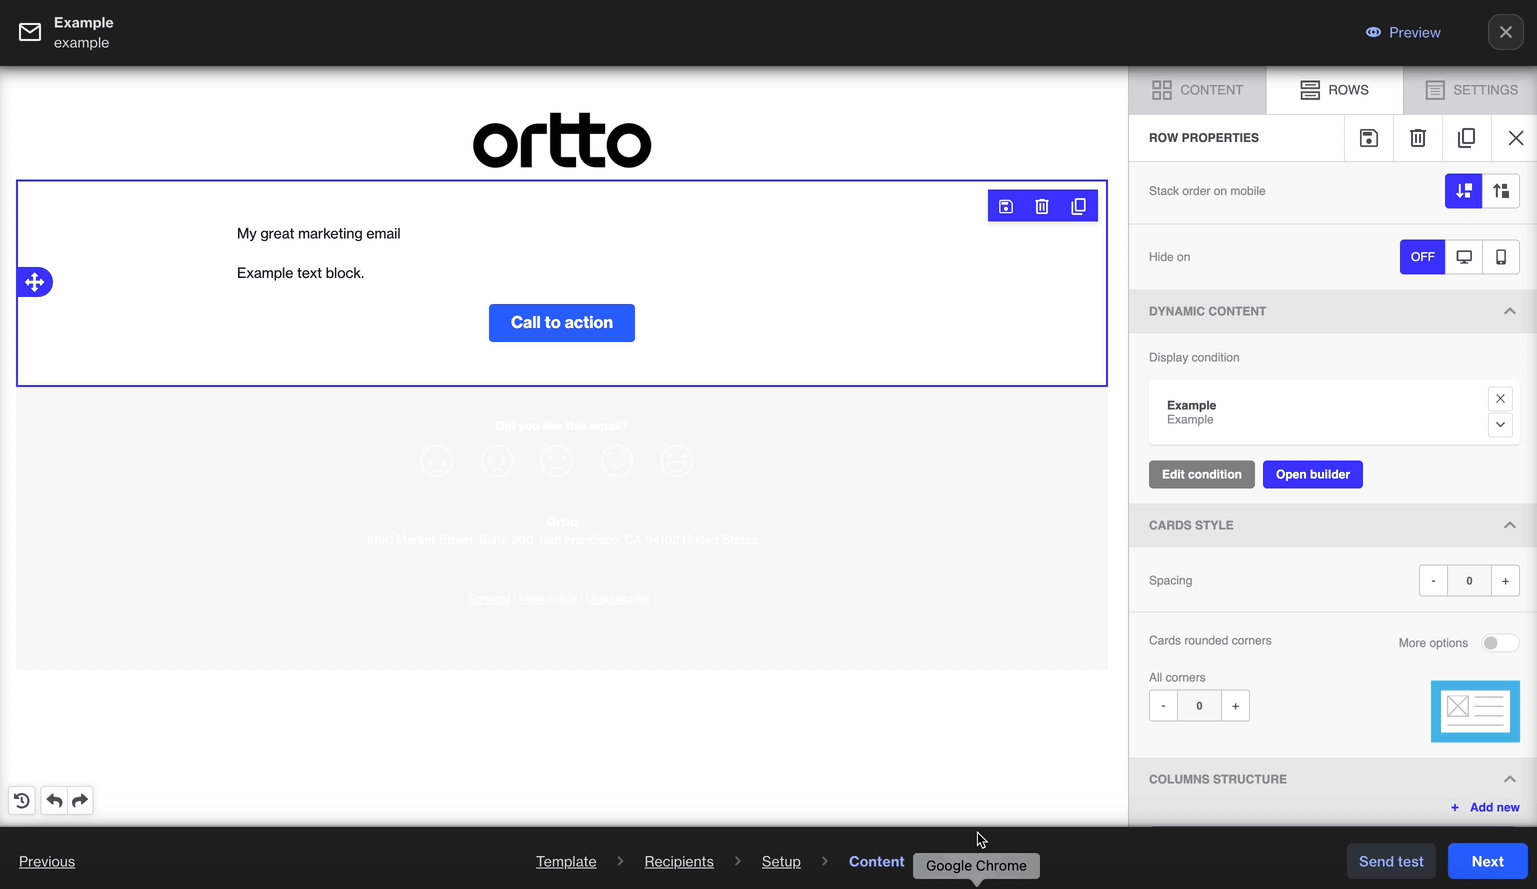
You can easily create dynamic content by applying display conditions to a row in your email. This lets you control the visibility of large content sections with just one condition.
To add a display condition for a row:
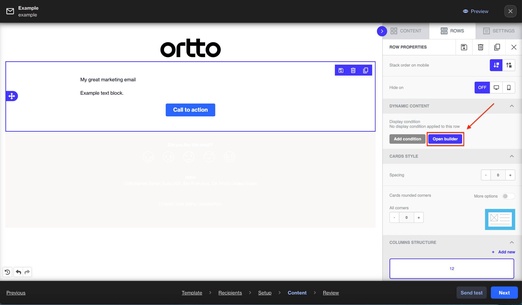
- Click on the row you want to manage, then at Rows > Row properties > Dynamic content > click Open builder.
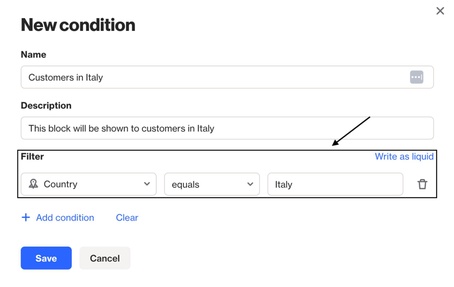
2. When you click on Open builder, you’ll see the New condition modal.
3. Give your condition a Name and a Description.
4. At Filter, set the conditions you want recipients to meet to be able to view the content.
NOTE:
- The conditions you add will be automatically generated in Liquid, which controls the content recipients see.
- Learn more about Liquid and how to write your own conditions using Liquid.
- The condition builder currently only supports person and account fields.
- To create conditions based on activity attributes, you'll need to write the conditions using Liquid.
About display conditions and Liquid
Display conditions use liquid and merge tags to control what recipients see in your emails. You can either use the condition builder to create liquid conditions automatically, or write your own if you're familiar with liquid.
To learn more about Liquid, check out our guides on:
- Liquid syntax, including operators.
- Control flow tags (such as if statements).
Create display conditions by writing in Liquid
You create display conditions for rows at the Content step when creating an email message:
- In the Content step of your email, click on the row you want to manage. Then, go to Rows > Row properties > Dynamic content, and click Add Condition.

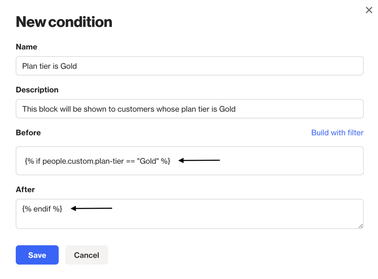
2. In the Add a new display condition modal, give your condition a Name and Description.
3. Add your Liquid code to the Before and After fields.
NOTE: Use control flow tags (e.g., if, else) in the Before and After fields to make the condition work.
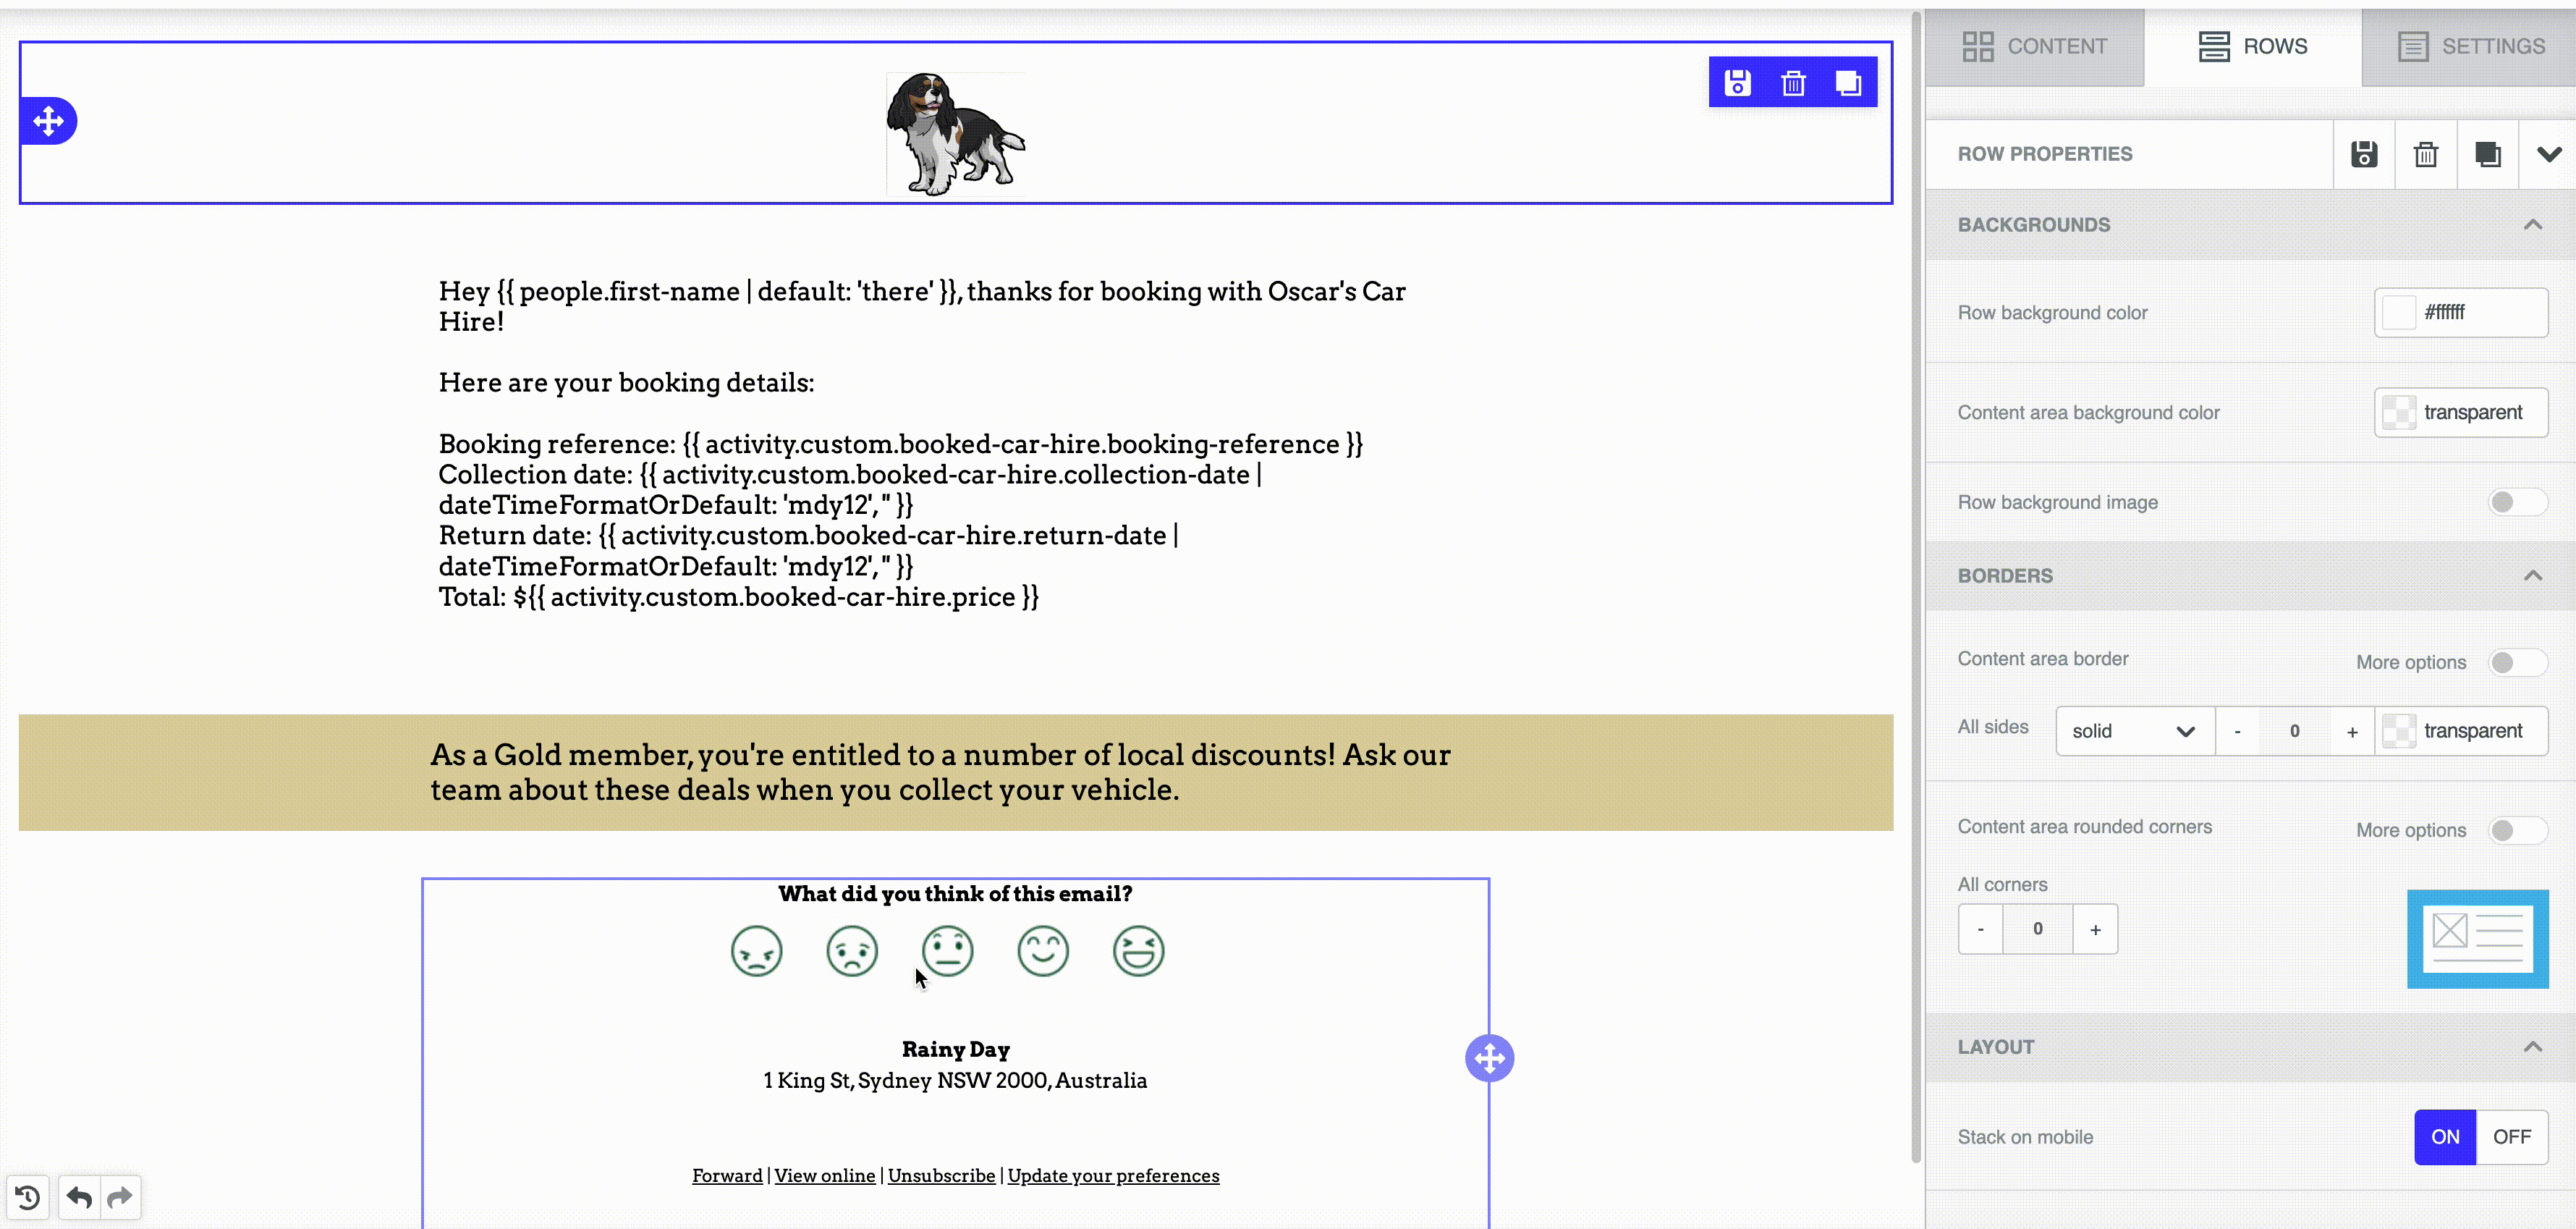
EX: To display content only to subscribers on the Gold plan, use this Liquid code:
{% if people.custom.plan-tier == “Gold” %} {% endif %}
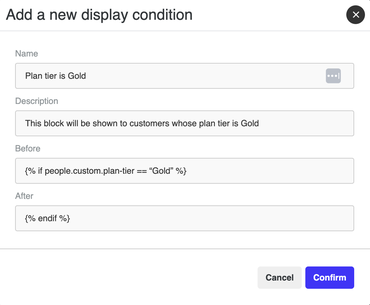
4. Click Confirm to save the condition.
Alternatively, you can use the condition builder:
- In Rows > Row properties > Dynamic content, click Open builder. Then, in the New condition modal, select Write as Liquid to open the Liquid input fields.
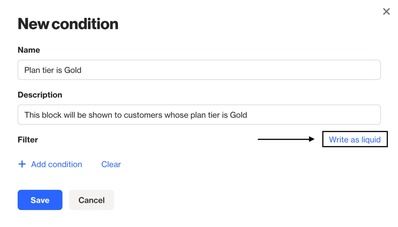
2. Add your beginning and ending conditions in the Before and After fields.
3. Click Save when you're done.
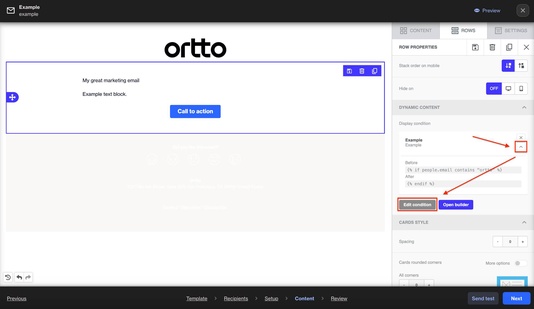
View and edit a display condition
To view a saved display condition, go to Rows > Row properties > Dynamic content. Click the down arrow (⌄) to see the raw Liquid syntax.
To edit the condition:
- For the condition builder: Click Open builder to modify the filter. Click Save to save changes.
- For raw Liquid: Click Edit condition to modify the Liquid syntax. Click Confirm to save changes.
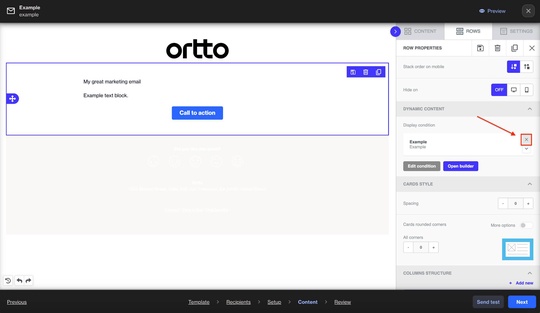
- To delete a row’s display condition, click the X.
Reuse display conditions
Display conditions are not saved at the account level, so you can't directly access conditions from one email in another. However, you can reuse them in a few ways.
Duplicate a row in the same email
If you have multiple rows with the same display conditions, you can create the condition on one row, then duplicate it. The duplicated row will carry over the display condition, and you can edit the content as needed.
Create a saved row
When you save a row with a display condition, the condition will be included whenever you reuse that row.
EX: If you save a row in Email A, you can add it to Email B later, along with its content and display conditions.
Learn more about saved rows.
Duplicate the email containing display conditions
To use an existing email with display conditions as a template, simply duplicate it. Open the email, click More, and select Duplicate to copy the content and conditions.
Preview display conditions
To preview how your email will appear to recipients, click Preview in the Content step or at the Review step.
When previewing, click the Person icon > Random recipient to see how merge tags and rows with display conditions will display for a specific recipient.
NOTE: If the random recipient has values for the fields in your merge tags and conditions, the preview will show their specific data and the rows they can view. If not, it will display fallback values or be blank if no fallbacks are set.
You can also preview the raw Liquid code and merge tag fallbacks from the same menu.
Other ways to add display conditions
You can also use Liquid display conditions in text boxes to control the visibility of text, images, or other elements. This can be done instead of, or alongside, adding conditions to rows.
EX: You can add a full condition in one text box to display different content based on a person’s language field:
{% if people.language == ‘en-us’ %} Hello {{ people.first-name }} {% elsif people.language == ‘es’ %} Hola {{ people.first-name }} {% endif %}
Alternatively, you can split the condition across multiple text boxes in the same row to control different elements as shown in the screenshot below.

Use cases and tips
You can customize and personalize your email content by creating display conditions based on system, custom, and data source activity attributes. Below are some examples of display conditions for different use cases.
NOTE: Learn more about creating conditions and using Liquid language.
Activity attributes
Example | Liquid |
|---|---|
Show content to people who clicked a specific URL in a specific email |
|
Show content to people who recently viewed a product that you are trying to promote |
|
Show content to people depending on how many times they performed a particular activity |
|
Field values
Example | Liquid |
|---|---|
Show content to customers who spent or donated a particular amount:
|
NOTE: We store currency or floating point number field values as the original number multiplied by 1000 (so it can be rendered as a decimal number). So in the above example, |
Show content to members of a specific audience |
To get the <audience ID>, you will need to view that audience in Ortto and copy the audience ID from the URL. In the liquid, this will look like:
|
Show a custom footer or signature row for each of your team members |
|
Show content to people who fit a particular age bracket |
|
Show content to account owners depending on on the account size |
|
Show content to people who expressed interest in learning more about a speciality of yours or a service you offer |
|
Multi-language content
To send emails in different languages, use row conditions to display content based on a subscriber’s preferred language.
EX:
You can set a display condition using the following filter: People > Language is <x>
Or, you write it in Liquid:
{% if people.language == ‘<x>’ %} {% endif %}
Then, enter text, images, and other elements in the appropriate language for each row.
NOTE: Learn more about displaying translated email message content.
Dynamic content from a JSON object
If you're using a JSON object to populate email content, you can set display conditions to loop through items in the object.
EX: If a customer starts a checkout on your website, you can use a display condition to pull in product details from the checkout started products activity attribute, which stores the order information in JSON format.
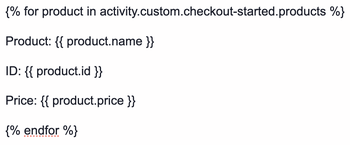
In the email content row, you can then use merge tags to output the object values.
NOTE:
- A full description of this example is available in Accessing JSON objects with Liquid.
- Learn more about display conditions when using a JSON endpoint for dynamic email content.