Report suppression filter
Overview
Report suppression filters are a powerful tool that allows users to exclude specific contacts from reports based on predefined conditions. This guide outlines the steps to create and manage report suppression filters efficiently.
Accessing report suppression filter
To access the report suppression filter page, go to Settings > Customer data > Report suppression filter
Managing report suppression filter
The report suppression filter page allows users to:
Reporting
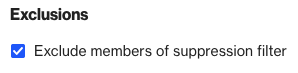
Setting suppression filter conditions will automatically enable the Exclude members of suppression filter chart option when you are creating a new report.
Create a report suppression filter
- Navigate to Report suppression filter
- Select Filter
- Select the conditions you wish to filter by, then click Done.
- When you have finished adding conditions, click Save.
NOTE: You can edit or clear the suppression filter conditions at any time.
- After setting the filters, you'll observe the number of contacts that meet the filter criteria and will consequently be excluded from reports where the exclude members of suppression filter option is activated within a reports settings.

- Learn more about filter conditions, including grouping and nesting conditions, in Working with filters.
Excluding members of the suppression filter from a report.
- Navigate to Reports
- Select the relevant Report
- Select Edit
- Underneath Advanced, tick the Exclude members of suppression filter box.