
Creating a new activity
Overview
By default, your account tracks system activities like Opened email and may also include activities from integrations you set up, such as Shopify. You can create your own custom activities as well.
After setting up an activity, you'll need to implement it using the provided code snippets—either on the server-side (backend) or client-side (frontend). If an activity is set up but not yet implemented, its status will be Setup and it won't have recorded any events.
Once you've implemented it (for example, when the first event occurs via your website's JavaScript or an API call), the activity will change to Live.
Accessing activities
To access activities go to CDP > Activities.
Managing activities
Create a custom activity
To create a new activity in Ortto:
- Navigate to Activities.
- Click New activity.
- Choose a Template: Select a template and click Use template to start.
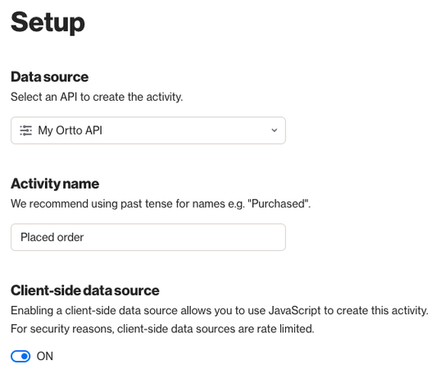
- Select API Data Source: On the Setup page, choose the API data source you want to use.
NOTE: This option appears only if you have multiple API data sources in your account.
5. Name Your Activity: Enter a suitable name for your activity.
NOTE: Rate limits apply to client-side activities:
- 20 events per contact per day.
- 100 events per hour, per activity IP address.
6. Choose an icon and define attributes.
- Select an Icon: Choose an appropriate icon for your activity.
- Define Attributes: In the Attributes section, specify any data fields needed for this activity. For each attribute:
- Enter a suitable Attribute name and Data type.
- To link the activity to a person field in your Ortto account’s customer data platform (CDP), select the relevant field from the Map value to CDP drop-down menu.
By default, activities are setup using server-side API calls. To create the activity using client-side (e.g. your website’s JavaScript),:
- Once the activity is created, navigate to: Settings > Edit > Enable client-side data source.
NOTE:
- Only existing person fields that match the Data type you selected will appear in the list.
- If you need a new custom person field for this attribute, click Create new. This will open the Create field dialog, similar to creating a new person custom field in the Settings > Customer data > Fields page. Make sure the Field type and Data type match to successfully create your custom activity.
Activating options and completing setup
- Activate options: Choose whether to enable the Conversion value and Track as touch options for this activity.
NOTE: Enabling the Conversion value sets an internal attribute called Value, which will be used for attribution, including MRR and ARR.
2. Set visibility options: Select the visibility settings for your custom activity.
3. Choose activity design options: Define at least one attribute for the activity and its options.
4. Click Next.
Implementation page
- Select how you’ll implement.
- Choose I’m getting technical help to send implementation instructions to your developer. If you enabled Client-side data source, you’ll receive code snippets for both server-side and client-side. If not, you’ll only get server-side snippets.
- Choose I’m doing it myself to receive the necessary code snippets for implementation. Again, if you enabled Client-side data source, you’ll see both server-side and client-side snippets; otherwise, you’ll just see server-side.
2. Click Done to complete the activity setup.
Archive, restore or delete an activity
You can archive, restore or delete a custom activity.
- Archive an Activity
- Navigate to Activities.
- Find the Activity you want to archive.
- Click the Three dots next to the activity.
- Select Archive.
- Restore or Delete an Activity
- On the Activities page, click the All drop-down on the right.
- Select Archived.
- Click the Three dots next to the activity.
- Choose Restore or Delete.
NOTE: If you delete the activity, you can choose to delete historical data as well. This process may take up to 24 hours to complete.