
Dynamic webhooks
Overview
Ortto webhooks allow you to connect with third-party applications by sending data from your Ortto account to those apps.
Dynamic webhooks are an advanced version of standard webhooks. Unlike standard webhooks, which offer limited control over payload structure and headers, dynamic webhooks give you full control over the HTTP requests sent to your chosen API endpoint. This allows you to:
- Define the full request structure (URL, headers, and body).
- Send data to virtually any public API.
- Use dynamic fields and templating to personalise requests.
- Interpret responses and store key values in custom fields.
- Use response data within journey activity logs.
EX: Some potential use cases for dynamic webhooks include:
- Send updated contact or account data from Ortto to your internal data warehouse or backend system in real time.
- Request the latest deal status, subscription details, or marketing permissions from your backend before continuing a journey.
- Trigger notifications in tools like Slack when key events occur (e.g. high-value lead created or form submitted).
Creating a dynamic webhook
To create a dynamic webhook, go to CDP > Data sources > New data source > Dynamic webhook data (advanced).
Setup
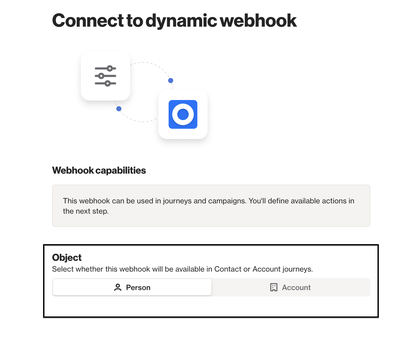
- On the webhook setup page, first select whether you want to create the dynamic webhook for the person or account object. This will determine whether the webhook will be available in contact or account journeys.
Connection details
Select the connection details dropdown to create and connect the webhook:
- Webhook name: this is the name which will appear when you are selecting the webhook in any actions, such as journeys. This is also the name which will appear on the Data sources page.
- Base URL: specify the URL of the 3rd-party application that will consume Ortto data sent in HTTP requests through this webhook.
- Authentication: If basic auth is to be sent with each request, then click Basic auth > Add basic auth and specify the Username and Password required to authenticate each request sent by this webhook.
- Custom headers: these headers will be included in every request.
- Query parameters: these parameters will be included in every request.
Actions
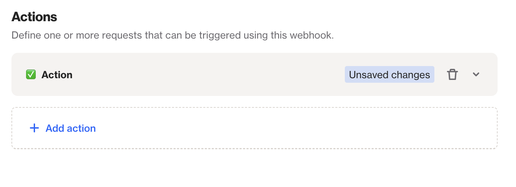
Once the webhook has been connected, you can then define one or multiple requests which can be triggered using the webhook (e.g. within journeys).
To add an action, select Add action and then select the dropdown to configure the setup.
Icon and request name
First, choose an icon and request name. This is how the action will appear within a Journey.
HTTP method
Select the HTTP method to use for the request. Supported methods include:
- POST
- GET
- PUT
- DELETE
- HEAD
Endpoint path
Specify the endpoint path that will be appended to the Base URL defined in the connection details.
Request body
Define the body of the request. You can construct the request body using:
- Static values
- Dynamic fields from Ortto (e.g. person or account fields)
Action inputs
Define inputs that must be provided when this action is used in a journey. Use these inputs as {{ input.key }} in headers, query parameters, or request body.
Custom headers
Add any additional headers specific to the action. These will be merged with any headers defined in the connection details. You can also choose to enable or disable whether the header should be included even when the value is empty
Query parameters
Add query parameters specific to the action. These will be merged with any parameters defined in the connection details.
Request body
Define the body of the request. You can construct the request body using:
- Static values
- Dynamic fields from Ortto (e.g. person or account attributes)
- Merge tags
The following merge tags are available to use for campaign data:
- Time:
{{ campaign.time }} - Contact ID:
{{ campaign.contact_id }} - Run ID:
{{ campaign.run_id }} - Webhook ID:
{{ campaign.webhook_id }} - Action ID:
{{ campaign.action_id }} - Campaign ID:
{{ campaign.campaign_id }} - Campaign name:
{{ campaign.campaign_name }} - Shape ID:
{{ campaign.shape_id }} - Shape name:
{{ campaign.shape_name }}
NOTE: These merge tags will currently work only inside a dynamic webhook action.
Editing a dynamic webhook
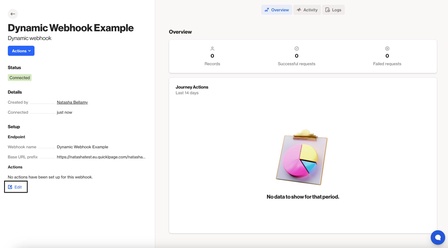
After a dynamic webhook has been created, you can make changes by selecting the Edit option at the bottom of the navigation panel on the left of the screen. You can then edit the connection details and add or remove actions.
Using dynamic webhooks in journeys
To trigger a dynamic webhook via a journey, Open the relevant journey > select Edit > Add a new shape > Select the Action shape type > Trigger dynamic webhook.
You can then select the relevant dynamic webhook and configure the shape setup.
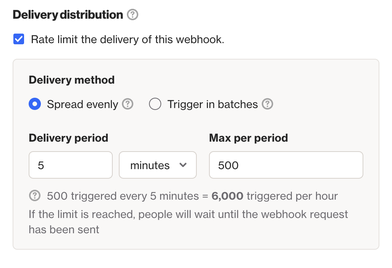
- Delivery distribution: If enabled, allows you to limit the delivery rate of the Webhook.
EX: With the setup in the screenshot below, 500 webhooks will be triggered every 5 minutes, equating to 6,000 triggered each hour.
- This action can occur: Select either Only once or More than once if the webhook should be triggered multiple times for the same contact.
- If this action fails: If you select Person will proceed in the journey then a failed action will be captured and the contact will continue through the journey as normal. If you select Person will exit the journey, then a failed action will be recorded and the contact will exit the journey immediately.