
Creating a tracked form
Overview
The Tracked form widget captures data from forms submitted on your website.
It's ideal if you're already using a custom form or one from a third-party tool. This widget lets you track and collect the form data directly into Ortto.
NOTE:
- If you're using an ecommerce integration set up through Ortto, tracking is added automatically.
- For all other forms, you’ll need to manually add the tracking code to the page where your form lives—this is required for the tracked form to work.
- The maximum amount of form fields is 50.
Create a tracked form
To create a tracked form in Ortto:
- Go to Marketing > Capture > New widget
- Choose Tracked form as the widget type
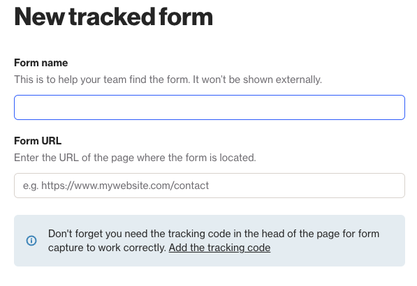
- Enter a name for your form
- Add the URL of the page where the form is located
5. Click Next and Ortto will start detecting your form in the background. You can close the window, setup will continue automatically.
NOTE: If you update your form on your website, you’ll need to re-scan it in Ortto. This keeps the form setup up-to-date, otherwise future submissions might not be captured correctly.
Setup
Once the form is connected, go to the Capture page and click on your tracked form to finish the setup.
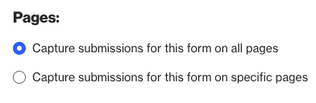
Pages
Choose where to track form submissions — either on all pages of your site or a specific page.
Upon submission
Decide what happens after someone submits the form:
- Keep the existing form behavior (like a confirmation message), or
- Redirect them to a page of your choice.

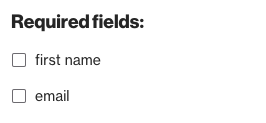
Required fields
Enable this if you want to collect only submissions that include certain fields. You can then select which fields are required.
Field mapping
- Click Next to start mapping.
- Drag fields from the right (Ortto CDP) to match the form fields on the left.
- Once you're done, click Next to save and view your tracked form widget.
You can make changes anytime by clicking Edit next to any section.
Once your tracked form widget is set up, it will start capturing data from form submissions automatically.
You can view these submissions under the activities page.
NOTE:
- If your page has multiple forms, Ortto will detect all of them — just choose which one you'd like to connect. Make sure each form uses unique field names so submissions are tracked correctly.
- If there’s only one form, you can skip straight to the Pages section.
- All form fields must be mapped to a field in Ortto (system, data source, or custom).
- Unmapped fields won’t be included in the submission data.
- Also, make sure your mapped fields match the unique identifiers set in your account under Settings > Customer data > Unique identifiers (e.g. Email for People, Name for Organizations).
Tracking a multi-step form
Ortto’s tracked form widget doesn’t support multi-step forms.
Instead, use a custom activity by sending form data from your backend to Ortto via the API.